
Updated How To Stream Your Favorite Games Online
How To Stream Your Favorite Games Online
The gaming industry is developing by leaps and bounds in this current digital revolution. Many streamers have become a part of this industry, broadcasting live gameplay footage to earn hefty money. Content creators can showcase their gaming skills through live streams and entertain the audience. This article will discuss the best gaming streaming platform for gamers and their fans.
Part 1. The Advancements in the Gaming Industry: Discussing the Statistics
Technological advancement has resulted in the development of incredible games. Integration of AI technology in gaming provides an interactive and efficient user experience. This technology has allowed developers to automate repetitive tasks while creating games. Also, gamers can enjoy playing in realistic virtual worlds with the help of VR headsets.
Gaming platforms also have the technology to analyze the user’s gaming style with a machine-learning algorithm. Cutting-edge graphics are among the best advancements in the gaming industry. Moreover, the popularity of gaming streams has also bloomed in recent years. The reason for the increased use of gaming streaming is its accessibility. It allows gamers from diverse backgrounds to share their gaming experience with interested fans.

Statistics of Gaming Streaming
No doubt, gaming streaming has witnessed a notable surge in popularity. It can be understood through the following statistics about streaming:
- In 2024, game live-streaming viewers will probably reach over 900 million.
- According to estimates, the revenue in this market is expected to reach US$13.65 billion in 2024.
- io reports that the esports viewership will grow to 640 million by 2025.
- The game live-streaming market is anticipated to reach around 7 billion users by 2028.
Part 2. The Best Gaming Streaming Platforms in 2024
After knowing about gaming streaming, do you want to know the best platform for streaming games? Many options can help you in accessing live game streams. Below are some of the platforms for gaming streaming so you can choose the best one:
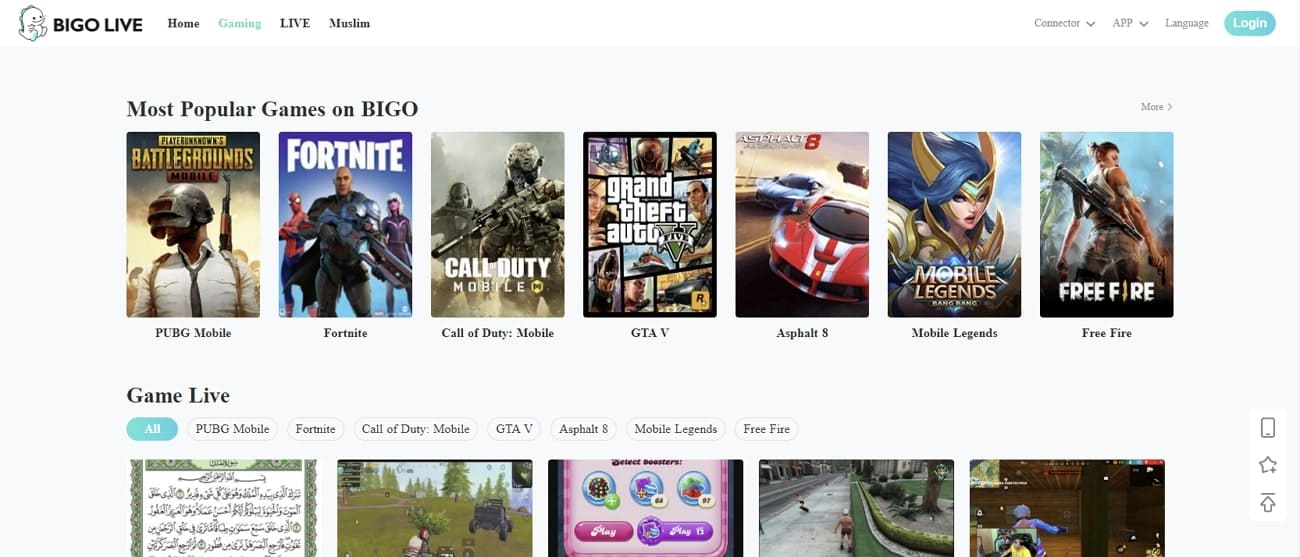
1. BIGO Live
BIGO Live is one of the best live-streaming platforms for gaming. It allows you to watch the streaming of your favorite game in high quality. These games include PUBG, GTA, Free Fire, Fortnite, and others. You can watch multiple streamers broadcast your favorite game to satisfy your craving.
- There are many gaming streams available on this website in different languages.
- This platform categorizes the most popular and other gaming streams for your ease.
- It has a live option that allows you to watch live gaming broadcasts of your beloved streamer.
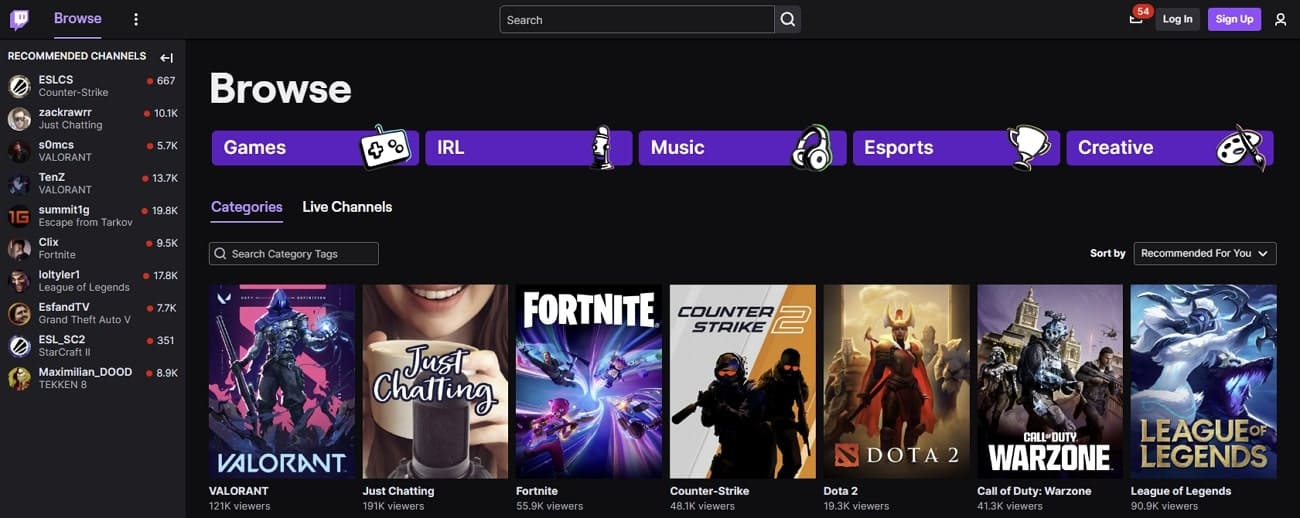
2. Twitch
If you are a game lover and looking for the best platform for streaming games, Twitch is the leading option. This gaming platform can stream Tekken 8, Apex Legends, and other famous games. With this platform, you can select the desired language for streaming games.
- You can analyze the popularity of a gamer by seeing the view count of a gaming stream.
- Twitch provides live channels to watch gaming streams in real time.
- This website provides a search tab for your favorite game or streamer.
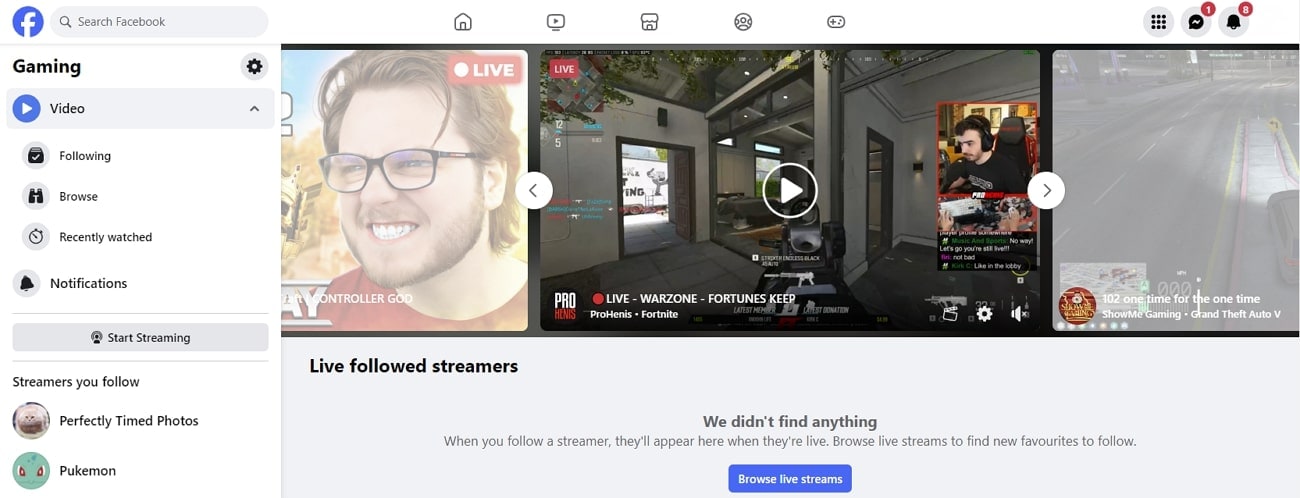
3. Facebook Gaming
People use Facebook to remain connected with friends and family. It is an effective platform for socializing and entertainment purposes. However, it also offers gaming streaming options to its game-loving users. Gamers can watch live streaming of their favorite game on this social media platform.
- There are many live stream channels of one game on Facebook.
- Viewers can comment or react to the live stream to interact with the gamer.
- Fans can search gamers’ profiles to watch live gaming streams.
4. YouTube Gaming
YouTube is the best streaming service for sports, news, and movies. Other than that, it can help you to watch and share gaming streaming with your friends. You can enjoy streaming games like Dota 2, Battleground Mobile, and others on YouTube.
- People can subscribe to gaming channels on YouTube to get the latest updates.
- YouTube allows you to search for any gaming stream on the search tab.
- Based on your watch history and subscription, it recommends gaming videos.

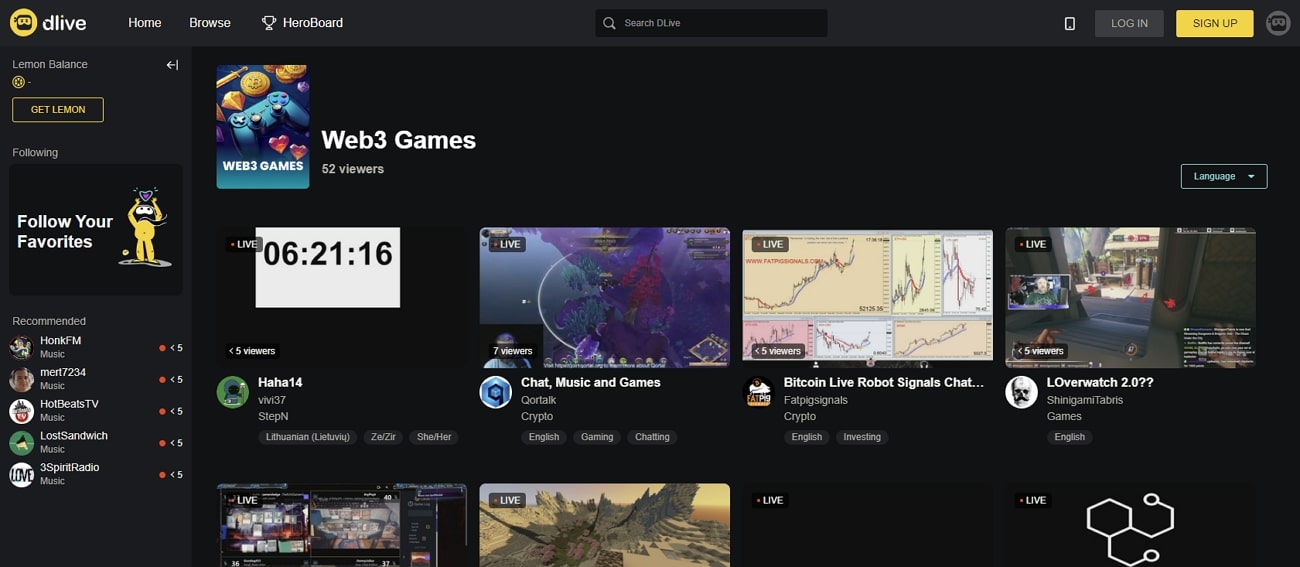
5. Dlive
Game streaming platforms enable the viewers to interact with streamers for an interactive experience. Dlive is one platform that lets you engage with the community. With this website, you can watch live streaming of games in different languages. Moreover, this platform offers the recommended channels for live game streaming.
- It provides a message box in every gaming streaming section to connect with other people.
- This website gives rewards to viewers for their engagement in the game streams.
- Users can enjoy lag-free performance on this platform for smooth streaming.
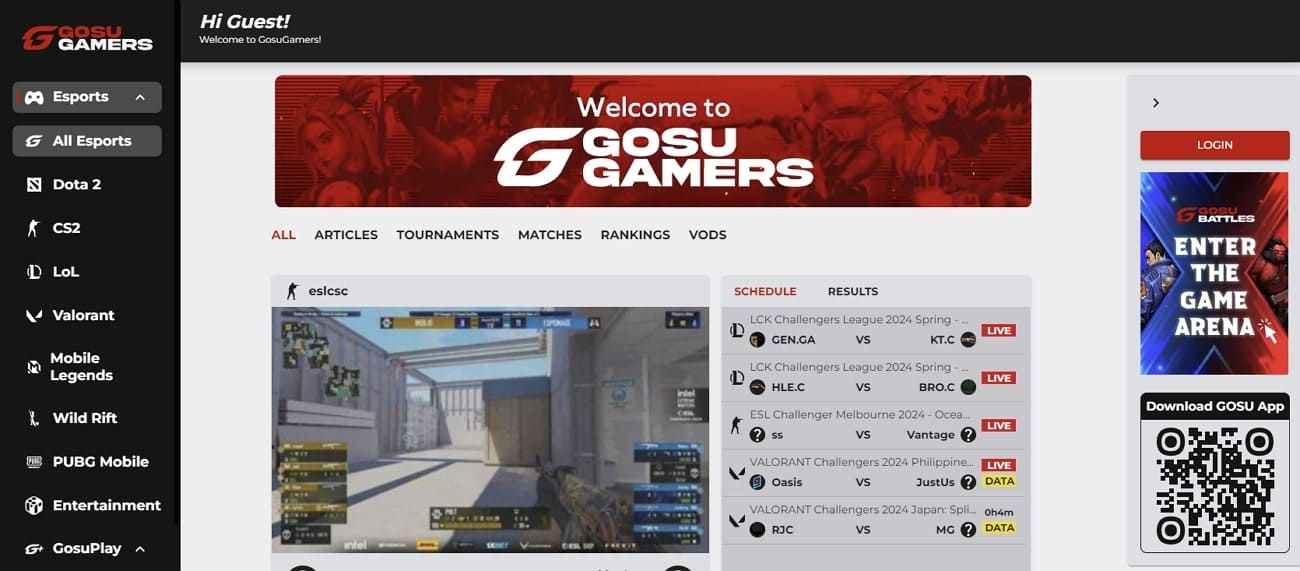
6. Gosu Gamer
Are you fond of esports and want information about esports from around the world? Gosu Gamers is a unique website that can give news and ranking of esports gamers. It can let you watch gaming streams with a chat option. Plus, you can also get information about past and upcoming e-gaming matches.
- It also has a replay option to help you enjoy past gaming matches.
- Gosu Gamer has an on-time notifications feature to inform you about your favorite gaming stream.
- This is thebest platform to stream games, and it also has live gaming tournament streams.
Part 3. Stream Your Favorite Game by Enhancing Quality With Wondershare Virbo Live
High-quality content videos will always attract the attention of viewers. The best platforms to stream games are those that can provide high-quality content. Therefore, you need a tool that can help you enhance streaming quality. Wondershare Virbo Live is one such tool that enables you to stream quality gaming content.
With this tool, you can edit and customize gaming streaming content. It supports streaming channels, including Facebook and YouTube, to stream your gaming content. Virbo Live has a microphone integration feature for live commentary during streaming. You do not need to download this tool as it has a cloud-based service.
Key Features Highlighting Details About Wondershare Virbo Live
- You can translate streaming content in the required language for global reach through AI translation. There are a variety of options you can go across for translating the added content.
- Users can generate scripts for gaming streaming with the AI script feature. By providing the product name, highlights, and promotional points, Wondershare Virbo Live easily generates a comprehensive script.
- It provides AI avatars with different poses and attire to make your streams attractive.
Step-by-Step Guide To Create Stream Room for Gaming With Wondershare Virbo Live
Wondershare Virbo Live can create high-quality content for your gaming streaming. Below are the steps to create the required stream room for gaming across Virbo Live:
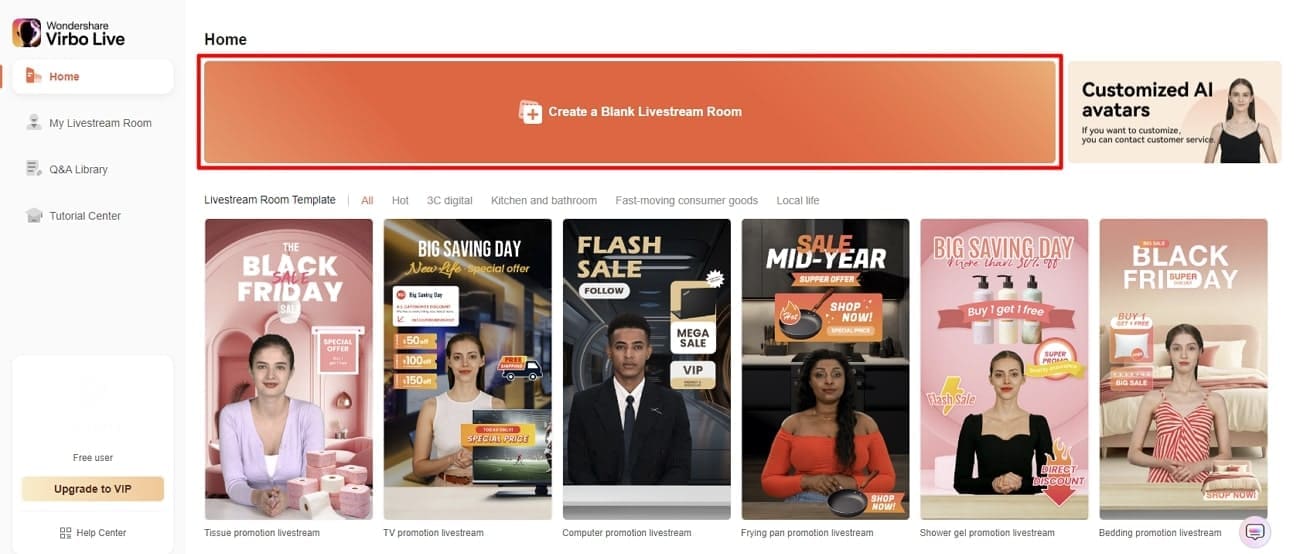
- Step 1. Access Tool Online for Creating Stream Room
Open the Wondershare Virbo Live website and proceed to the main editing platform. After that, click the “Create a Blank Livestream Room” button on the main interface. A new window will open with the many options to make your gaming stream personalized.
- Step 2. Choose Desired AI Avatar for Gaming Streaming
Upon reaching this window, tap the “AI avatar” tab on the top right side of the new window. You will find different avatars with different poses in the dialog box. Later, choose the desired AI avatar for your gaming streaming.

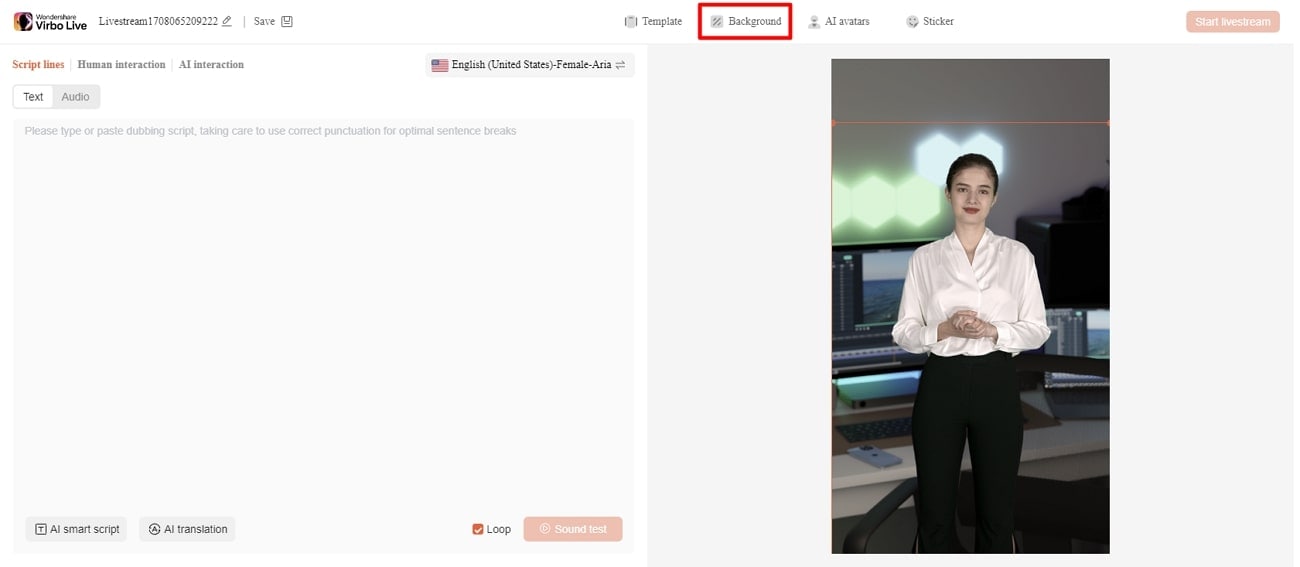
- Step 3. Adjust Changes in Background
Opt for the “Background” tab to make changes in the background. Then, you can choose from the available options for the background.
- Step 4. Integrate Personalized Voice for Live Video
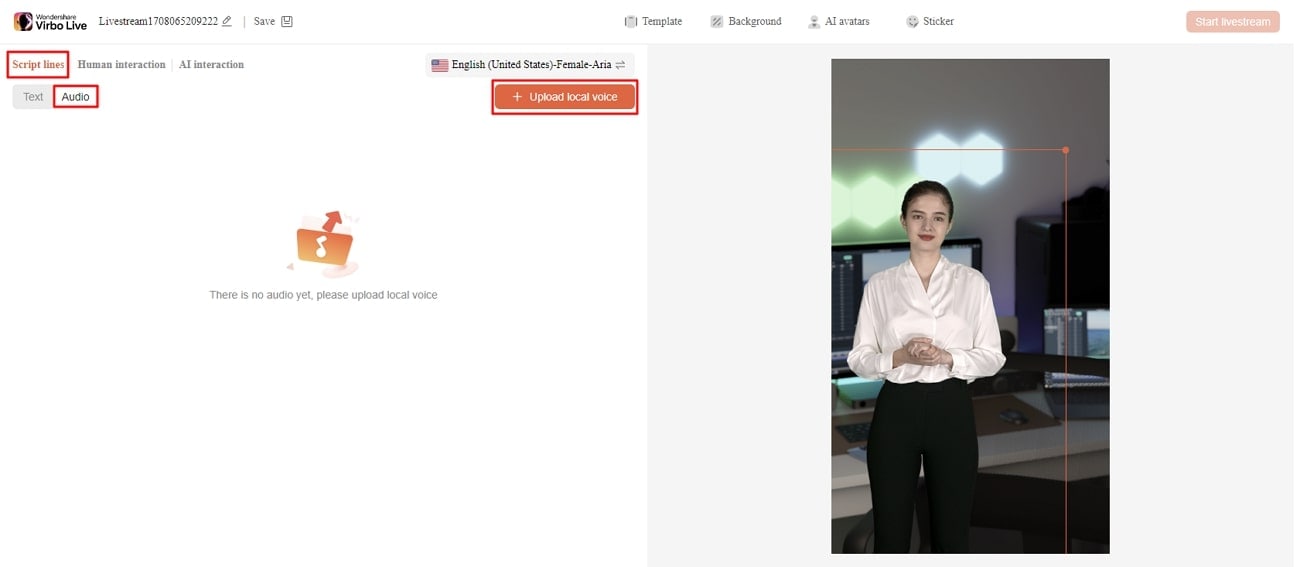
After this, move toward the left side of the screen and opt for the “Script lines” tab. Next, choose the “Audio” section and hit the “Upload local voice” button. This will allow you to add personalized voice during the gaming streaming.
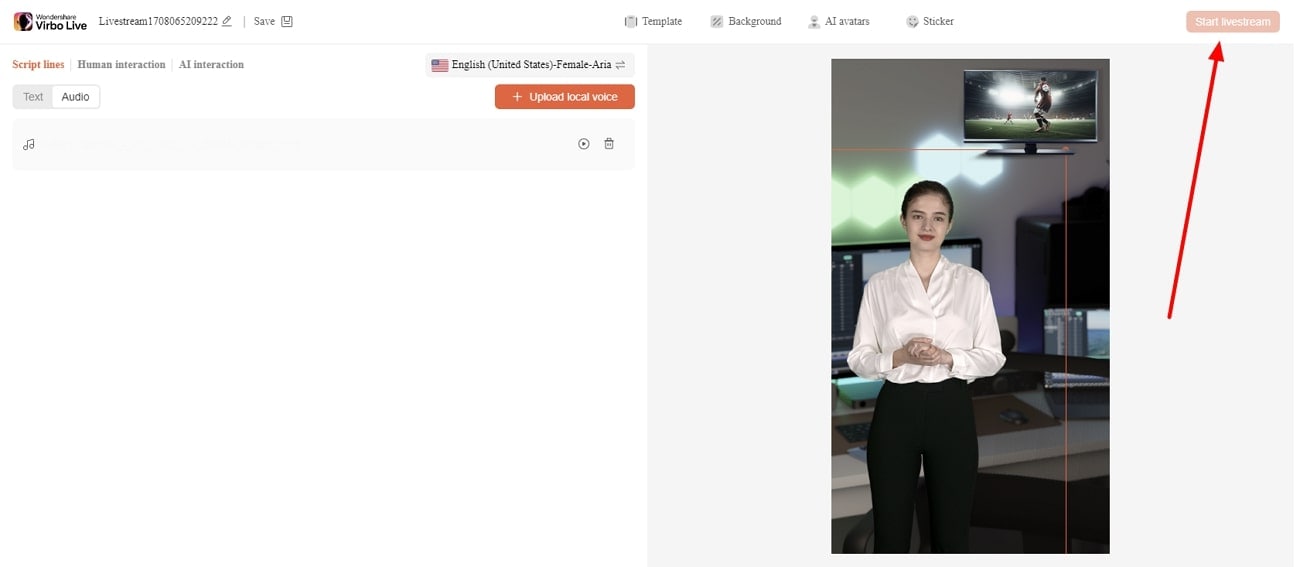
- Step 5. Start Live Streaming of Your Game
Once you have done all the customization, you can start streaming the game. For this, click the “Start Livestream” button to start a live stream of the game.
Conclusion
The integration of AI technology has improved the gaming experience of users. Also, gaming streaming has emerged as one of the latest trends in this industry. You can choose the best platform to stream games from available options, as provided in this article. However, if you want to optimize these gaming streams, Wondershare Virbo Live is the best solution. It helps you enhance the quality of your game streams with many features.
[Ultimate Guide] How to Live Stream on Facebook?
A lot of people consume Facebook Live content as it provides a fun experience for the audience. Today, Facebook Live is being displayed across all genres. From gaming, vlogging, and sports, to basically anything under the Sun, going live on Facebook has become a new trend.
However, even to this date, a lot of users are confused about how to livestream on Facebook. That is why we have created this guide so you can livestream on Facebook without any hassle.
Part 1: Easy-to-follow Step Guidance to Start Facebook Live
Facebook Live video is one of the most sought-after features of all time. Not only does it help creators connect with their audience but it lets them generate more revenue, ultimately bringing more money to their account.
Moreover, it is an awesome way to reach a broader audience and let people discover your content in real-time. A lot of people are confused about how to use Facebook Live because the methods to use it on the mobile app, the web, and Creator Studio are all different.
So, let’s talk about how to go live on Facebook. Before you start, you should understand that you can live stream to your page, group, profile, and event using the Facebook app or using a camera and streaming software.
01 How to go live on Facebook using a phone
As we have already discovered, you can go live on your Facebook page, group, profile, and event from anywhere in the world. The best way to go about life in the modern world is to use the Facebook app which is available on both Android and iOS.
Here is a complete guide on how to use Facebook Live streaming services on your mobile.
Step 1 Choosing where to go live (Personal Profile, Group, or Page)
The first step is choosing where you want to live. Ask yourself where are you trying to go live. Is it on your personal profile, a Facebook page that you own, or in some group? Navigate to wherever you want to go live.
Step 2 Going live
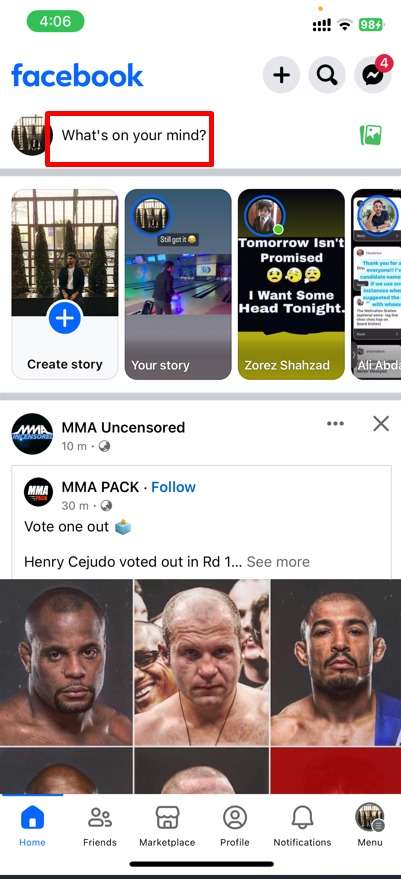
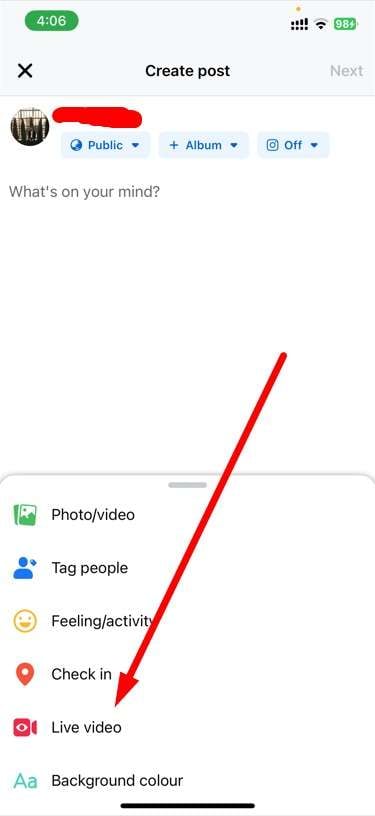
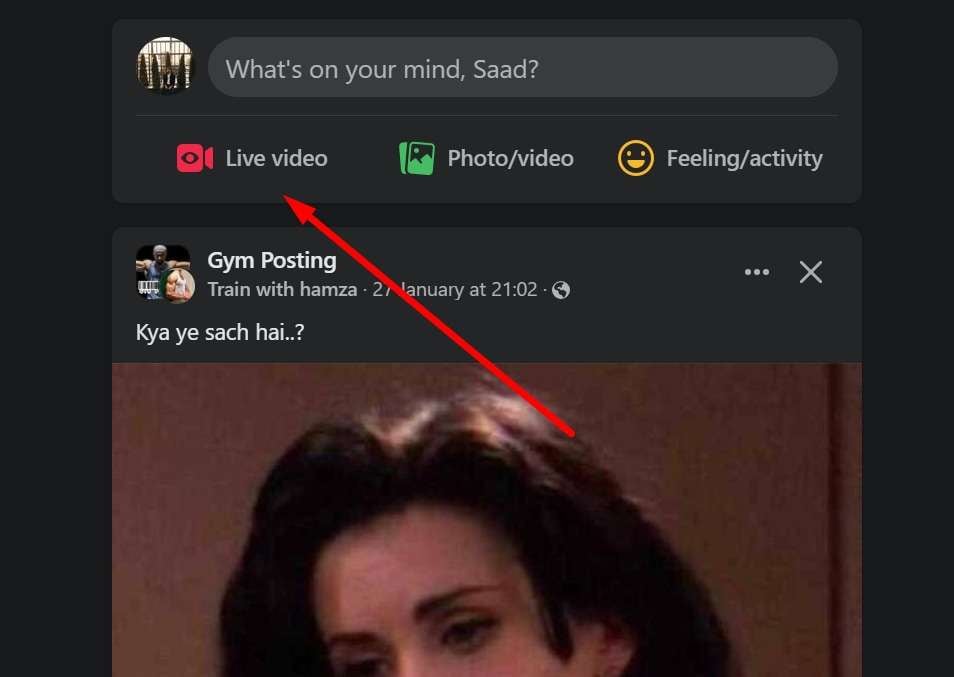
Let’s say that you want to go live on your personal Facebook profile. Then, you need to click on the Facebook app, and click on What’s on your mind? Select Live Video which will be an option available. Now, you will start to see that new features will appear and you will need to set details about your livestreams in the next step.
Step 3 Setting live stream details and going live
Now you will need to give Facebook access to your camera and microphone, add a description to your video, set effects of your liking, and adjust everything accordingly. You can also invite your friends to join and watch the live video. So set those options and click on Go Live.
Step 4 Finishing the live stream
Once you have completed the live stream, simply click the Finish button to end your broadcast. In just a couple of minutes, your livestream will be ready in the form of a video.
02 How to go live on Facebook using the web
When you use the web version of Facebook, you will be redirected to Live Producer, which is a tool that allows you to use higher-end production equipment and streaming software. This happens on both laptops and PCs.
If you are a Facebook live streamer and want to go live using the web, then follow these steps.
Step 1 Find the Live video option on Facebook
Firstly, you will need to be logged in to your Facebook account. Once you are logged in, at the top of the News Feed, click on the What’s on your mind section and click on the three dots action button. There, you will find Live Video which will ultimately redirect you to Live Producer. So click on it.
Step 2 Setting up livestream
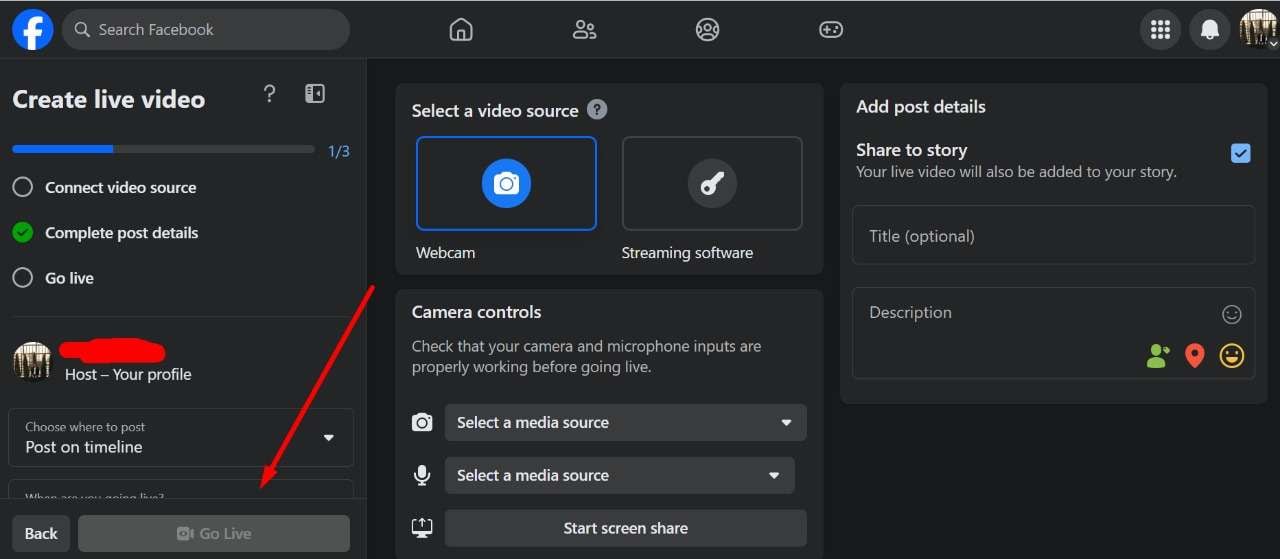
Once you are on Facebook Live Producer, you can add your title, and description, choose the equipment, and set a lot of things right on your Facebook account. You can do this before the live stream starts which is great because you can start live in a professional manner.
Step 3 Start your live stream on Web
Once everything is good to go, simply click on Go Live and you will be able to share your story with the rest of the world. You can also end the live stream whenever you like.
Part 2: Selected Tool to Elevate Your Facebook Live Experience
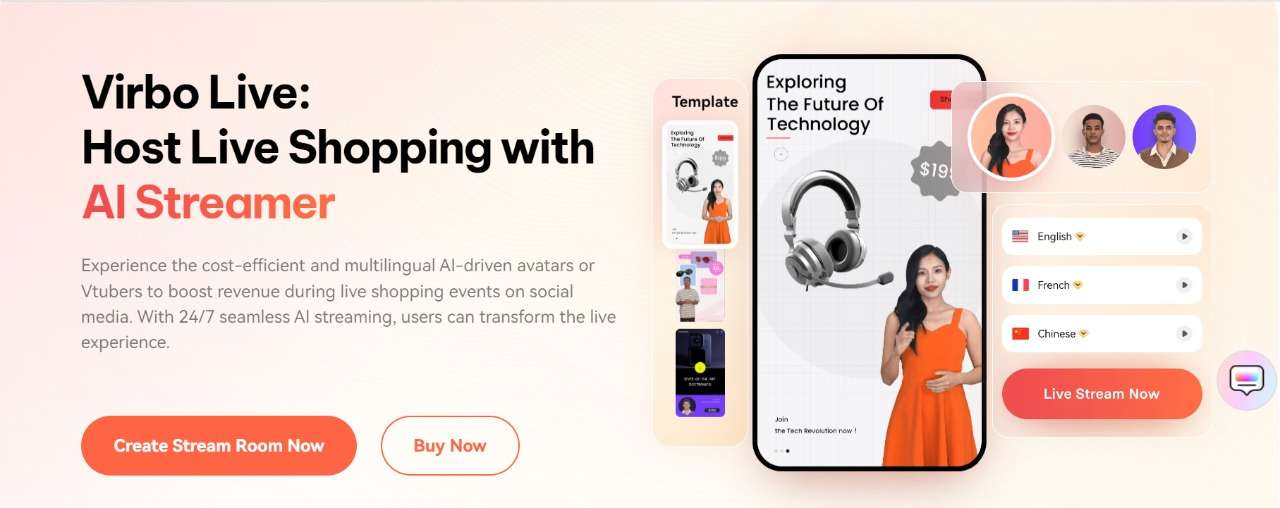
If you want to take your Facebook streaming to the next level, then you should try Virbo Live . Virbo is an all-in-one AI platform that allows users to create high-quality content with 300+ voices and a plethora of powerful features.
Virbo Live aims to transform the live experience by adding AI into play and improving traditional Facebook live streaming. Using Virbo Live is simple. You need to create a live shopping room where you can create a room or simply select a template. Then, you can choose the AI models and background. You can also choose the text and the voice that you want to be played during the live stream. And lastly, you can interact with your audience in the most user-friendly way possible.
For Facebook live streaming, Virbo Live is one of the most amazing tools that is transforming traditional boring live shopping into an AI-driven shopping experience. Let’s discover some of the features related to Facebook Live.
Features of Virbo Live
- Cost-effective: When it comes to going live on Facebook using the traditional method, you will need a lot of equipment like a camera, mic, and more. With Virbo Live, you don’t need anything because everything is handled by AI.
- 24/7 broadcasting: The regular Facebook live stream can be interrupted but with Virbo Live, you get continuous 24/7 broadcasting without interruptions.
- Live shopping made it easier: Virbo Live makes it easier for brands to showcase their products in the most user-friendly way possible. You can have the AI describe everything as your product gets bought by the audience.
Part 3: FAQs about Facebook Live
1. How do you get to Facebook Live?
You get a live stream on Facebook by using the live streaming feature. To do that, you either need to have a PC, Android, or iOS device. If you are on PC, you can simply log in to Facebook Web. But on mobile devices, you need to have the Facebook app or the Creators app downloaded to go live.
2. Can you watch Facebook Live without an account?
Facebook live videos are public, meaning you can watch them on any device as long as you have the internet. Moreover, Facebook live videos don’t require an active Facebook account to be played as they are usually public.
3. Is Facebook Live stream free?
Yes, Facebook live streaming is 100% free, meaning you don’t have to pay a penny to use any of the features. However, if you use a third-party tool, then you might need to pay to get some features unlocked.
4. Is YouTube Live better than Facebook Live?
Both YouTube Live and Facebook Live are perfect for streaming. However, if your goal is monetization and making money, then using YouTube Live would be better. However, if you want to interact with your audience and make your community grow, then Facebook Live is the best choice.
Conclusion
Facebook streams are a fun and engaging way to interact with the audience. In this guide, we have covered a complete guide that you can follow to get live on your Facebook and reach a broader audience.
And if you want to take your Facebook live streaming to the next level, then a tool like Virbo AI will be perfect for businesses that want to bring in more revenue and reach a bigger audience.
A lot of people consume Facebook Live content as it provides a fun experience for the audience. Today, Facebook Live is being displayed across all genres. From gaming, vlogging, and sports, to basically anything under the Sun, going live on Facebook has become a new trend.
However, even to this date, a lot of users are confused about how to livestream on Facebook. That is why we have created this guide so you can livestream on Facebook without any hassle.
Part 1: Easy-to-follow Step Guidance to Start Facebook Live
Facebook Live video is one of the most sought-after features of all time. Not only does it help creators connect with their audience but it lets them generate more revenue, ultimately bringing more money to their account.
Moreover, it is an awesome way to reach a broader audience and let people discover your content in real-time. A lot of people are confused about how to use Facebook Live because the methods to use it on the mobile app, the web, and Creator Studio are all different.
So, let’s talk about how to go live on Facebook. Before you start, you should understand that you can live stream to your page, group, profile, and event using the Facebook app or using a camera and streaming software.
01 How to go live on Facebook using a phone
As we have already discovered, you can go live on your Facebook page, group, profile, and event from anywhere in the world. The best way to go about life in the modern world is to use the Facebook app which is available on both Android and iOS.
Here is a complete guide on how to use Facebook Live streaming services on your mobile.
Step 1 Choosing where to go live (Personal Profile, Group, or Page)
The first step is choosing where you want to live. Ask yourself where are you trying to go live. Is it on your personal profile, a Facebook page that you own, or in some group? Navigate to wherever you want to go live.
Step 2 Going live
Let’s say that you want to go live on your personal Facebook profile. Then, you need to click on the Facebook app, and click on What’s on your mind? Select Live Video which will be an option available. Now, you will start to see that new features will appear and you will need to set details about your livestreams in the next step.
Step 3 Setting live stream details and going live
Now you will need to give Facebook access to your camera and microphone, add a description to your video, set effects of your liking, and adjust everything accordingly. You can also invite your friends to join and watch the live video. So set those options and click on Go Live.
Step 4 Finishing the live stream
Once you have completed the live stream, simply click the Finish button to end your broadcast. In just a couple of minutes, your livestream will be ready in the form of a video.
02 How to go live on Facebook using the web
When you use the web version of Facebook, you will be redirected to Live Producer, which is a tool that allows you to use higher-end production equipment and streaming software. This happens on both laptops and PCs.
If you are a Facebook live streamer and want to go live using the web, then follow these steps.
Step 1 Find the Live video option on Facebook
Firstly, you will need to be logged in to your Facebook account. Once you are logged in, at the top of the News Feed, click on the What’s on your mind section and click on the three dots action button. There, you will find Live Video which will ultimately redirect you to Live Producer. So click on it.
Step 2 Setting up livestream
Once you are on Facebook Live Producer, you can add your title, and description, choose the equipment, and set a lot of things right on your Facebook account. You can do this before the live stream starts which is great because you can start live in a professional manner.
Step 3 Start your live stream on Web
Once everything is good to go, simply click on Go Live and you will be able to share your story with the rest of the world. You can also end the live stream whenever you like.
Part 2: Selected Tool to Elevate Your Facebook Live Experience
If you want to take your Facebook streaming to the next level, then you should try Virbo Live . Virbo is an all-in-one AI platform that allows users to create high-quality content with 300+ voices and a plethora of powerful features.
Virbo Live aims to transform the live experience by adding AI into play and improving traditional Facebook live streaming. Using Virbo Live is simple. You need to create a live shopping room where you can create a room or simply select a template. Then, you can choose the AI models and background. You can also choose the text and the voice that you want to be played during the live stream. And lastly, you can interact with your audience in the most user-friendly way possible.
For Facebook live streaming, Virbo Live is one of the most amazing tools that is transforming traditional boring live shopping into an AI-driven shopping experience. Let’s discover some of the features related to Facebook Live.
Features of Virbo Live
- Cost-effective: When it comes to going live on Facebook using the traditional method, you will need a lot of equipment like a camera, mic, and more. With Virbo Live, you don’t need anything because everything is handled by AI.
- 24/7 broadcasting: The regular Facebook live stream can be interrupted but with Virbo Live, you get continuous 24/7 broadcasting without interruptions.
- Live shopping made it easier: Virbo Live makes it easier for brands to showcase their products in the most user-friendly way possible. You can have the AI describe everything as your product gets bought by the audience.
Part 3: FAQs about Facebook Live
1. How do you get to Facebook Live?
You get a live stream on Facebook by using the live streaming feature. To do that, you either need to have a PC, Android, or iOS device. If you are on PC, you can simply log in to Facebook Web. But on mobile devices, you need to have the Facebook app or the Creators app downloaded to go live.
2. Can you watch Facebook Live without an account?
Facebook live videos are public, meaning you can watch them on any device as long as you have the internet. Moreover, Facebook live videos don’t require an active Facebook account to be played as they are usually public.
3. Is Facebook Live stream free?
Yes, Facebook live streaming is 100% free, meaning you don’t have to pay a penny to use any of the features. However, if you use a third-party tool, then you might need to pay to get some features unlocked.
4. Is YouTube Live better than Facebook Live?
Both YouTube Live and Facebook Live are perfect for streaming. However, if your goal is monetization and making money, then using YouTube Live would be better. However, if you want to interact with your audience and make your community grow, then Facebook Live is the best choice.
Conclusion
Facebook streams are a fun and engaging way to interact with the audience. In this guide, we have covered a complete guide that you can follow to get live on your Facebook and reach a broader audience.
And if you want to take your Facebook live streaming to the next level, then a tool like Virbo AI will be perfect for businesses that want to bring in more revenue and reach a bigger audience.
Live Chat With WooCommerce: Leading Into the Live Selling World
E-commerce has reached an unprecedented level of fame all around the world. It provides convenience for buying and selling goods through accessible platforms. WooCommerce is one of those leading platforms that offer a satisfying e-commerce experience. Also, this platform is well-known for its exceptional functionality and infrastructure, which makes online selling easy.
What if you want a WooCommerce live chat feature to interact with your customers? This article presents benefits and ways to integrate live chat with WooCommerce to interact with customers. You can also learn about an innovative live-streaming platform that boosts your live sales.

Part 1. Overviewing WooCommerce E-Commerce and Its Utility in the Market
WooCommerce is a powerful e-commerce platform renowned for its adaptability. Its scalable nature allows you to start businesses of all sizes. The advanced customization options of WooCommerce make things effortless for users. Moreover, it provides a flexible selling experience, whether you’re selling products or services. Irrespective of its functionality, the live chat WooCommerce feature is absent from the platform.
People can use WooCommerce as a plugin for WordPress, the leading content management system. This open-source plugin helps users customize their online stores. By doing so, it allows sellers to meet their branding requirements. Also, you can manage inventory, order processing, payment gateways, and shipping details. Moreover, it provides a built-in geo-location support to detect customer’s address.

Features of WooCommerce
Many businesses are using WooCommerce for online stores throughout the world. Its impressive usability and accessibility help users in different e-commerce aspects. Provided are some features of WooCommerce that make it special for brand owners:
1. Inventory Management
It provides multiple inventory management options to track stock levels. You can receive notifications for short or out-of-stock products. Moreover, you can sort or filter products by price, popularity, ratings, latest, and more.
2. Pre-installed Payment Methods
To simplify payment processes, WooCommerce provides pre-installed payment gateways. You can choose any payment method, including Cash on Delivery, PayPal, and Credit Card payments.
3. Sell Anything
With WooCommerce, you can sell anything from real products to digital downloads. Moreover, this 100% open-source plugin allows you to sell anywhere with its global support.
4. Mobile Friendliness
WooCommerce ensures that your store looks equally beautiful on desktop and smartphone. Store owners can even turn their existing stores into mobile apps without custom coding.
Part 2. How To Add Live Chat Feature in WooCommerce?
Live chatting is an essential function for interacting with the audience for trustworthiness. Unfortunately, WooCommerce doesn’t provide a dedicated live chat feature. If you want to use this service, integrate it separately with a third-party source. For this purpose, you can use a reliable plugin that enables WooCommerce online chat.
LiveChat is a renowned customer service platform that provides a superb live experience. It helps to chat with customers and share their data with CRM. Moreover, the AI chatbots help to greet your store visitors with automated responses. They allow you to capture more leads and increase sales. Ultimately, LiveChat helps boost your store’s overall revenue.
Comprehensive Guide to Setting Up the LiveChat Plugin on WooCommerce
Using the LiveChat plugin is a good option to get alive chat for WooCommerce. The query is how to set up the plugin across your WooCommerce store. For this, the provided step-by-step resolves all queries involving setting up the LiveChat plugin:
- Step 1. First, you have to access the WordPress dashboard to enter the “Plugins” section. Then, hit the “Add New” button and write “LiveChat WooCommerce” to search for this plugin. Look for the “WordPress Live Chat Plugin for WooCommerce – LiveChat” in the results that appear. Once identified, click the “Install Now” button to proceed.

- Step 2. Upon installation, you need to hit the “Activate” widget. After that, sign up with your account on the “Integrate with LiveChat” screen.

- Step 3. When the log-in and installation process is complete, a chat widget appears on the website. Then, click on “Go to LiveChat” to start live chatting.

- Step 4. If you want to change the settings, select the “LiveChat” option in the WordPress dashboard. Next, hit “Settings” and turn on or turn off the desired options.

Part 3. Wondershare Virbo Live: Assisting Quality Livestream Selling
Live selling has set marketing expectations high for the sellers. Therefore, you should use an efficient live selling tool to stay competitive. To meet the standards, Wondershare Virbo Live is an intuitive and interactive live streaming tool to enhance your streaming quality. Most sellers don’t have the knowledge to market their items on WooCommerce. For this purpose, this simple and easy-to-use medium will help sellers grow revenue.
Moreover, this tool is compatible with all major social media platforms. This allows you to integrate live streams with YouTube, Facebook, Instagram, and more. You don’t need to download the platform as it supports cloud-based service. Another exciting feature is that you can introduce AI avatars or VTubers to your live sessions. Overall, this is the best live-streaming platform with AI-powered features.
Key Highlights of Wondershare Virbo Live
- The smart AI streamer allows you to translate text for dubbing into different languages. It helps accommodate a wider audience of different regions, ethnicities, and cultures.
- Wondershare Virbo Live helps create scripts for live selling. Its built-in AI Smart Script feature allows you to type or generate a script with instant prompts.
- Users can also change live stream templates and backgrounds. Moreover, it allows the addition of creative stickers for better customer engagement.
Get Started Online Free Download
Step-by-Step Guide to Creating a Streaming Room in Virbo Live
Many live-streaming tools exist, but Wondershare Virbo Live is the most recommended. It provides innovative AI-powered functions to facilitate users in a single platform. Here’s how you can create your streaming room using this tool:
- Step 1. Generate a Blank Live Streaming Room
Access the Virbo Live tool from its official website. You must select the “Create Stream Room Now” button from the display. On the new screen, navigate and select the “Create a Black Livestream Room” option. Upon doing so, you will get access to several live-streaming settings.

Get Started Online Free Download
- Step 2. Integrate Microphone for Human-Like Interaction
Now, press the “Human interaction” tab on the left of your screen to integrate the mic with this tool. You have to hit the “Turn Microphone on to Take Over” button under the “Microphone” sub-section. Also, you can move to the “AI Interaction” tab to create an automated Q&A session.

- Step 3. Customize Live Stream Template and Background
Wondershare Virbo Live presents different templates and backgrounds for users. Click on the “Background” tab from the top navigation bar to try stunning backgrounds. You can also select the “Template” tab to explore various templates for quick live streaming setup.

- Step 5. Pick Suitable AI Avatars for Your Live Event
To add more fun, hit the “AI Avatars” tab from the top navigation bar. This section shows creative avatars with different outfits and poses. You can choose the suitable one that demonstrates your personality. After selecting the avatar, you can preview it on the right side of the screen.

- Step 6. Start Your Livestream After All Settings
After customizing all the features according to your desire, click on the “Start livestream” button at the top right of the screen. The results will be displayed across the respective selection as you decide which platform you’ll be using for the livestream.

Part 4. Discussion: Why Should We Shift To Live Selling?
Live chatting services add more energy to your live events. As discussed, the WooCommerce online chat feature is essential to engage with potential customers. Some people still feel doubtful about whether they will get benefits or not. This section clarifies some potential benefits of shifting to live selling that users can get in the overall market:
- **Build Connections:**Live streams add a human touch in the live selling that connects viewers emotionally. So you can easily build relationships to increase your brand awareness.
- **Successful Selling:**People can understand what to expect from a product during the live stream. So, it results in successful live selling and reduced delivery returns.
- **Global Audience:**Unlike traditional selling strategies, live selling helps reach international audiences. You can showcase products or services from anywhere to gain worldwide customers.
- **Digital Experience:**Live selling is far ahead of the offline world. For this digital experience, shoppers don’t need to find reliable physical stores. Also, the digitalized live shopping experience is more entertaining and profitable.
Conclusion
This ultimate guide provides an overview of WooCommerce and its features. We have also explained a way to enable WooCommerce live chat. Moreover, we have introduced a live-streaming tool that can integrate with other social platforms. With Virbo Live, users can optimize their streams with features like AI avatars, script generation, and much more.
E-commerce has reached an unprecedented level of fame all around the world. It provides convenience for buying and selling goods through accessible platforms. WooCommerce is one of those leading platforms that offer a satisfying e-commerce experience. Also, this platform is well-known for its exceptional functionality and infrastructure, which makes online selling easy.
What if you want a WooCommerce live chat feature to interact with your customers? This article presents benefits and ways to integrate live chat with WooCommerce to interact with customers. You can also learn about an innovative live-streaming platform that boosts your live sales.
Part 1. Overviewing WooCommerce E-Commerce and Its Utility in the Market
WooCommerce is a powerful e-commerce platform renowned for its adaptability. Its scalable nature allows you to start businesses of all sizes. The advanced customization options of WooCommerce make things effortless for users. Moreover, it provides a flexible selling experience, whether you’re selling products or services. Irrespective of its functionality, the live chat WooCommerce feature is absent from the platform.
People can use WooCommerce as a plugin for WordPress, the leading content management system. This open-source plugin helps users customize their online stores. By doing so, it allows sellers to meet their branding requirements. Also, you can manage inventory, order processing, payment gateways, and shipping details. Moreover, it provides a built-in geo-location support to detect customer’s address.
Features of WooCommerce
Many businesses are using WooCommerce for online stores throughout the world. Its impressive usability and accessibility help users in different e-commerce aspects. Provided are some features of WooCommerce that make it special for brand owners:
1. Inventory Management
It provides multiple inventory management options to track stock levels. You can receive notifications for short or out-of-stock products. Moreover, you can sort or filter products by price, popularity, ratings, latest, and more.
2. Pre-installed Payment Methods
To simplify payment processes, WooCommerce provides pre-installed payment gateways. You can choose any payment method, including Cash on Delivery, PayPal, and Credit Card payments.
3. Sell Anything
With WooCommerce, you can sell anything from real products to digital downloads. Moreover, this 100% open-source plugin allows you to sell anywhere with its global support.
4. Mobile Friendliness
WooCommerce ensures that your store looks equally beautiful on desktop and smartphone. Store owners can even turn their existing stores into mobile apps without custom coding.
Part 2. How To Add Live Chat Feature in WooCommerce?
Live chatting is an essential function for interacting with the audience for trustworthiness. Unfortunately, WooCommerce doesn’t provide a dedicated live chat feature. If you want to use this service, integrate it separately with a third-party source. For this purpose, you can use a reliable plugin that enables WooCommerce online chat.
LiveChat is a renowned customer service platform that provides a superb live experience. It helps to chat with customers and share their data with CRM. Moreover, the AI chatbots help to greet your store visitors with automated responses. They allow you to capture more leads and increase sales. Ultimately, LiveChat helps boost your store’s overall revenue.
Comprehensive Guide to Setting Up the LiveChat Plugin on WooCommerce
Using the LiveChat plugin is a good option to get alive chat for WooCommerce. The query is how to set up the plugin across your WooCommerce store. For this, the provided step-by-step resolves all queries involving setting up the LiveChat plugin:
- Step 1. First, you have to access the WordPress dashboard to enter the “Plugins” section. Then, hit the “Add New” button and write “LiveChat WooCommerce” to search for this plugin. Look for the “WordPress Live Chat Plugin for WooCommerce – LiveChat” in the results that appear. Once identified, click the “Install Now” button to proceed.
- Step 2. Upon installation, you need to hit the “Activate” widget. After that, sign up with your account on the “Integrate with LiveChat” screen.
- Step 3. When the log-in and installation process is complete, a chat widget appears on the website. Then, click on “Go to LiveChat” to start live chatting.
- Step 4. If you want to change the settings, select the “LiveChat” option in the WordPress dashboard. Next, hit “Settings” and turn on or turn off the desired options.
Part 3. Wondershare Virbo Live: Assisting Quality Livestream Selling
Live selling has set marketing expectations high for the sellers. Therefore, you should use an efficient live selling tool to stay competitive. To meet the standards, Wondershare Virbo Live is an intuitive and interactive live streaming tool to enhance your streaming quality. Most sellers don’t have the knowledge to market their items on WooCommerce. For this purpose, this simple and easy-to-use medium will help sellers grow revenue.
Moreover, this tool is compatible with all major social media platforms. This allows you to integrate live streams with YouTube, Facebook, Instagram, and more. You don’t need to download the platform as it supports cloud-based service. Another exciting feature is that you can introduce AI avatars or VTubers to your live sessions. Overall, this is the best live-streaming platform with AI-powered features.
Key Highlights of Wondershare Virbo Live
- The smart AI streamer allows you to translate text for dubbing into different languages. It helps accommodate a wider audience of different regions, ethnicities, and cultures.
- Wondershare Virbo Live helps create scripts for live selling. Its built-in AI Smart Script feature allows you to type or generate a script with instant prompts.
- Users can also change live stream templates and backgrounds. Moreover, it allows the addition of creative stickers for better customer engagement.
Get Started Online Free Download
Step-by-Step Guide to Creating a Streaming Room in Virbo Live
Many live-streaming tools exist, but Wondershare Virbo Live is the most recommended. It provides innovative AI-powered functions to facilitate users in a single platform. Here’s how you can create your streaming room using this tool:
- Step 1. Generate a Blank Live Streaming Room
Access the Virbo Live tool from its official website. You must select the “Create Stream Room Now” button from the display. On the new screen, navigate and select the “Create a Black Livestream Room” option. Upon doing so, you will get access to several live-streaming settings.
Get Started Online Free Download
- Step 2. Integrate Microphone for Human-Like Interaction
Now, press the “Human interaction” tab on the left of your screen to integrate the mic with this tool. You have to hit the “Turn Microphone on to Take Over” button under the “Microphone” sub-section. Also, you can move to the “AI Interaction” tab to create an automated Q&A session.
- Step 3. Customize Live Stream Template and Background
Wondershare Virbo Live presents different templates and backgrounds for users. Click on the “Background” tab from the top navigation bar to try stunning backgrounds. You can also select the “Template” tab to explore various templates for quick live streaming setup.
- Step 5. Pick Suitable AI Avatars for Your Live Event
To add more fun, hit the “AI Avatars” tab from the top navigation bar. This section shows creative avatars with different outfits and poses. You can choose the suitable one that demonstrates your personality. After selecting the avatar, you can preview it on the right side of the screen.
- Step 6. Start Your Livestream After All Settings
After customizing all the features according to your desire, click on the “Start livestream” button at the top right of the screen. The results will be displayed across the respective selection as you decide which platform you’ll be using for the livestream.
Part 4. Discussion: Why Should We Shift To Live Selling?
Live chatting services add more energy to your live events. As discussed, the WooCommerce online chat feature is essential to engage with potential customers. Some people still feel doubtful about whether they will get benefits or not. This section clarifies some potential benefits of shifting to live selling that users can get in the overall market:
- **Build Connections:**Live streams add a human touch in the live selling that connects viewers emotionally. So you can easily build relationships to increase your brand awareness.
- **Successful Selling:**People can understand what to expect from a product during the live stream. So, it results in successful live selling and reduced delivery returns.
- **Global Audience:**Unlike traditional selling strategies, live selling helps reach international audiences. You can showcase products or services from anywhere to gain worldwide customers.
- **Digital Experience:**Live selling is far ahead of the offline world. For this digital experience, shoppers don’t need to find reliable physical stores. Also, the digitalized live shopping experience is more entertaining and profitable.
Conclusion
This ultimate guide provides an overview of WooCommerce and its features. We have also explained a way to enable WooCommerce live chat. Moreover, we have introduced a live-streaming tool that can integrate with other social platforms. With Virbo Live, users can optimize their streams with features like AI avatars, script generation, and much more.
Beyond the Basics: Secrets for TikTok Live Studio Success
TikTok has changed the streaming world. With millions of users on the platform, TikTok Live Studio is a tool that allows you to stream and go live with ease and better engagement. TikTok has realized the power of streaming and is now competing with some of the biggest platforms like Facebook Live, Twitch, and YouTube.
But if you want to grow your TikTok using the Live Studio, then we have a complete guideline of how to go from a beginner streamer to an advanced one.
Part 1: Basic Knowledge of Pro Tips for TikTok Live Studio Success

We live in an attention economy where live streaming has become the pinnacle of entertainment. You see many creators like Adin Ross, N3on, and Sneako making the move and becoming one of the biggest streamers out there, earning millions of dollars per year.
The studio behind TikTok saw the potential and decided to allow live streaming, which is one of the best ways creators can interact with their audience. However, as the platform got bigger, TikTok introduced its official Live Studio tool that aims to set streamers up for success.
So what exactly is Live Studio? LIVE Studio is TikTok-dedicated streaming software that lets you stream games on TikTok, connect with the community, receive gifts, and subscriptions, and easily create high-quality content for your viewers to enjoy.
So how does it work?
01 How does TikTok Live Studio work?
Being a comprehensive live streaming software, creators who want to use Live Studio will need to at least have 1000 followers to unlock and access this wonderful software. TikTok LIVE Studio has helped gaming creators up their TikTok Live experience, experience true monetization, and connect deeply with their viewers.
However, if you want to be a gaming-related creator, you must have posted game-related short videos or gone live while playing a game of your choice. But with non-gamers, the policy is different. You need at least 10,000 followers to have access to the LIVE Studio.
02 Benefits and Features of TikTok Live Studio
Tik Tok LIVE Studio provides many features that make streaming a breeze. Especially when you are a gamer, you get so many intuitive controls that it turns your TikTok into an analytical dashboard where you can understand your audience a bit better.
Firstly, Live Studio TikTok makes it easier for beginners to go live and get their streaming career started. It is simple to use and easy to get started when there is a dedicated tool for streaming.
Secondly, you can engage with viewers like a pro using streaming-oriented features like LIVE, LIVE Goal, Highlight, and more. It sets up a whole system for you to follow and improve, allowing you to take your streaming career to the next level.
Moreover, with TikTok LIVE Studio, you can also chat with your viewers through an in-game chatbox. From reacting to their comments and receiving gifts, Live Studio provides all the options for streamers to leverage.
Part 2: Pro Tips for TikTok Live Studio Success
1. Select AI-powered streaming tools to ease the workload

We live in an AI-focused world where even gamers tend to move towards AI avatars instead of displaying themselves playing the game. If you have been a fan of vTubers and want a similar streaming style for your gaming TikTok Live, then you should try Virbo Live .
Moreover, in the modern world, TikTok commerce has been blowing up with shops showcasing their products and getting the most return of the content that they are making. But with virtual live avatars in Virbo, you can take it up a notch and get your TikTok store to sell better with greater engagement.
First of all, you are going to save a lot of money when it comes to using an AI avatar since you won’t need to hire a person to do everything for you. Secondly, using these VTubers will give you a boost in revenue especially when there is a live shopping event.
Lastly, with 24/7 seamless AI streaming, you can plan the stream ahead of time and get much more out of your livestreams. Here are some of Virbo’s live-streaming features.
Features of Virbo Live
- AI Live Shopping: Virbo offers 24/7 live avatars that you can use to set up AI live shopping right on your TikTok page. You don’t need any human model present and you can showcase your product on the TikTok page as you like.
- Realistic AI-Driven Avatars: All avatars are realistic and the vTubers can perfectly mimic natural movements. From different ethnicities, poses, and attire, you have the freedom to choose anything.
- Multiple Languages and Accents: Virbo offers multiple languages and accents that various avatars can have. Hence, you can break the language barrier and create live streams in various languages to target the native people.
2. Set your objectives for TikTok Live
When it comes to going live on TikTok, you also need to set your objectives. TikTok Live Studio provides many features that you can leverage. Hence, by planning your actions, you can make the best out of going live on TikTok
For example, before your stream starts, ask yourself, what are your objectives? Do you want more views, more people engaged, more conversations, monetization? Once you have the goal in mind, then you can leverage TikTok Live Studio and make the most return out of your effective live session.
3. Promote your live beforehand
Before you go live using TikTok Live Studio, you need to promote your life. It is important to build up anticipation before actually going live on the platform. Hence, when you announce that you are going live and also tease what is going to be in the video, you improve your chances of getting more viewers to join, especially if you have an audience already.
One of the best ways to promote is simply to make an engaging TikTok that only teases the content of your upcoming live session, sparking the curiosity factor amongst the potential viewers.
4. Timing matters the most
The right time when you push out your content is what matters the most. The same is true with YouTube, Facebook, Instagram, and most other platforms. With TikTok, you must understand where your audience is mostly active in
How do you find that? Well, you need to understand your audience deeply and when they are mostly active. For example, your audience could be active on TikTok on a certain time and that’s where pushing your livestream will get the most results.
5. Take care of technical aspects
Most people ignore the technical aspects of TikTok livestream. This is especially true if you want to come in front of the camera for live streaming purposes. For example, you need to make sure that your lighting, sound, and connectivity are perfect so nothing hinders the experience of your audience.
With TikTok Live Studio, you can handle the hardware, which devices you want to connect, and the overall quality of your live streams. So, when you address the technical aspects the right way, you increase your chances of engaging the audience.
Part 3: Step Guidance to Start TikTok Live Studio
Step 1 Download TikTok Live Studio

Visit the official website of TikTok Live Studio and download it for your Windows. But you can also log in to your TikTok account and download Live Studio from there. But if you don’t see the TikTok Live Studio download button in your TikTok app, then that means the software might not be available in your region.
Step 2 Install and Login TikTok Live Studio

After completing the download, you need to install the software on your Windows PC or laptop. Give it all the permission that it needs and after you are done installing it on your machine, you need to log in just like you log in to your TikTok. The application will allow you to choose various options like Facebook, Google, and Twitter login.
Step 3 Setting up LIVE Studio and going live

Once you are logged in, you can either skip the process or Set Up so that everything will go under your supervision. You will need to select things like Microphone, Camera settings, Streaming Settings, and more. Once everything is set up, you just need to click Go Live, and your live stream will be started.
Conclusion
TikTok Live Studio is one of the best live streaming tools you will find. The regular TikTok app is quite limited, especially if you are a streamer trying to make it on the TikTok world.
There is so much competition on the TikTok streaming service, but with Live Studio, you get a lot of freedom and tools to measure your progress in the competitive TikTok world.
TikTok has changed the streaming world. With millions of users on the platform, TikTok Live Studio is a tool that allows you to stream and go live with ease and better engagement. TikTok has realized the power of streaming and is now competing with some of the biggest platforms like Facebook Live, Twitch, and YouTube.
But if you want to grow your TikTok using the Live Studio, then we have a complete guideline of how to go from a beginner streamer to an advanced one.
Part 1: Basic Knowledge of Pro Tips for TikTok Live Studio Success
We live in an attention economy where live streaming has become the pinnacle of entertainment. You see many creators like Adin Ross, N3on, and Sneako making the move and becoming one of the biggest streamers out there, earning millions of dollars per year.
The studio behind TikTok saw the potential and decided to allow live streaming, which is one of the best ways creators can interact with their audience. However, as the platform got bigger, TikTok introduced its official Live Studio tool that aims to set streamers up for success.
So what exactly is Live Studio? LIVE Studio is TikTok-dedicated streaming software that lets you stream games on TikTok, connect with the community, receive gifts, and subscriptions, and easily create high-quality content for your viewers to enjoy.
So how does it work?
01 How does TikTok Live Studio work?
Being a comprehensive live streaming software, creators who want to use Live Studio will need to at least have 1000 followers to unlock and access this wonderful software. TikTok LIVE Studio has helped gaming creators up their TikTok Live experience, experience true monetization, and connect deeply with their viewers.
However, if you want to be a gaming-related creator, you must have posted game-related short videos or gone live while playing a game of your choice. But with non-gamers, the policy is different. You need at least 10,000 followers to have access to the LIVE Studio.
02 Benefits and Features of TikTok Live Studio
Tik Tok LIVE Studio provides many features that make streaming a breeze. Especially when you are a gamer, you get so many intuitive controls that it turns your TikTok into an analytical dashboard where you can understand your audience a bit better.
Firstly, Live Studio TikTok makes it easier for beginners to go live and get their streaming career started. It is simple to use and easy to get started when there is a dedicated tool for streaming.
Secondly, you can engage with viewers like a pro using streaming-oriented features like LIVE, LIVE Goal, Highlight, and more. It sets up a whole system for you to follow and improve, allowing you to take your streaming career to the next level.
Moreover, with TikTok LIVE Studio, you can also chat with your viewers through an in-game chatbox. From reacting to their comments and receiving gifts, Live Studio provides all the options for streamers to leverage.
Part 2: Pro Tips for TikTok Live Studio Success
1. Select AI-powered streaming tools to ease the workload
We live in an AI-focused world where even gamers tend to move towards AI avatars instead of displaying themselves playing the game. If you have been a fan of vTubers and want a similar streaming style for your gaming TikTok Live, then you should try Virbo Live .
Moreover, in the modern world, TikTok commerce has been blowing up with shops showcasing their products and getting the most return of the content that they are making. But with virtual live avatars in Virbo, you can take it up a notch and get your TikTok store to sell better with greater engagement.
First of all, you are going to save a lot of money when it comes to using an AI avatar since you won’t need to hire a person to do everything for you. Secondly, using these VTubers will give you a boost in revenue especially when there is a live shopping event.
Lastly, with 24/7 seamless AI streaming, you can plan the stream ahead of time and get much more out of your livestreams. Here are some of Virbo’s live-streaming features.
Features of Virbo Live
- AI Live Shopping: Virbo offers 24/7 live avatars that you can use to set up AI live shopping right on your TikTok page. You don’t need any human model present and you can showcase your product on the TikTok page as you like.
- Realistic AI-Driven Avatars: All avatars are realistic and the vTubers can perfectly mimic natural movements. From different ethnicities, poses, and attire, you have the freedom to choose anything.
- Multiple Languages and Accents: Virbo offers multiple languages and accents that various avatars can have. Hence, you can break the language barrier and create live streams in various languages to target the native people.
2. Set your objectives for TikTok Live
When it comes to going live on TikTok, you also need to set your objectives. TikTok Live Studio provides many features that you can leverage. Hence, by planning your actions, you can make the best out of going live on TikTok
For example, before your stream starts, ask yourself, what are your objectives? Do you want more views, more people engaged, more conversations, monetization? Once you have the goal in mind, then you can leverage TikTok Live Studio and make the most return out of your effective live session.
3. Promote your live beforehand
Before you go live using TikTok Live Studio, you need to promote your life. It is important to build up anticipation before actually going live on the platform. Hence, when you announce that you are going live and also tease what is going to be in the video, you improve your chances of getting more viewers to join, especially if you have an audience already.
One of the best ways to promote is simply to make an engaging TikTok that only teases the content of your upcoming live session, sparking the curiosity factor amongst the potential viewers.
4. Timing matters the most
The right time when you push out your content is what matters the most. The same is true with YouTube, Facebook, Instagram, and most other platforms. With TikTok, you must understand where your audience is mostly active in
How do you find that? Well, you need to understand your audience deeply and when they are mostly active. For example, your audience could be active on TikTok on a certain time and that’s where pushing your livestream will get the most results.
5. Take care of technical aspects
Most people ignore the technical aspects of TikTok livestream. This is especially true if you want to come in front of the camera for live streaming purposes. For example, you need to make sure that your lighting, sound, and connectivity are perfect so nothing hinders the experience of your audience.
With TikTok Live Studio, you can handle the hardware, which devices you want to connect, and the overall quality of your live streams. So, when you address the technical aspects the right way, you increase your chances of engaging the audience.
Part 3: Step Guidance to Start TikTok Live Studio
Step 1 Download TikTok Live Studio
Visit the official website of TikTok Live Studio and download it for your Windows. But you can also log in to your TikTok account and download Live Studio from there. But if you don’t see the TikTok Live Studio download button in your TikTok app, then that means the software might not be available in your region.
Step 2 Install and Login TikTok Live Studio
After completing the download, you need to install the software on your Windows PC or laptop. Give it all the permission that it needs and after you are done installing it on your machine, you need to log in just like you log in to your TikTok. The application will allow you to choose various options like Facebook, Google, and Twitter login.
Step 3 Setting up LIVE Studio and going live
Once you are logged in, you can either skip the process or Set Up so that everything will go under your supervision. You will need to select things like Microphone, Camera settings, Streaming Settings, and more. Once everything is set up, you just need to click Go Live, and your live stream will be started.
Conclusion
TikTok Live Studio is one of the best live streaming tools you will find. The regular TikTok app is quite limited, especially if you are a streamer trying to make it on the TikTok world.
There is so much competition on the TikTok streaming service, but with Live Studio, you get a lot of freedom and tools to measure your progress in the competitive TikTok world.
Access All Matches: Free World Cup Live Streaming Options
The World Cup ignites a global frenzy, uniting fans in a whirlwind of excitement. Today, accessing all matches has never been easier. The plethora of free World Cup live streaming options available cater to fans worldwide. They ensure no one misses a moment of the action.
From streaming services to social media platforms, there are many avenues to watch the World Cup live for free. The accessibility revolutionizes how fans engage with the tournament. It amplifies the passion that defines this pinnacle of football. Explore the page to learn free World Cup streaming sites without missing a beat.

Part I. 6 Free World Cup Live Streaming Platforms
The FIFA World Cup is around the corner. With it, fans around the globe are gearing up to catch all the action live. While many use traditional cable or satellite subscriptions, there’s a growing trend towards free streaming platforms. They offer convenience and accessibility without hefty subscription fees. Here’s an overview of some popular free World Cup streaming sites for watching the World Cup.
BBC iPlayer – Broadcast Matches in 4k UHD
BBC iPlayer is renowned for its high-quality broadcasts. It offers matches in stunning 4K Ultra HD resolution. The platform also provides comprehensive coverage of the World Cup. It even covers pre-match analysis and post-match highlights. However, it’s geo-restricted to UK viewers only. The app limits access for international fans.

ITVX – Stream Entire World Cup Online
ITVX allows free World Cup live streaming online. It covers all matches extensively, from the group stage to the final. The platform offers an intuitive interface and seamless streaming experience. Like BBC iPlayer, ITVX is geo-restricted to users within the UK.

SBS – Watch All World Cup Matches Online
SBS is the go-to destination for Australian viewers, offering free online streaming of all World Cup matches. It provides multilingual commentary options and comprehensive coverage of the tournament. However, it’s limited to viewers in Australia, restricting access for international fans.

Tubi – Access the World Cup Without an Account
Tubi stands out for its no-account-required approach. It allows users to watch the World Cup live for free without the hassle of signing up. The platform also offers a diverse range of content, including sports, movies, and TV shows. The availability of World Cup matches may vary depending on licensing agreements and geographical restrictions.

Peacock – Livestream the World Cup in 60FPS
Peacock offers live streaming of the World Cup in smooth 60 frames per second (FPS). It provides an immersive viewing experience for World Cup fans. The app features a wide range of sports content, including exclusive coverage of major events as well. Peacock is geo-restricted to viewers in the United States. It limits access for international audiences.

RTBF Auvio – Watch the World Cup Without Lag
RTBF Auvio provides lag-free streaming of World Cup matches. It ensures viewers don’t miss a moment of the action. The app offers a user-friendly interface and seamless playback. However, it’s limited to viewers in Belgium, restricting access for international fans.

Part II. How To Access Free World Cup Streaming Sites?
Accessing free World Cup streaming sites is possible with a VPN. Here’s a step-by-step guide on how to do it:
- Step 1: Subscribe to VPN
Start by subscribing to a reputable VPN service. Look for providers that offer servers in the UK or Australia. These are the regions where many free World Cup streaming sites are available.
- Step 2: Install VPN on a computer or smartphone
Download and install the VPN app on your computer or smartphone. Most VPN providers offer apps for various devices and operating systems, making installation a breeze.
- Step 3: Connect to the Server in the UK/Australia
Launch the VPN app and log in with your credentials. Then, choose a server located in the UK or Australia from the server list. Connecting to a server in these regions will give you an IP address from that location. It allows you to bypass geo-restrictions.
- Step 4: Go to BBC, ITV, or SBS, and start streaming
Once connected to the VPN server, open your web browser or streaming app. Visit the websites of BBC iPlayer, ITV, or SBS. You can now access free World Cup streaming content and enjoy watching matches live or on-demand.
Now, let’s explore three top VPN services along with their pros and cons:
ExpressVPN
ExpressVPN is one of the leading VPN providers in the industry. It’s known for its reliability, speed, and extensive server network. It boasts over 3,000 servers in 160 locations across 94 countries. ExpressVPN offers a wide range of options for bypassing geo-restrictions. It also provides options for accessing content from around the globe.

Pros
- A vast network of servers with 160 locations worldwide.
- Fast and reliable connections, suitable for streaming and downloading.
- User-friendly app and is available for various devices and operating systems.
- Excellent customer support with 24/7 live chat assistance.
Cons
- Slightly higher priced compared to some other VPN providers.
- Limited to five simultaneous connections per subscription.
CyberGhost
CyberGhost is a budget-friendly VPN option that offers a good balance of performance and affordability. It provides users with access to over 7,000 servers in more than 90 countries. The platform ensures reliable connections and strong privacy protection. CyberGhost is known for its user-friendly apps and customizable features.

Pros
- Cheaper VPN alternative without compromising on performance.
- Large server network spanning over 90 countries.
- User-friendly and suitable for beginners.
- Strong encryption and privacy features, including a strict no-logs policy.
Cons
- The server network may not be as extensive as some other providers.
- Connection speeds may vary depending on server load.
NordVPN
NordVPN is recognized for its emphasis on security and privacy. It offers users advanced encryption protocols and a strict no-logs policy. The app operates a large network of over 5,000 servers in over 60 countries. It provides users with reliable access to geo-restricted content. NordVPN also provides high-speed connections for streaming and downloading.

Pros
- Robust security features with advanced encryption protocols.
- Large server network spanning over 60 countries.
- The app is compatible with various devices and platforms.
- Excellent customer support and 24/7 live chat assistance.
Cons
- The interface may be slightly less intuitive for some users.
- Occasional server congestion during peak hours.
Each of these VPN providers offers unique features and advantages. Choose the one that best fits your needs when accessing free World Cup live-streaming sites.
Part III. Should I Pay for a TV Channel for World Cup Streaming?
Considering whether to pay for a TV channel for World Cup streaming? It’s essential to weigh the costs and benefits against other available options. Subscribing to a TV channel may offer convenience and a dedicated viewing experience. However, it can come with a significant price tag. Here are some alternative options to consider:
US Channels
- FuboTV: $77/month
- Hulu+: $70/month
- Sling Blue: $35/month
Canadian Channel
- BellMedia: $15/month
Spanish Channel
- Telemundo: $70/month
New Zealand Channel
- SkyGo: $24/month
Using VPNs to access free World Cup streaming sites may be more cost-effective. While VPN services need subscription fees, they’re often cheaper than TV channel subscriptions. VPNs also offer the flexibility to access a variety of free streaming platforms from around the world. It expands the range of available content beyond what’s offered by individual channels.
Bonus. Using a Reliable Platform for Uninterrupted Steaming
You may know many streaming platforms like YouTube, Facebook Live, TikTok, Shopee, etc. Here is an emerging player in the live-streaming industry, Wondershare Virbo . It offers a unique approach to hosting live streams with AI-driven avatars.
Virbo integrates with major live-streaming platforms supported by OBS. It provides users with a reliable and versatile tool for uninterrupted streaming. The tool stands out for its innovative features, including:
- **Host live streaming using AI streamer.**Virbo allows users to host live streams with AI streamers. You can choose from various avatars to represent you during live streams.
- **Multiple languages and accents.**Virbo supports many languages and accents. It’s accessible to a global audience and caters to diverse viewer preferences.
- **AI-live shopping.**With AI-live shopping capabilities, you can integrate shopping experiences into your live streams.
- Microphone integration. Virbo ensures clear communication during live streams.
- **Cloud-based access.**You can access Virbo from any device with an internet connection.
- Compatibility with major platforms. Virbo Live is compatible with major live-streaming platforms supported by OBS.
Get Started Online Free Download
Pros
- Web-accessible, allowing users to access the platform from any device with an internet connection.
- Intuitive interface, suitable for beginners and experienced streamers alike.
- With a single click, Avatar streaming makes it easy to personalize and enhance live streams.
Cons
- Limited AI avatars on the free trial plan. It potentially limits customization options for users exploring the platform before subscribing.
Price Plans
Choosing the right plan can make all the difference in ensuring a seamless and fulfilling experience. Virbo offers a range of plans tailored to meet your diverse needs:
| Creator Plan | Business Plan | Advanced Plan |
|---|---|---|
| · Price: $89.9/month | · Billing: Automatically renews, cancels anytime. | · 3600 minutes/month of live streaming duration |
| · Price: $159.9/month | · Billing: Automatically renews, cancels anytime. | · 10800 minutes/month of live streaming duration |
| · Price: $599.9/month | · Billing: Automatically renews, cancels anytime. | · Unlimited live streaming duration |
To see detailed information on AI avatars, cloud storage, and AI scripts of different plans, please visit Virbo Live’s official pricing website .
Conclusion
Accessing free World Cup streaming sites or paid TV channels offers unparalleled excitement and global unity. While free World Cup live streaming provides accessibility and cost-effectiveness, paid channels offer dedicated coverage and convenience.
For seamless live-streaming experiences, consider Virbo. It’s a versatile platform offering AI-driven features and customizable plans. With Virbo, unlock the potential of live streaming and content creation to engage and captivate your audience. Don’t miss out on the action – explore free options or elevate your experience with Virbo today.
CyberGhost
CyberGhost is a budget-friendly VPN option that offers a good balance of performance and affordability. It provides users with access to over 7,000 servers in more than 90 countries. The platform ensures reliable connections and strong privacy protection. CyberGhost is known for its user-friendly apps and customizable features.
Pros
- Cheaper VPN alternative without compromising on performance.
- Large server network spanning over 90 countries.
- User-friendly and suitable for beginners.
- Strong encryption and privacy features, including a strict no-logs policy.
Cons
- The server network may not be as extensive as some other providers.
- Connection speeds may vary depending on server load.
NordVPN
NordVPN is recognized for its emphasis on security and privacy. It offers users advanced encryption protocols and a strict no-logs policy. The app operates a large network of over 5,000 servers in over 60 countries. It provides users with reliable access to geo-restricted content. NordVPN also provides high-speed connections for streaming and downloading.
Pros
- Robust security features with advanced encryption protocols.
- Large server network spanning over 60 countries.
- The app is compatible with various devices and platforms.
- Excellent customer support and 24/7 live chat assistance.
Cons
- The interface may be slightly less intuitive for some users.
- Occasional server congestion during peak hours.
Each of these VPN providers offers unique features and advantages. Choose the one that best fits your needs when accessing free World Cup live-streaming sites.
Part III. Should I Pay for a TV Channel for World Cup Streaming?
Considering whether to pay for a TV channel for World Cup streaming? It’s essential to weigh the costs and benefits against other available options. Subscribing to a TV channel may offer convenience and a dedicated viewing experience. However, it can come with a significant price tag. Here are some alternative options to consider:
US Channels
- FuboTV: $77/month
- Hulu+: $70/month
- Sling Blue: $35/month
Canadian Channel
- BellMedia: $15/month
Spanish Channel
- Telemundo: $70/month
New Zealand Channel
- SkyGo: $24/month
Using VPNs to access free World Cup streaming sites may be more cost-effective. While VPN services need subscription fees, they’re often cheaper than TV channel subscriptions. VPNs also offer the flexibility to access a variety of free streaming platforms from around the world. It expands the range of available content beyond what’s offered by individual channels.
Bonus. Using a Reliable Platform for Uninterrupted Steaming
You may know many streaming platforms like YouTube, Facebook Live, TikTok, Shopee, etc. Here is an emerging player in the live-streaming industry, Wondershare Virbo . It offers a unique approach to hosting live streams with AI-driven avatars.
Virbo integrates with major live-streaming platforms supported by OBS. It provides users with a reliable and versatile tool for uninterrupted streaming. The tool stands out for its innovative features, including:
- **Host live streaming using AI streamer.**Virbo allows users to host live streams with AI streamers. You can choose from various avatars to represent you during live streams.
- **Multiple languages and accents.**Virbo supports many languages and accents. It’s accessible to a global audience and caters to diverse viewer preferences.
- **AI-live shopping.**With AI-live shopping capabilities, you can integrate shopping experiences into your live streams.
- Microphone integration. Virbo ensures clear communication during live streams.
- **Cloud-based access.**You can access Virbo from any device with an internet connection.
- Compatibility with major platforms. Virbo Live is compatible with major live-streaming platforms supported by OBS.
Get Started Online Free Download
Pros
- Web-accessible, allowing users to access the platform from any device with an internet connection.
- Intuitive interface, suitable for beginners and experienced streamers alike.
- With a single click, Avatar streaming makes it easy to personalize and enhance live streams.
Cons
- Limited AI avatars on the free trial plan. It potentially limits customization options for users exploring the platform before subscribing.
Price Plans
Choosing the right plan can make all the difference in ensuring a seamless and fulfilling experience. Virbo offers a range of plans tailored to meet your diverse needs:
| Creator Plan | Business Plan | Advanced Plan |
|---|---|---|
| · Price: $89.9/month | · Billing: Automatically renews, cancels anytime. | · 3600 minutes/month of live streaming duration |
| · Price: $159.9/month | · Billing: Automatically renews, cancels anytime. | · 10800 minutes/month of live streaming duration |
| · Price: $599.9/month | · Billing: Automatically renews, cancels anytime. | · Unlimited live streaming duration |
To see detailed information on AI avatars, cloud storage, and AI scripts of different plans, please visit Virbo Live’s official pricing website .
Conclusion
Accessing free World Cup streaming sites or paid TV channels offers unparalleled excitement and global unity. While free World Cup live streaming provides accessibility and cost-effectiveness, paid channels offer dedicated coverage and convenience.
For seamless live-streaming experiences, consider Virbo. It’s a versatile platform offering AI-driven features and customizable plans. With Virbo, unlock the potential of live streaming and content creation to engage and captivate your audience. Don’t miss out on the action – explore free options or elevate your experience with Virbo today.
RTMP Streaming on Instagram: A Comprehensive Tutorial
Professionals and content creators now use different social media platforms for live streaming. There are many big names on these platforms, such as Instagram . Instagram is one of the most-used networks, with over 2 billion monthly active users. Using this live-stream platform is always a plus for companies and individuals.
However, the discussion is about how to stream to Instagram with an RTMP. This detailed guide helps you in using RTMP Instagram for live streaming. Furthermore, you will also learn about a recommended tool that offers AI-powered features for broadcasting.
Part 1. Some Rules and Requirements To Understand Before Live Streaming on Instagram
Like every platform, Instagram has some protocols for broadcasting content to global audiences. Therefore, learning the rules and requirements before going live on Instagram is necessary. First, your account should be at least 30 days old; otherwise, they can restrict your stream.
There is a rule that you can go live for 4 hours per stream without retakes. This length was increased from 60 minutes in the recent update. Also, you can repost a live video on your profile if it is more than 15 minutes long. Instagram allows you to schedule a stream from 1 hour to 90 days in advance.
The initial requirement of Instagram Live RTMP is that your content be respectful and updated. Additionally, you need to set your stream to 1920x1080 resolution on a vertical camera. Meanwhile, Instagram gives leverage on the number of followers so that you can start with minimum viewers. Also, there is no need to have a business account for live streaming.
Part 2. How To Live Stream to Instagram With an RTMP?
Setting high-quality live streams encourages people to tune into your broadcast. For this purpose, you need a seamless encoder like OBS . Unfortunately, Instagram doesn’t officially support third-party encoders. To solve this query, you need an effective solution.
Therefore, the following steps guide streaming on Instagram with an RTMP (Real-Time Messaging Protocol). You will also learn how to set the required parameters in this comprehensive guide:
- Step 1. Start with downloading and launching OBS Studio on your PC. The first thing to do is set up vertical camera dimensions for RTMP Instagram live streaming. To access the settings window, hit the “Settings” option in the “Controls” panel.
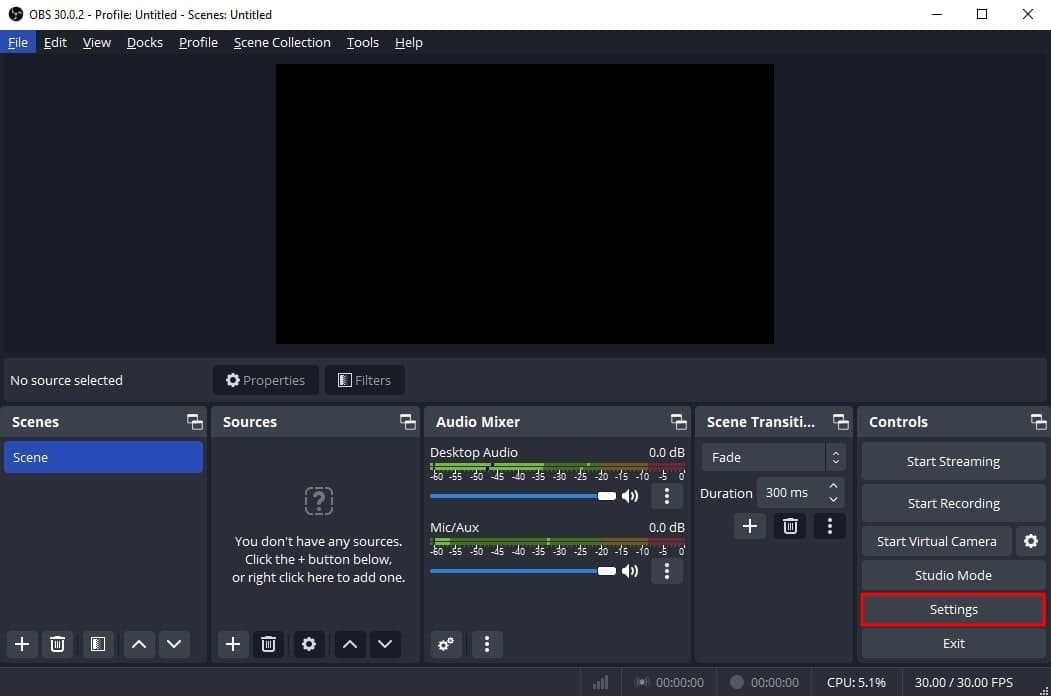
- Step 2. Look for the “Video” tab in the “Settings” window that opens. After that, enter “1080x1920” in the “Base (Canvas) Resolution” bar. Similarly, add a “1080x1920” value in the “Output (Scaled) Resolution” bar to set a 9:16 aspect ratio for vertical display. Then, hit the “OK” button to apply these changes to your Instagram streams.
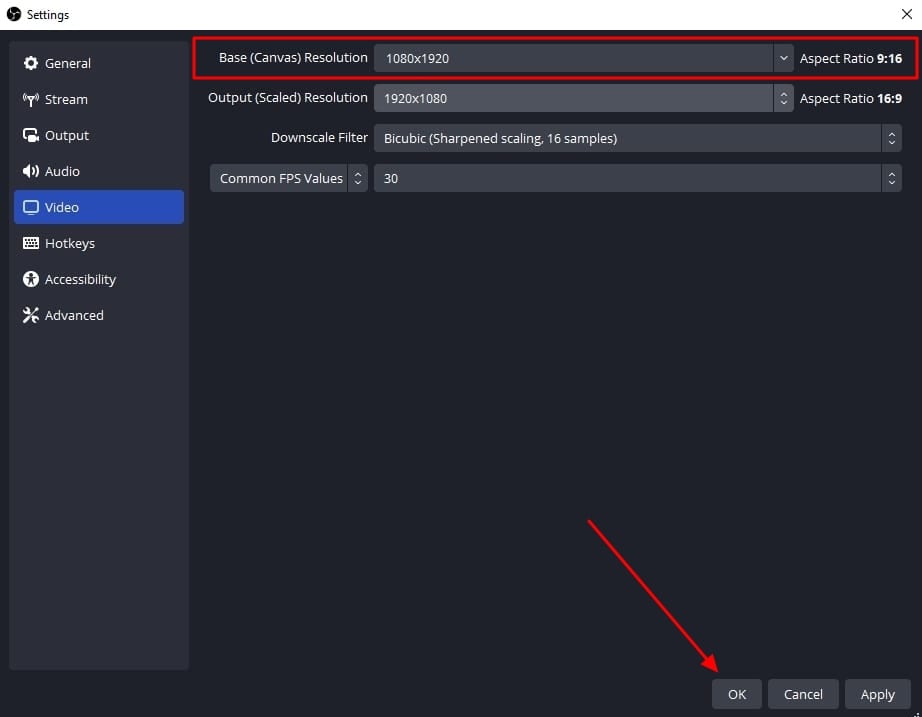
- Step 3. After that, you need to add external sources to the scene. Click on the “+” icon in the “Scenes” panel or rename the scene. Once the scene is created, hit the “+” icon of the “Sources” panel. Then, select the “Video Capture Device” option from the menu and rename the device to your liking. After that, choose the video capture device from the “Device” dropdown and hit the “OK” option. Similarly, you can select the “Audio Input Capture” option to introduce an audio device.

- Step 4. To add text overlays on your stream, hit the “+” icon again in the “Sources” panel. Choose the “Text (GDI+)” option and rename your overlay. On the next window, insert your text in the “Text” box. Then, click the “Select Font” button and choose your required font style and size. Additionally, you can change font color, opacity, alignment, background, and more. After customizing the text, hit the “OK” button to save the overlay in the sources section.
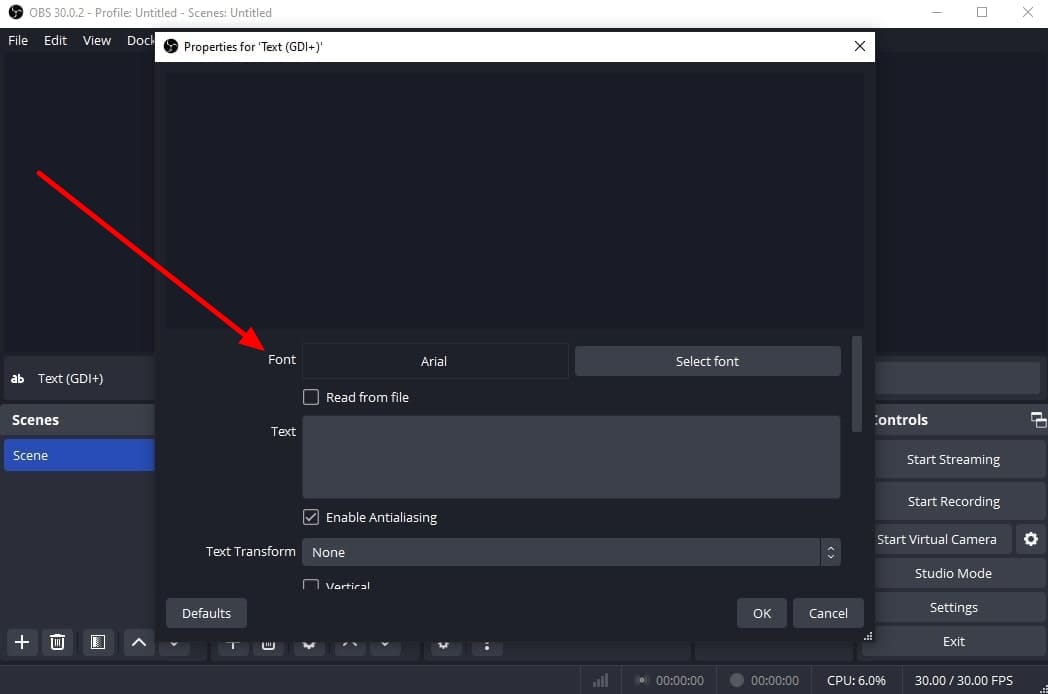
- Step 5. Afterward, select the “Stream” option in the settings window of OBS Studio. Set the “Service” to “Custom” from the dropdown. Then, you need to enter the server and stream key to proceed.
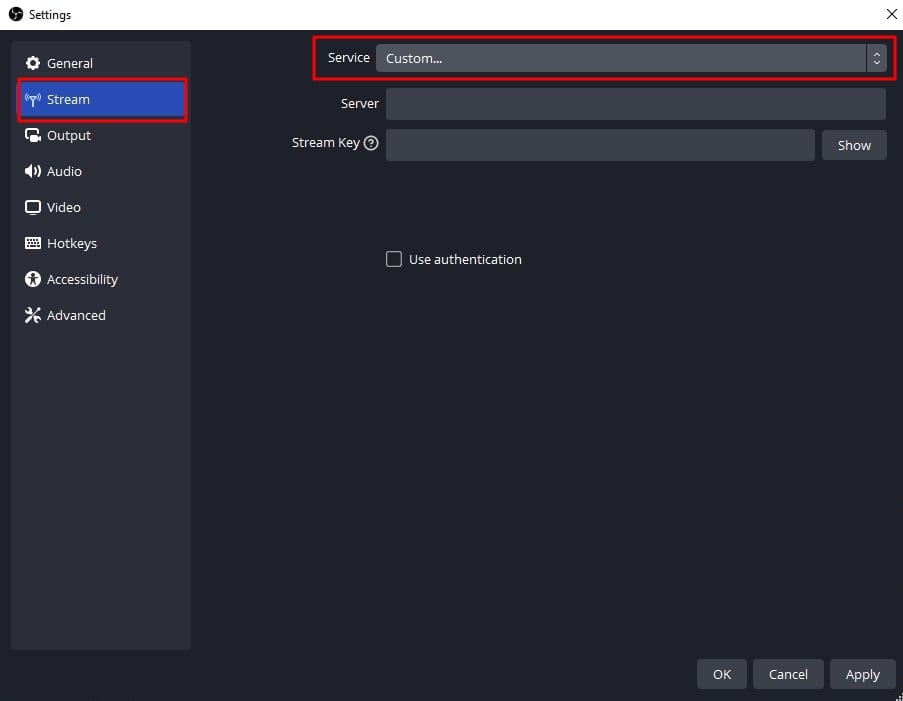
- Step 6. To get the server and stream key, visit rtmp.in on your browser. On the main interface of this Instagram RTMP, hit the “GO LIVE ON INSTAGRAM” widget. Then, it asks you to log in to your Instagram account.
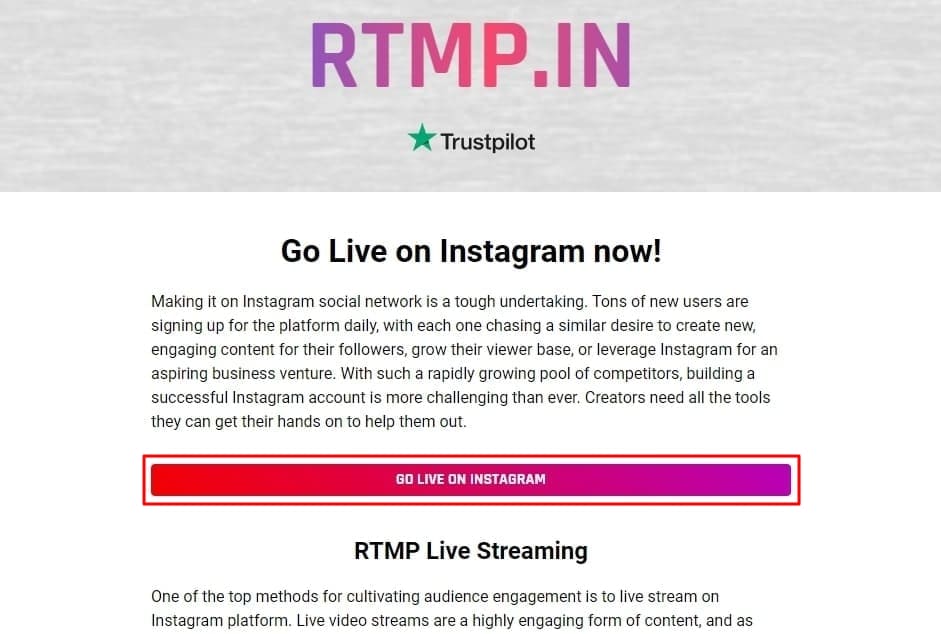
- Step 7. Once you’re logged in, it gives you a stream server URL and Stream key. First, copy the Server link and return to the OBS Studio software. Then, paste the link in the “Server” bar. After that, open the RTMP site again and hit the “Create New Broadcast” option.
You can also give a name to your broadcast in the “Broadcast Title” bar. After creating the broadcast, it shows the “Stream Key,” which you can copy. Then, move again to the OBS Stream setting panel and paste the key in the “Stream Key” bar. Lastly, hit the “Apply” option to save all these settings for your stream.

- Step 8. After getting ready, choose the “Start Streaming” option from the “Controls” panel. It starts your stream with selected parameters. To stop the stream, you can select the “Stop Streaming” option.
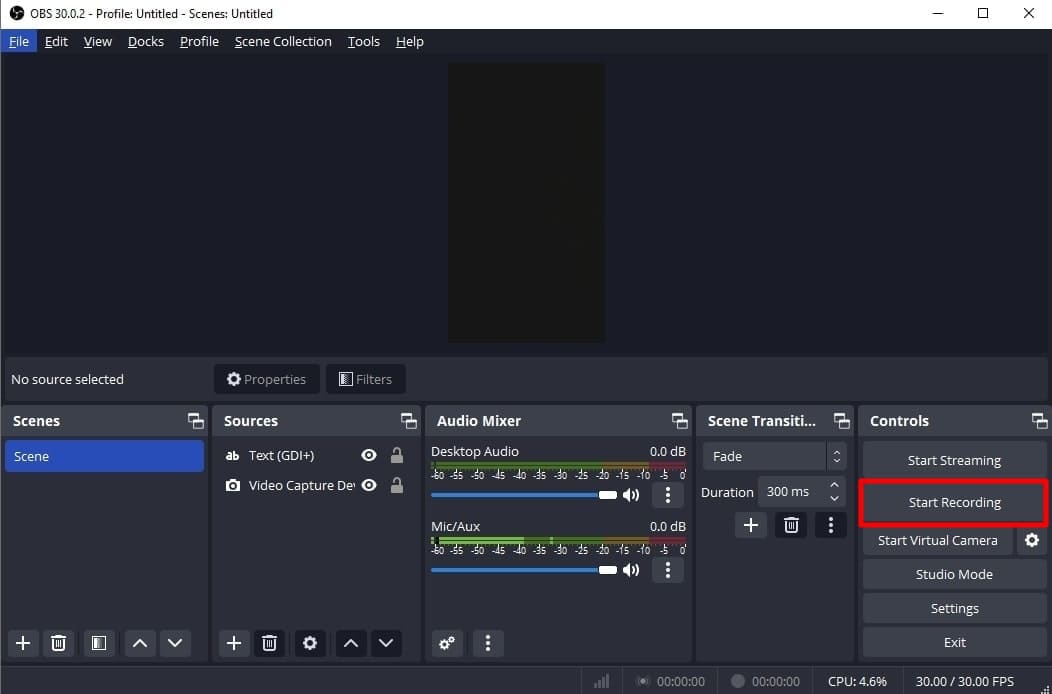
Part 3. How To Attract a Better Audience During Live Streaming on Instagram?
OBS Studio is an efficient software but offers limited functionality when it comes to engaging streams. Thus, you need an advanced solution that can help you reach global audiences through live streaming. For this purpose, Wondershare Virbo Live becomes an unsung hero for you. It provides AI-powered functions that help to start creative streams and generate more leads.
Moreover, the handy controls of Wondershare Virbo Live allow you to customize live streams to your requirements. Therefore, you can start streaming for different purposes, such as marketing, brand awareness, and more. Additionally, it allows you to set automatic responses and create a Q&A database to keep your audience engaged. Plus, it allows you to select creative AI avatars with different poses and outfits.
Key Features of Virbo Live
- You can choose different templates and backgrounds for a stunning streaming appearance.
- Users can write or generate scripts manually using the AI Smart Script feature. For this, they need to add prompts according to the script’s purpose.
- This tool helps to translate scripts into multiple languages and accents. Also, you can get dubbed audio in different AI voices.
Simple Guide To Start Live Streaming Using Wondershare Virbo Live
Many live streaming tools exist, but Wondershare Virbo Live provides more controls. Now, the thing is how to create a live stream room with this tool. For this, follow the given steps one by one to start live streaming with Virbo Live:
- Step 1. Visit the Official Site To Create a Stream Room
First,open theofficial website of Wondershare Virbo Live tool on your device. Navigate to the window and hit the “Create Stream Room Now” button. Upon doing that, it takes you inside the main interface of the tool.
Get Started Online Free Download
- Step 2. Advance To Create a Blank Livestream Room
Once you get to the tool’s home screen, select the “Create a Blank Livestream Room” option. Then, you can try different customization features to make your livestream room look stunning.

- Step 3. Customize Your Livestream Template and Background
After that, click on the “Template” tab to explore different templates. Choose a template that suits live streaming needs. Furthermore, open the “Background” tab from the same window to check exciting background options. You can select different backgrounds from variating categories in the same window.
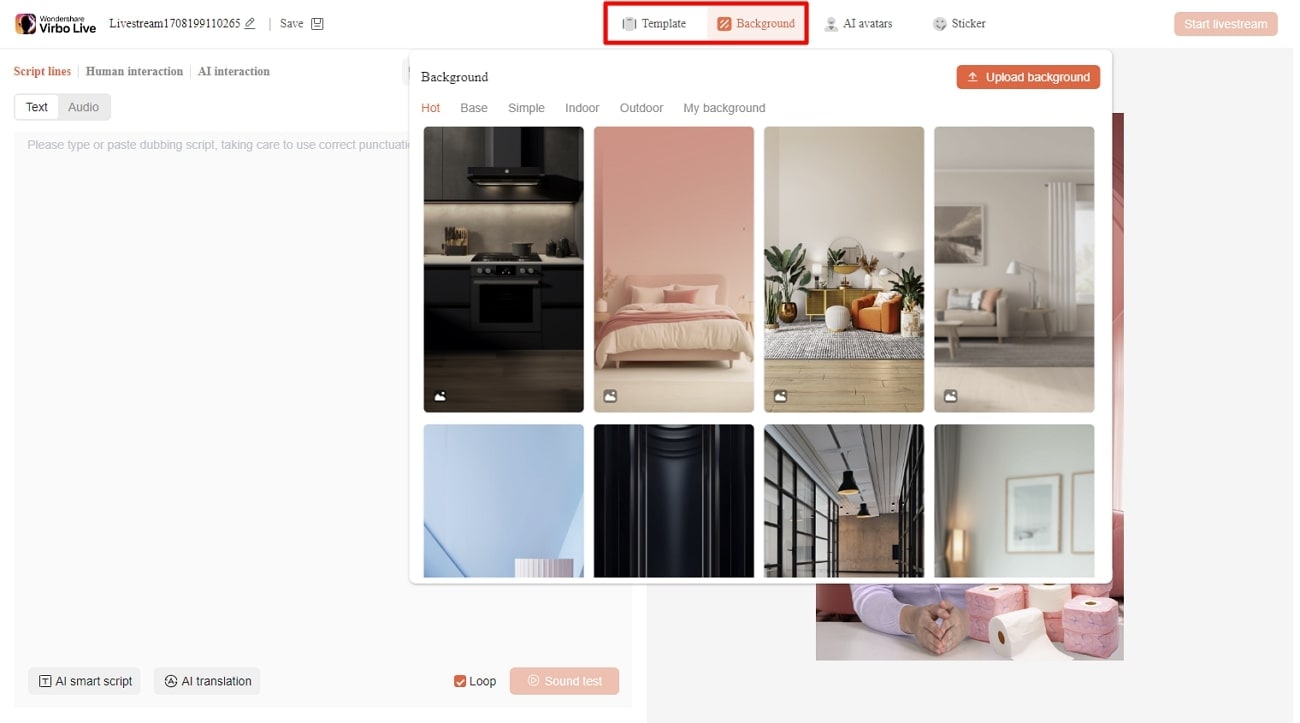
- Step 4. Add Script or Use AI Script Generator
Then, you need to provide the script for translation or dubbing. Select the “Text” given in the left side section for this. It provides a text box to type or paste your script text. Choose the “AI Smart Script” option from the bottom left corner if you don’t have a script. Add prompts there, and it will generate your scripts instantly.
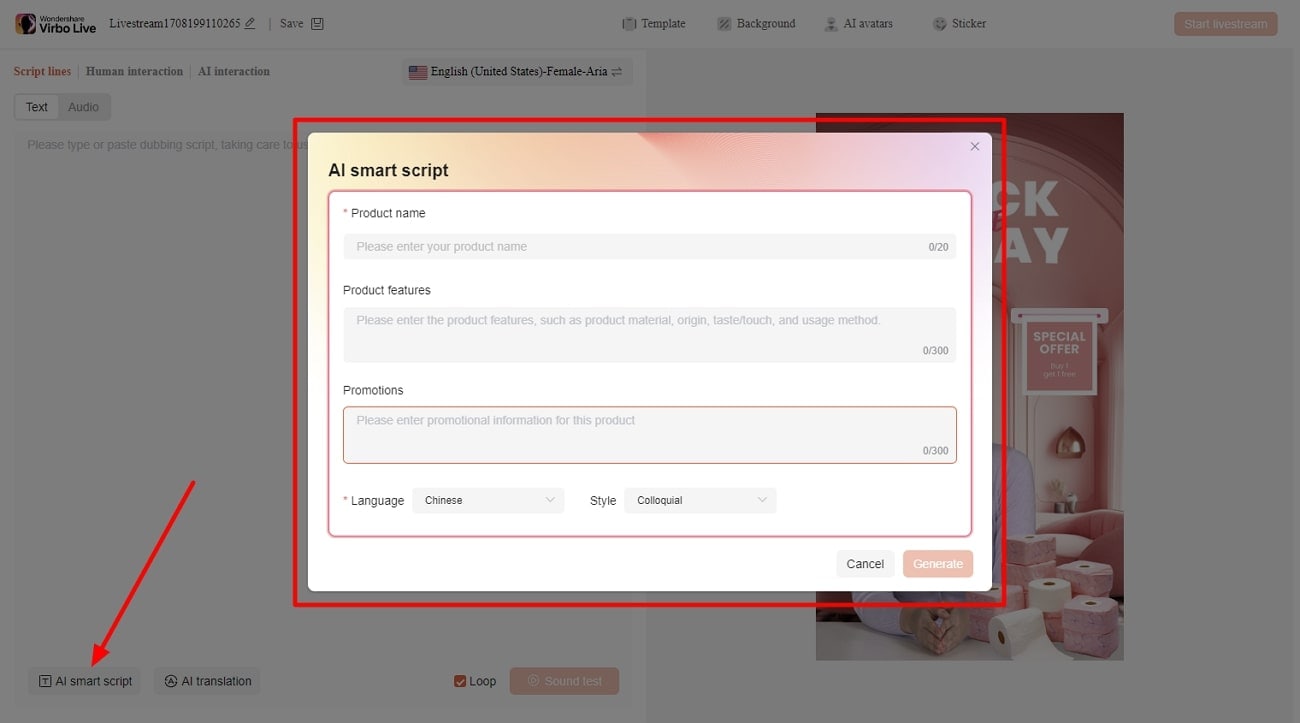
- Step 5. Select Creative AI Avatars According to Requirement
Select the “AI avatars” tab to unveil creative avatars. There is also a whole range of AI avatars to choose from. After selecting the one that suits your motive, you can preview your selected AI avatar before launching the stream.
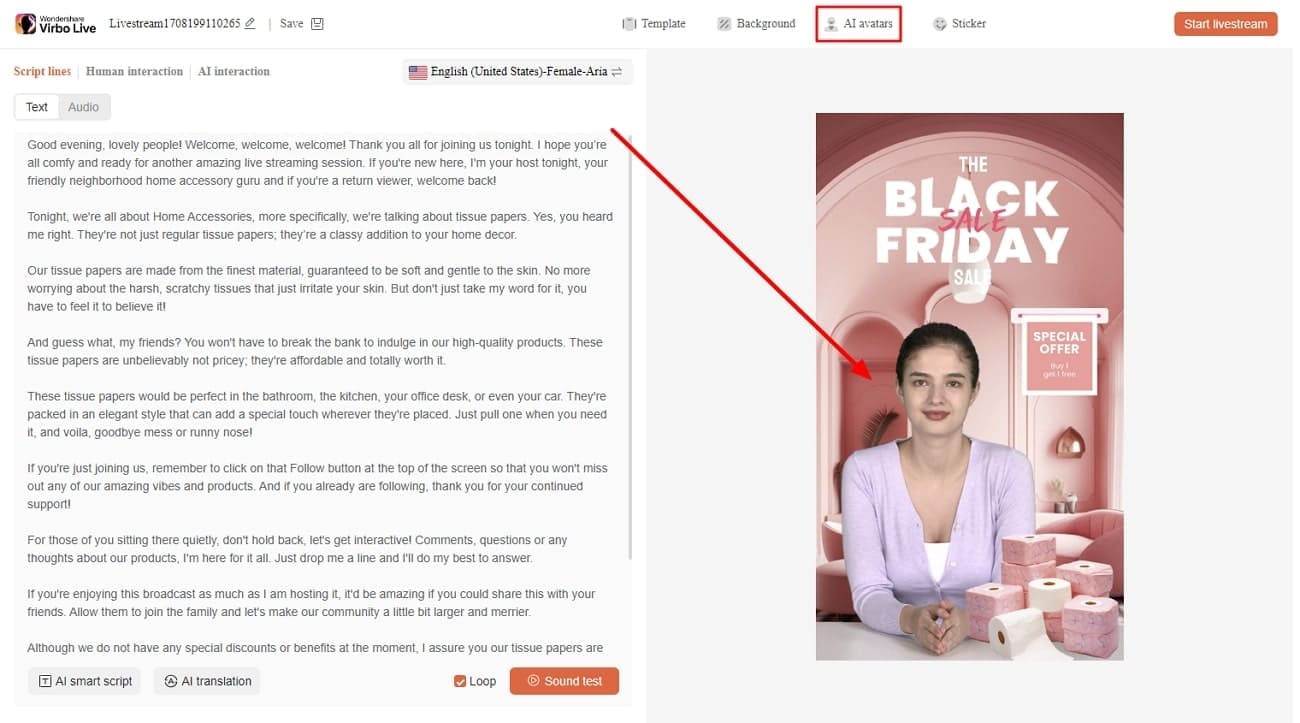
- Step 6. Start Your Livestream With All Selections
After finalizing all the options, you canproceed to start your stream. Select the “Start livestream” option from the top right corner in the same window.
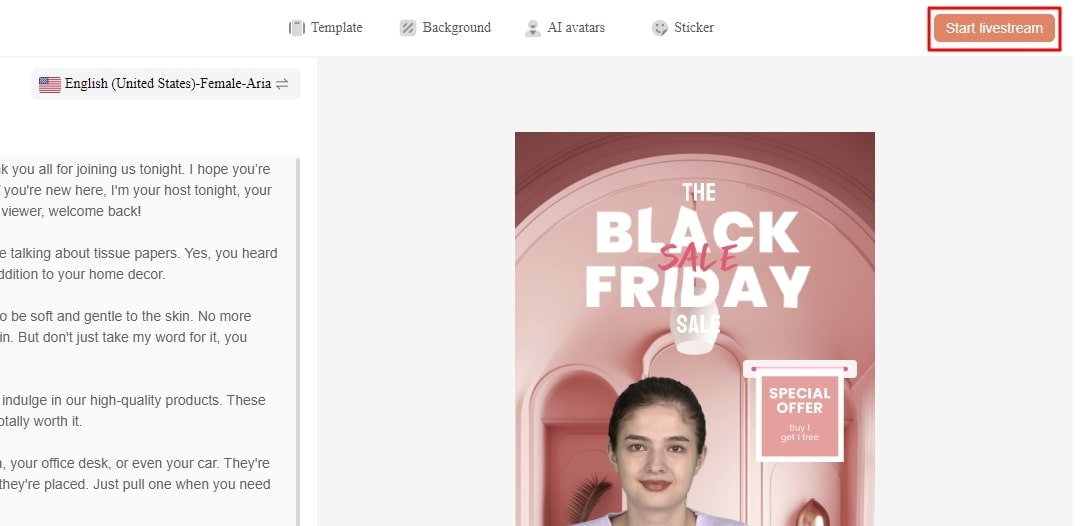
Conclusion
Conclusively, this article intends to provide information about rules and requirements for live streaming on Instagram. You also learned how to live stream to Instagram with an RTMP like OBS Studio. Tools like Wondershare Virbo Live simplify your live streams with AI integration. Also, you can make your broadcast exciting for viewers by using different interactive elements.
Professionals and content creators now use different social media platforms for live streaming. There are many big names on these platforms, such as Instagram . Instagram is one of the most-used networks, with over 2 billion monthly active users. Using this live-stream platform is always a plus for companies and individuals.
However, the discussion is about how to stream to Instagram with an RTMP. This detailed guide helps you in using RTMP Instagram for live streaming. Furthermore, you will also learn about a recommended tool that offers AI-powered features for broadcasting.
Part 1. Some Rules and Requirements To Understand Before Live Streaming on Instagram
Like every platform, Instagram has some protocols for broadcasting content to global audiences. Therefore, learning the rules and requirements before going live on Instagram is necessary. First, your account should be at least 30 days old; otherwise, they can restrict your stream.
There is a rule that you can go live for 4 hours per stream without retakes. This length was increased from 60 minutes in the recent update. Also, you can repost a live video on your profile if it is more than 15 minutes long. Instagram allows you to schedule a stream from 1 hour to 90 days in advance.
The initial requirement of Instagram Live RTMP is that your content be respectful and updated. Additionally, you need to set your stream to 1920x1080 resolution on a vertical camera. Meanwhile, Instagram gives leverage on the number of followers so that you can start with minimum viewers. Also, there is no need to have a business account for live streaming.
Part 2. How To Live Stream to Instagram With an RTMP?
Setting high-quality live streams encourages people to tune into your broadcast. For this purpose, you need a seamless encoder like OBS . Unfortunately, Instagram doesn’t officially support third-party encoders. To solve this query, you need an effective solution.
Therefore, the following steps guide streaming on Instagram with an RTMP (Real-Time Messaging Protocol). You will also learn how to set the required parameters in this comprehensive guide:
- Step 1. Start with downloading and launching OBS Studio on your PC. The first thing to do is set up vertical camera dimensions for RTMP Instagram live streaming. To access the settings window, hit the “Settings” option in the “Controls” panel.
- Step 2. Look for the “Video” tab in the “Settings” window that opens. After that, enter “1080x1920” in the “Base (Canvas) Resolution” bar. Similarly, add a “1080x1920” value in the “Output (Scaled) Resolution” bar to set a 9:16 aspect ratio for vertical display. Then, hit the “OK” button to apply these changes to your Instagram streams.
- Step 3. After that, you need to add external sources to the scene. Click on the “+” icon in the “Scenes” panel or rename the scene. Once the scene is created, hit the “+” icon of the “Sources” panel. Then, select the “Video Capture Device” option from the menu and rename the device to your liking. After that, choose the video capture device from the “Device” dropdown and hit the “OK” option. Similarly, you can select the “Audio Input Capture” option to introduce an audio device.
- Step 4. To add text overlays on your stream, hit the “+” icon again in the “Sources” panel. Choose the “Text (GDI+)” option and rename your overlay. On the next window, insert your text in the “Text” box. Then, click the “Select Font” button and choose your required font style and size. Additionally, you can change font color, opacity, alignment, background, and more. After customizing the text, hit the “OK” button to save the overlay in the sources section.
- Step 5. Afterward, select the “Stream” option in the settings window of OBS Studio. Set the “Service” to “Custom” from the dropdown. Then, you need to enter the server and stream key to proceed.
- Step 6. To get the server and stream key, visit rtmp.in on your browser. On the main interface of this Instagram RTMP, hit the “GO LIVE ON INSTAGRAM” widget. Then, it asks you to log in to your Instagram account.
- Step 7. Once you’re logged in, it gives you a stream server URL and Stream key. First, copy the Server link and return to the OBS Studio software. Then, paste the link in the “Server” bar. After that, open the RTMP site again and hit the “Create New Broadcast” option.
You can also give a name to your broadcast in the “Broadcast Title” bar. After creating the broadcast, it shows the “Stream Key,” which you can copy. Then, move again to the OBS Stream setting panel and paste the key in the “Stream Key” bar. Lastly, hit the “Apply” option to save all these settings for your stream.
- Step 8. After getting ready, choose the “Start Streaming” option from the “Controls” panel. It starts your stream with selected parameters. To stop the stream, you can select the “Stop Streaming” option.
Part 3. How To Attract a Better Audience During Live Streaming on Instagram?
OBS Studio is an efficient software but offers limited functionality when it comes to engaging streams. Thus, you need an advanced solution that can help you reach global audiences through live streaming. For this purpose, Wondershare Virbo Live becomes an unsung hero for you. It provides AI-powered functions that help to start creative streams and generate more leads.
Moreover, the handy controls of Wondershare Virbo Live allow you to customize live streams to your requirements. Therefore, you can start streaming for different purposes, such as marketing, brand awareness, and more. Additionally, it allows you to set automatic responses and create a Q&A database to keep your audience engaged. Plus, it allows you to select creative AI avatars with different poses and outfits.
Key Features of Virbo Live
- You can choose different templates and backgrounds for a stunning streaming appearance.
- Users can write or generate scripts manually using the AI Smart Script feature. For this, they need to add prompts according to the script’s purpose.
- This tool helps to translate scripts into multiple languages and accents. Also, you can get dubbed audio in different AI voices.
Simple Guide To Start Live Streaming Using Wondershare Virbo Live
Many live streaming tools exist, but Wondershare Virbo Live provides more controls. Now, the thing is how to create a live stream room with this tool. For this, follow the given steps one by one to start live streaming with Virbo Live:
- Step 1. Visit the Official Site To Create a Stream Room
First,open theofficial website of Wondershare Virbo Live tool on your device. Navigate to the window and hit the “Create Stream Room Now” button. Upon doing that, it takes you inside the main interface of the tool.
Get Started Online Free Download
- Step 2. Advance To Create a Blank Livestream Room
Once you get to the tool’s home screen, select the “Create a Blank Livestream Room” option. Then, you can try different customization features to make your livestream room look stunning.
- Step 3. Customize Your Livestream Template and Background
After that, click on the “Template” tab to explore different templates. Choose a template that suits live streaming needs. Furthermore, open the “Background” tab from the same window to check exciting background options. You can select different backgrounds from variating categories in the same window.
- Step 4. Add Script or Use AI Script Generator
Then, you need to provide the script for translation or dubbing. Select the “Text” given in the left side section for this. It provides a text box to type or paste your script text. Choose the “AI Smart Script” option from the bottom left corner if you don’t have a script. Add prompts there, and it will generate your scripts instantly.
- Step 5. Select Creative AI Avatars According to Requirement
Select the “AI avatars” tab to unveil creative avatars. There is also a whole range of AI avatars to choose from. After selecting the one that suits your motive, you can preview your selected AI avatar before launching the stream.
- Step 6. Start Your Livestream With All Selections
After finalizing all the options, you canproceed to start your stream. Select the “Start livestream” option from the top right corner in the same window.
Conclusion
Conclusively, this article intends to provide information about rules and requirements for live streaming on Instagram. You also learned how to live stream to Instagram with an RTMP like OBS Studio. Tools like Wondershare Virbo Live simplify your live streams with AI integration. Also, you can make your broadcast exciting for viewers by using different interactive elements.
How To Start a Private Live Stream on YouTube
In today’s digital age, live streaming has become a powerful tool for connecting with audiences in real-time. This method has especially been crucial for businesses looking to get into live selling or gamers wanting to stream their games. But say, for example, that you want to keep your stream private, accessible only to select viewers; how do you do that?
Here’s where private live streaming comes in. This option allows you to share your content with specific individuals, ensuring a more intimate and controlled environment. This guide will teach you how to set up private YouTube streams and give you special tips to let AI help you with your streams with Wondershare Virbo.

Part 1: What Do You Need To Get Started With YouTube Private Live Streaming?
Before diving into the exciting world of private live streaming, here is the equipment to ensure a smooth and seamless experience.
- YouTube account. First things first, you’ll need a YouTube account. This is your gateway to the platform and your key to unlock the world of live streaming.
- A capable PC. Next, prepare your PC and the command center for your private stream. While specific requirements vary depending on the complexity of your stream, here are some general recommendations:
- **Processor:**Intel Core i5 or equivalent (or newer)
- **RAM:**8GB or more
- **Graphics Card:**Dedicated GPU recommended for enhanced performance
- **Internet Connection:**A stable and fast internet connection with sufficient upload bandwidth (consider at least 3 Mbps for standard definition)
- A streaming tool. Now, you’ll need a streaming tool to capture your video and audio and send it live to YouTube. Wondershare Virbo is recommended, especially for live-selling purposes. Other options include OBS and similar stream apps for other purposes.
With these essential elements in place, you’re on your way to launching your private YouTube adventure.
Part 2: How To Start a Private YouTube Live Stream?
Ready to share your talents or ideas with a select audience? Dive into the steps to create a private live stream on YouTube by following the guide below. It’s pretty straightforward.
- Step 1: Access YouTube Studio.Head to your YouTube Studio page (studio.youtube.com) and log in using your Google account linked to your YouTube channel.
- Step 2: Prepare for live streaming**.** Click Create in the top left corner of the Studio dashboard, and select Go Live from the dropdown menu. Alternatively, click the camera icon next to your profile picture and choose Go Live.

- Step 3: Now, set your visibility. Before starting your broadcast, ensure your stream is private. Under the Visibility setting, click the dropdown menu and choose Private. This option restricts viewership to individuals you specifically invite.

- Step 4: There are two methods existing for inviting viewers:
- **Email Invitations:**Click on Share Privately and enter the email addresses of individuals you wish to grant access. You can also choose to notify them via email.
- **Link sharing:**Although not recommended for complete privacy, you can copy the stream link and share it directly with trusted individuals. Remember, anyone with the link can access the stream, even uninvited guests.

- Step 5: Once everything is set and your viewers are invited, click Go Live to launch your private YouTube stream. Remember, only invited individuals using their YouTube accounts can view your content.
Additional Tips for Private YouTube Live Streams
Here are some additional tips that you can follow before starting a private YouTube stream:
- Test streaming. Consider using a test stream before inviting viewers to ensure everything runs smoothly.
- Giving guidelines to your viewers. Encourage guests to use their YouTube accounts for optimal viewing experience and security. Further, you can add house rules, especially for more intimate streams or live selling/auctions.
- **Exploring advanced privacy settings.**Explore advanced privacy settings within YouTube Studio for further control over viewer permissions.
- Using AI. Tools like Wondershare Virbo can help integrate AI into your private YouTube streams. This way, you won’t always have to glue your eyes on your stream. Discover more about this feature in the following section.
By following these steps and keeping privacy in mind, you can effectively host engaging live streams on YouTube, connecting with your chosen audience in a controlled and intimate setting. Remember to personalize your content, interact with your viewers, and enjoy the unique experience of private live streaming.
Part 3: Breaking the Limitations of Live Streams With Wondershare Virbo
Live streaming constantly evolves, offering creators new ways to connect with audiences. While traditional live streams require your physical presence, imagine having an engaging and interactive stream running 24/7, even when you’re not there. This is great, especially for private YouTube streams, where the need to engage the select viewers becomes more apparent.
Enter Wondershare Virbo , a revolutionary tool that leverages AI to create realistic and captivating live streams around the clock.
Introducing Wondershare Virbo
Gone are the days of relying solely on manual effort to keep your audience engaged. Virbo Live transcends these limitations, offering:
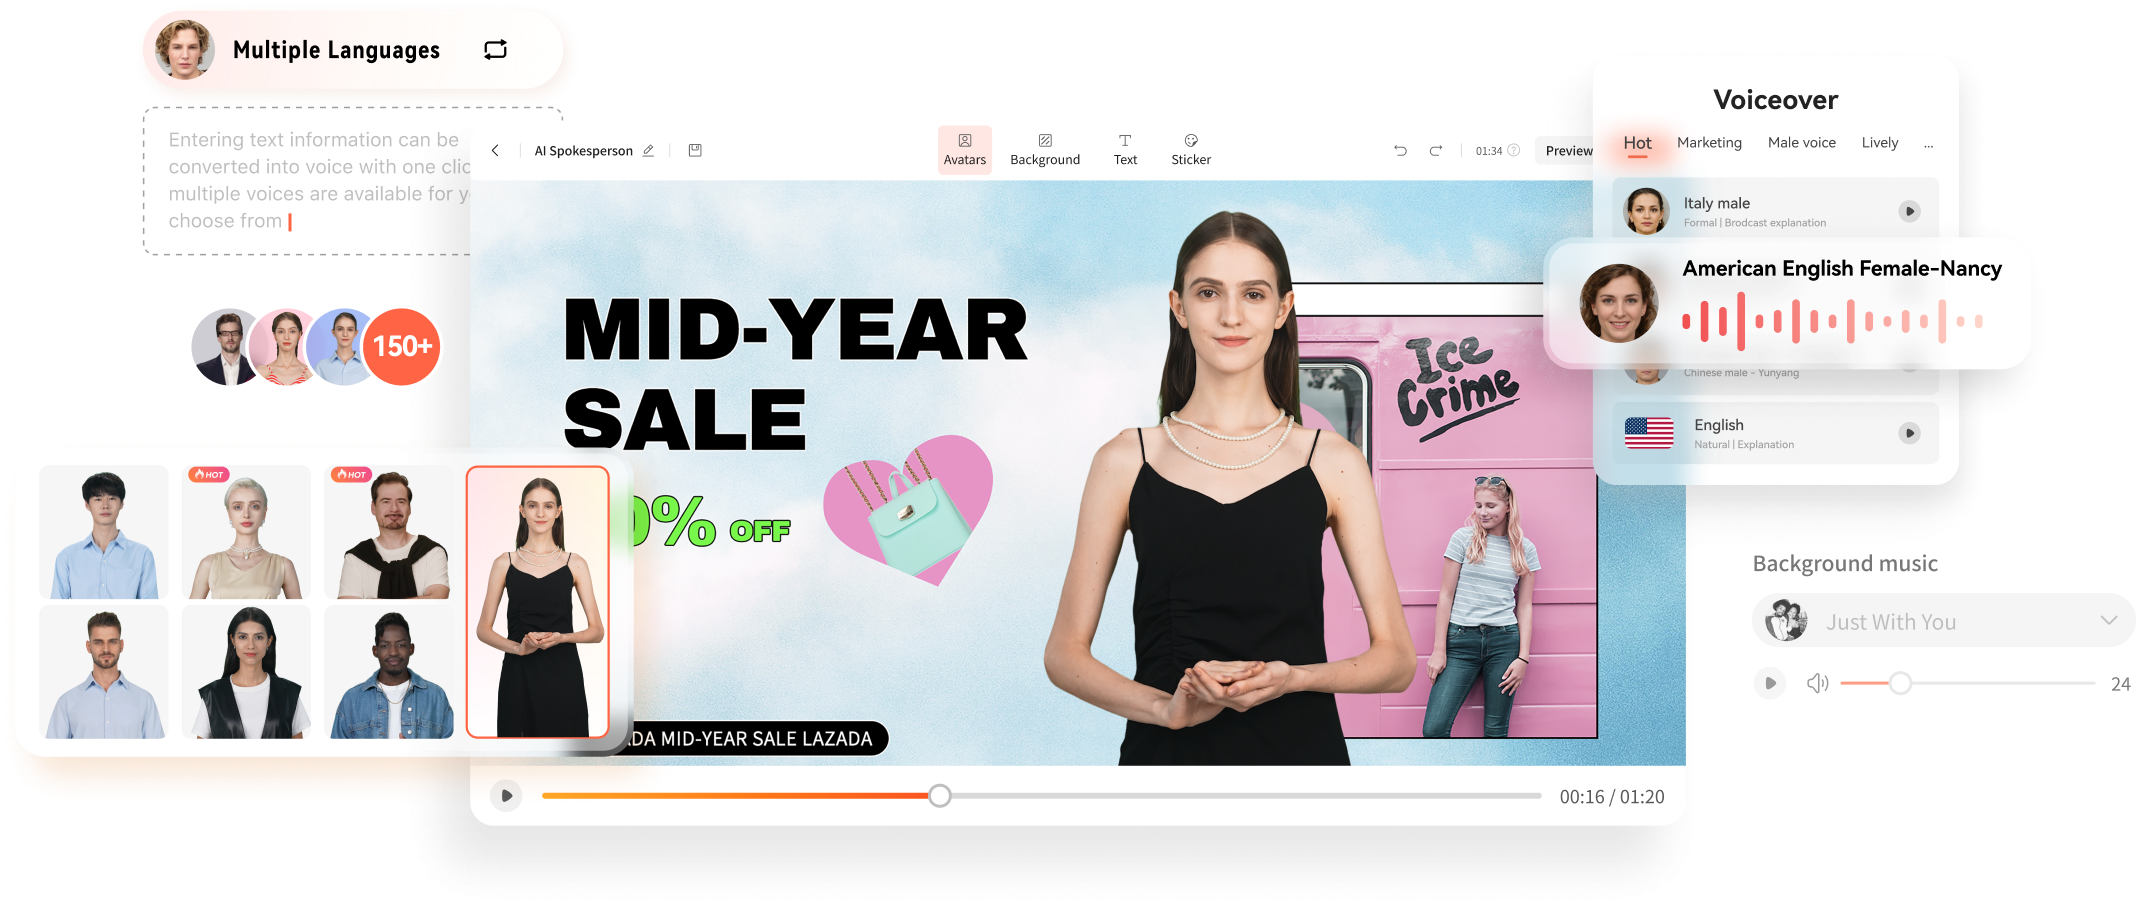
Get Started Online Free Download
- **24/7 content delivery.**Whether taking a break or focusing on other tasks, Virbo Live ensures your stream continues with AI-powered content, keeping viewers entertained and informed.
- **Virtual host template library.**No more scrambling for guest hosts or struggling with solo presentations. Virbo Live’s diverse library of 150+ customizable AI avatars can be your virtual co-host, presenter, or even a captivating character, interacting with viewers, answering questions, and conducting interviews.
- Content creation is made easy with templates. Forget starting from scratch. Virbo Live provides 180+ professionally designed video templates across various themes and styles, saving you time and effort. Plus, enjoy a library of royalty-free music to add the perfect soundtrack.
- **Engaging AI voices.**Bring your content to life with 120 AI voices, offering a variety of tones and accents, ensuring your message resonates with a global audience.
Integrating AI into Your Live Stream
Adding Virbo Live to your existing setup is simple and intuitive. Add Virbo as a live OBS window and use the YouTube stream key. Here’s a step-by-step guide:
- Step 1: Install Wondershare Virbo or access the web app.
Get Started Online Free Download
- Step 2: Click Create a Blank Livestream Room to customize your stream’s interface.

- Step 3: Choose from templates, backgrounds, AI avatars, and stickers to create a visually engaging environment.

- Step 4: Under Script Lines, write the script your AI host will deliver throughout the stream. Use AI Interaction to set responses for specific questions and Human interaction for actual responses from your end.

- Step 5: Once everything is set, click Start Livestream and connect it to your preferred platform through OBS. Paste your streaming key for seamless integration.
Use-Cases for Wondershare Virbo and Private YouTube Live Streaming
Virbo Live empowers you to explore new avenues in content creation. Imagine using it for:
- **E-commerce shopping.**Showcase products with AI hosts demonstrating their features and answering customer questions in real-time, even outside business hours.
- **Educational live tutorials.**Host interactive learning experiences with AI tutors delivering engaging lectures and responding to student inquiries.
- **Live Q&A sessions.**Let your AI host manage large-scale Q&A sessions and field questions and keep the conversation flowing smoothly.
With Wondershare Virbo Live, the possibilities are endless. Unleash your creativity, explore new ways to connect with your audience, and experience the power of 24/7 private YouTube streams. Remember, this is just a starting point – personalize your content, experiment with different features, and discover the unique potential Virbo Live brings to your streaming journey.
Conclusion
In today’s digital age, live streaming has become a powerful tool for connecting with audiences in real-time. YouTube live streaming offers a versatile platform to share your passions and connect with a select group of viewers. This article has guided you through setting up a private live stream on YouTube, ensuring your content reaches only your guests.
Remember, key considerations include enabling private streaming within YouTube Studio, inviting viewers via email or link sharing, and personalizing your content to create an engaging experience. If you want to take your live streams to the next level, consider Wondershare Virbo, a user-friendly tool designed to simplify private live streaming on YouTube with the help of AI.
In today’s digital age, live streaming has become a powerful tool for connecting with audiences in real-time. This method has especially been crucial for businesses looking to get into live selling or gamers wanting to stream their games. But say, for example, that you want to keep your stream private, accessible only to select viewers; how do you do that?
Here’s where private live streaming comes in. This option allows you to share your content with specific individuals, ensuring a more intimate and controlled environment. This guide will teach you how to set up private YouTube streams and give you special tips to let AI help you with your streams with Wondershare Virbo.
Part 1: What Do You Need To Get Started With YouTube Private Live Streaming?
Before diving into the exciting world of private live streaming, here is the equipment to ensure a smooth and seamless experience.
- YouTube account. First things first, you’ll need a YouTube account. This is your gateway to the platform and your key to unlock the world of live streaming.
- A capable PC. Next, prepare your PC and the command center for your private stream. While specific requirements vary depending on the complexity of your stream, here are some general recommendations:
- **Processor:**Intel Core i5 or equivalent (or newer)
- **RAM:**8GB or more
- **Graphics Card:**Dedicated GPU recommended for enhanced performance
- **Internet Connection:**A stable and fast internet connection with sufficient upload bandwidth (consider at least 3 Mbps for standard definition)
- A streaming tool. Now, you’ll need a streaming tool to capture your video and audio and send it live to YouTube. Wondershare Virbo is recommended, especially for live-selling purposes. Other options include OBS and similar stream apps for other purposes.
With these essential elements in place, you’re on your way to launching your private YouTube adventure.
Part 2: How To Start a Private YouTube Live Stream?
Ready to share your talents or ideas with a select audience? Dive into the steps to create a private live stream on YouTube by following the guide below. It’s pretty straightforward.
- Step 1: Access YouTube Studio.Head to your YouTube Studio page (studio.youtube.com) and log in using your Google account linked to your YouTube channel.
- Step 2: Prepare for live streaming**.** Click Create in the top left corner of the Studio dashboard, and select Go Live from the dropdown menu. Alternatively, click the camera icon next to your profile picture and choose Go Live.
- Step 3: Now, set your visibility. Before starting your broadcast, ensure your stream is private. Under the Visibility setting, click the dropdown menu and choose Private. This option restricts viewership to individuals you specifically invite.
- Step 4: There are two methods existing for inviting viewers:
- **Email Invitations:**Click on Share Privately and enter the email addresses of individuals you wish to grant access. You can also choose to notify them via email.
- **Link sharing:**Although not recommended for complete privacy, you can copy the stream link and share it directly with trusted individuals. Remember, anyone with the link can access the stream, even uninvited guests.
- Step 5: Once everything is set and your viewers are invited, click Go Live to launch your private YouTube stream. Remember, only invited individuals using their YouTube accounts can view your content.
Additional Tips for Private YouTube Live Streams
Here are some additional tips that you can follow before starting a private YouTube stream:
- Test streaming. Consider using a test stream before inviting viewers to ensure everything runs smoothly.
- Giving guidelines to your viewers. Encourage guests to use their YouTube accounts for optimal viewing experience and security. Further, you can add house rules, especially for more intimate streams or live selling/auctions.
- **Exploring advanced privacy settings.**Explore advanced privacy settings within YouTube Studio for further control over viewer permissions.
- Using AI. Tools like Wondershare Virbo can help integrate AI into your private YouTube streams. This way, you won’t always have to glue your eyes on your stream. Discover more about this feature in the following section.
By following these steps and keeping privacy in mind, you can effectively host engaging live streams on YouTube, connecting with your chosen audience in a controlled and intimate setting. Remember to personalize your content, interact with your viewers, and enjoy the unique experience of private live streaming.
Part 3: Breaking the Limitations of Live Streams With Wondershare Virbo
Live streaming constantly evolves, offering creators new ways to connect with audiences. While traditional live streams require your physical presence, imagine having an engaging and interactive stream running 24/7, even when you’re not there. This is great, especially for private YouTube streams, where the need to engage the select viewers becomes more apparent.
Enter Wondershare Virbo , a revolutionary tool that leverages AI to create realistic and captivating live streams around the clock.
Introducing Wondershare Virbo
Gone are the days of relying solely on manual effort to keep your audience engaged. Virbo Live transcends these limitations, offering:
Get Started Online Free Download
- **24/7 content delivery.**Whether taking a break or focusing on other tasks, Virbo Live ensures your stream continues with AI-powered content, keeping viewers entertained and informed.
- **Virtual host template library.**No more scrambling for guest hosts or struggling with solo presentations. Virbo Live’s diverse library of 150+ customizable AI avatars can be your virtual co-host, presenter, or even a captivating character, interacting with viewers, answering questions, and conducting interviews.
- Content creation is made easy with templates. Forget starting from scratch. Virbo Live provides 180+ professionally designed video templates across various themes and styles, saving you time and effort. Plus, enjoy a library of royalty-free music to add the perfect soundtrack.
- **Engaging AI voices.**Bring your content to life with 120 AI voices, offering a variety of tones and accents, ensuring your message resonates with a global audience.
Integrating AI into Your Live Stream
Adding Virbo Live to your existing setup is simple and intuitive. Add Virbo as a live OBS window and use the YouTube stream key. Here’s a step-by-step guide:
- Step 1: Install Wondershare Virbo or access the web app.
Get Started Online Free Download
- Step 2: Click Create a Blank Livestream Room to customize your stream’s interface.
- Step 3: Choose from templates, backgrounds, AI avatars, and stickers to create a visually engaging environment.
- Step 4: Under Script Lines, write the script your AI host will deliver throughout the stream. Use AI Interaction to set responses for specific questions and Human interaction for actual responses from your end.
- Step 5: Once everything is set, click Start Livestream and connect it to your preferred platform through OBS. Paste your streaming key for seamless integration.
Use-Cases for Wondershare Virbo and Private YouTube Live Streaming
Virbo Live empowers you to explore new avenues in content creation. Imagine using it for:
- **E-commerce shopping.**Showcase products with AI hosts demonstrating their features and answering customer questions in real-time, even outside business hours.
- **Educational live tutorials.**Host interactive learning experiences with AI tutors delivering engaging lectures and responding to student inquiries.
- **Live Q&A sessions.**Let your AI host manage large-scale Q&A sessions and field questions and keep the conversation flowing smoothly.
With Wondershare Virbo Live, the possibilities are endless. Unleash your creativity, explore new ways to connect with your audience, and experience the power of 24/7 private YouTube streams. Remember, this is just a starting point – personalize your content, experiment with different features, and discover the unique potential Virbo Live brings to your streaming journey.
Conclusion
In today’s digital age, live streaming has become a powerful tool for connecting with audiences in real-time. YouTube live streaming offers a versatile platform to share your passions and connect with a select group of viewers. This article has guided you through setting up a private live stream on YouTube, ensuring your content reaches only your guests.
Remember, key considerations include enabling private streaming within YouTube Studio, inviting viewers via email or link sharing, and personalizing your content to create an engaging experience. If you want to take your live streams to the next level, consider Wondershare Virbo, a user-friendly tool designed to simplify private live streaming on YouTube with the help of AI.
Also read:
- [Updated] Cutthroat Countdown Best Zombies In Gaming Unveiled
- 2024 Approved Essential Tips for Maximizing Your Facebook Story Impact
- Download | Corsair iCUE for Windows 11/10
- Effortlessly Elevate Your AI Experience: Free, Powerful and Smart with GPT-4 & Copilot
- How to Transfer Apps from OnePlus Ace 2V to Another | Dr.fone
- MP4 Creation From RAM Files at No Cost - Easy Guide by Movavi’s Web Tool
- New 2024 Approved Live Commerce Success Stories Lessons Learned & Predictions for the Future
- New 2024 Approved The Boxing Streaming Websites You Cant Afford To Miss
- New Free TV Streaming 9 Sites You Need To Know for 2024
- New How To Watch NBA Live Stream Free Anywhere
- New User Choice Top Free Streaming Sites for Sports for 2024
- Official Canon MX410 Printer Driver Downloads for Windows Machines
- Top List Best Livestream Shopping Apps Of for 2024
- Unlocking Apple iPhone 13 Pro Max Lock Screen 3 Foolproof Methods that Actually Work | Dr.fone
- Update Your HP Scanjet Software for Windows 10, 8 & 7 - Get the Latest Version Here
- Updated 2024 Approved The Ultimate List of Live Chat Apps for Shopify
- Updated In 2024, How To Reach More Users by Using Instagram Live Shopping
- Title: Updated How To Stream Your Favorite Games Online
- Author: Jeff
- Created at : 2024-09-24 17:04:33
- Updated at : 2024-09-30 21:19:31
- Link: https://ai-live-streaming.techidaily.com/updated-how-to-stream-your-favorite-games-online/
- License: This work is licensed under CC BY-NC-SA 4.0.