
Updated 2024 Approved Unveiling the Secrets of Shopee Livestream Selling System
Unveiling the Secrets of Shopee Livestream Selling System
Live videos are becoming crucial for promoting and selling stuff in today’s online market. This trend is especially prevalent in Southeast Asian countries like China, Singapore, and Malaysia. People in these regions utilize live-streaming platforms and tools to promote their products. This guide explores one of these platforms called **Shopee Livestream.
We will explain how Shopee’s live videos work to help you create content that will interest people. Keep reading to learn how to be a Shopee live seller to sell things better with this platform and other live-streaming tools.

Part 1. A Review on Shopee Livestream: Learning the Basics
Shopee offers a platform for sellers to host interactive video streaming sessions within its app. This feature lets sellers connect with their audience in real-time to build a stronger bond. It is functional in the Philippines, Indonesia, Thailand, and other Southeast Asian countries. With millions of active users on this forum, sellers have the opportunity to boost sales.
Through this platform, users can get their orders delivered to their door without paying any extra shipping fees. This shopping platform allows you to talk directly to sellers while you shop. You can enjoy fun playing games and free stuff for an exciting shopping experience. Also, sellers and buyers get safe payment choices to ensure reliability.

Live Shopping Features Available on Shopee
With Shopee’s live-streaming service, there are many cool features to improve online shopping. Let’s explore the features of live selling in Shopee to see how this platform works:
- Livestream call lets the host answer viewer questions and stream with others using audio or video.
- It has business insights that show live stream data to improve your live selling based on clicks and orders.
- Different prize popups throughout the stream encourage viewers to follow your shop.
- The orange bag icon lets the host show products during the stream.
- Hosts can open a sharing panel to share the live stream on Instagram, WhatsApp, or Facebook.
It’s essential to note that you also need to use the smartphone app to operate the Shopee live show fully. This way, you can get a seamless and optimized experience across Shopee. It makes it easy to watch live streams and buy/sell things whenever you want.

Part 2. Some Basic Guidelines To Perform Live Shopping in Shopee
When starting live shopping at Shopee, it is essential to follow the rules to have a good time. This means you have to do what Shopee says when you’re selling things or buying them on the platform. Let’s explore these guidelines to ensure a better shopping experience:
- You can only add up to 500 products to the orange bag during one livestream.
- Sellers can’t use phrases like “Add to Orange Bag” or “Send PM” to share links. It is prohibited during the stream or on social media outside the Shopee app.
- If you have multiple shops, each shop needs its livestream. Also, ensure the items you promote fit within the live stream frame.
- Do not upload content with sensitive information, harassment, or cyberbullying.
- Users can’t use music they don’t own the rights to during their live shopping. Instead, you should use music that is free for anyone to use.
- You can rearrange the products and edit details like price discounts before you go live.
Part 3. The Simple Guide to Using the Live Shopping Service of Shopee
With the rise of online shopping, Shopee streamlines the process for its users. Users can perform live selling in Shopeethrough mobile apps and desktops. The friendly interface allows you to showcase things in real-time. Let’s discuss a step-by-step guide to elevate your online shopping experience.
Steps of Live Shopping in the Shopee Mobile App
Before starting the process, download the Shopee mobile app on your smartphone. Afterward, pass the eligibility test for being the seller. Next, you need to prepare the required equipment to go for a livestream. To start your Shopee Live, you can follow these steps.
- Step 1. After launching the app on your phone, head to the “Me” tab. Within this tab, press the “Live Streaming” option and then tap on the “Create Stream” feature.

- Step 2. In the upcoming screen, tap “Add a Title” to type in the label. You can also add a description as desired. Next, click the “Add Cover” button below the shopping bag to upload an image of 500x500. Then, hit “Add Related Products” to feature the desired products during a live session.

- Step 3. Once you’ve made changes, press the “Next” button at the bottom. This action will give you a 3-second preview of your video. Proceed by clicking on “Go Live” to stream your video. Now, all your followers get a notification to join the session.

Steps of Live Shopping on Shopee Live Desktop
In addition to the mobile app, you can also utilize Shopee live commerce on your Desktop. In the following section, you’ll find detailed instructions for live streaming on PCs:
- Step 1. First, launch your livestream software, such as OBS, on your desktop. Then, make the required changes for live streaming in the tool settings.
- Step 2. Then, head to the Shopee Live website and sign in with your relevant country page. To create streaming, provide all the details, including the cover photo and title. Now, hit the “Add Related Products” button to insert your desired ones in a live stream. Finally, click the “Next” button to proceed with this livestream generation.

- Step 3. Upon reaching a new window, copy the generated link and Stream key through the app and paste it into OBS. This facilitates the transition of streaming between the software and the Shopee website. After adjusting the settings, select the “Go Live” button to start showcasing your products.

Part 4. Make Livestreaming Selling Efficient With Wondershare Virbo Live
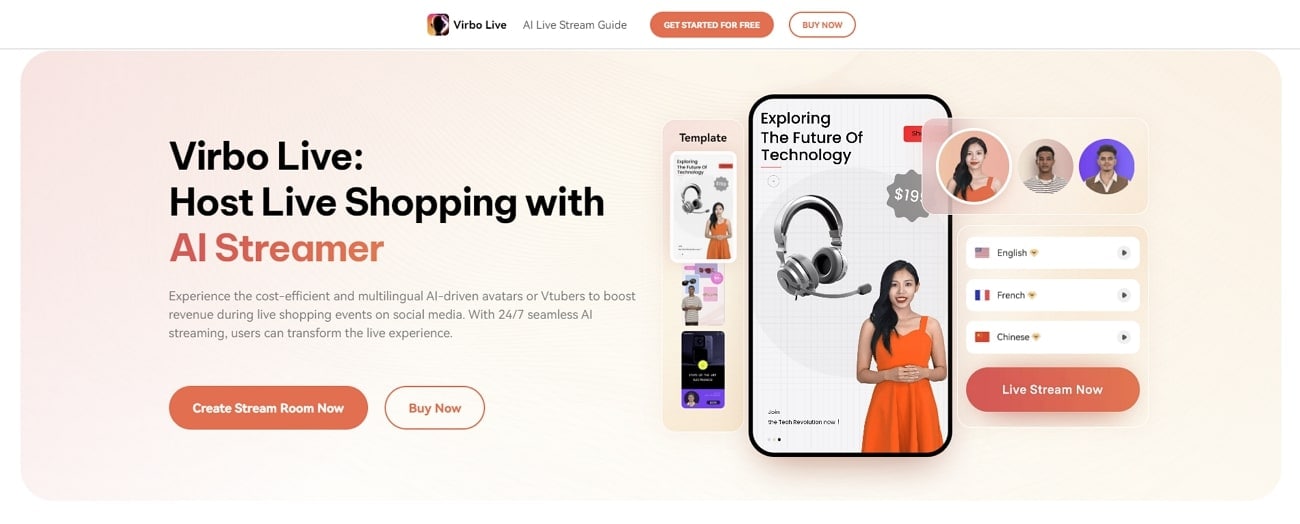
Like Shopee’s live selling tool, many other platforms offer live shopping. However, not all of them provide the comprehensive features needed to set up livestream events across multiple channels. This is where Wondershare Virbo Live stands out. It offers an all-in-one solution to manage a livestream selling system online with exclusive tools. Users can benefit from its ability to carry out continuous 24/7 broadcasting without interruptions.
Its AI-driven avatars or VTubers reduce the dependence on large human teams. You can customize your own AI avatar in different outfits and poses to build a unique identity. The customizable feature of the Q&A repository responds to customer’s queries quickly to engage them. Its compatibility with social platforms makes it the perfect tool to create videos to sell across any platform.
Features of Wondershare Virbo Live You Should Consider
- AI translation allows users to talk to viewers in their preferred language without a language barrier.
- You can also utilize AI for script generation to create interactive live streams.
- Users can simply write text or speak during the live stream to stimulate the AI streamer to respond accordingly.
Get Started Online Free Download
Steps of Creating a Stream Room via Wondershare Virbo Live
If you want to optimize the Shopee live stream, Wondershare Virbo Live can help you with its diverse features. Here are the simple steps to follow for boosting sales through AI-generated avatars:
- Step 1. Get the Tool Online To Create a Blank Livestream Room
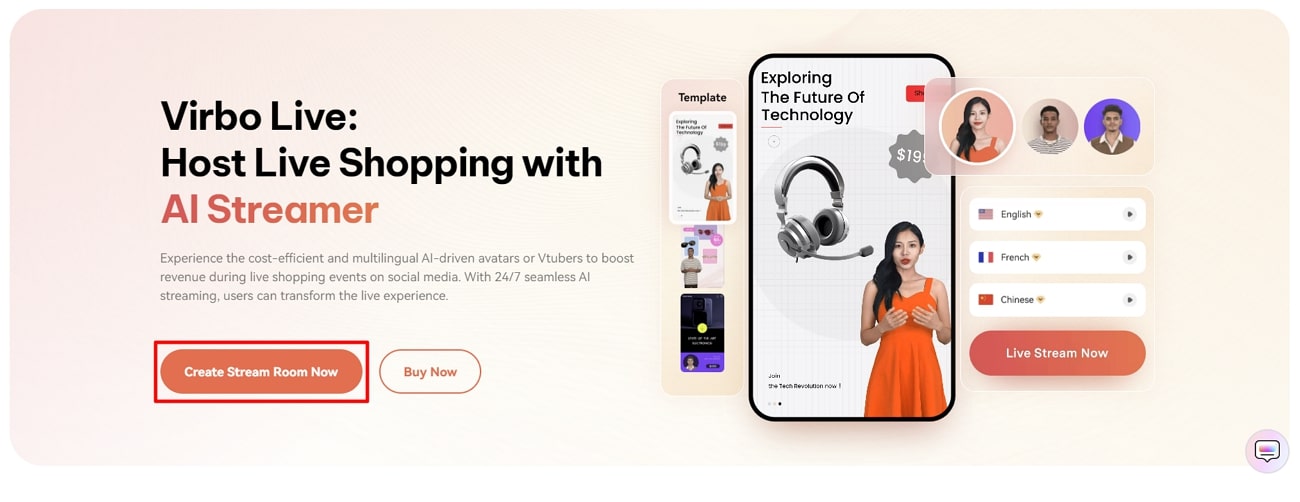
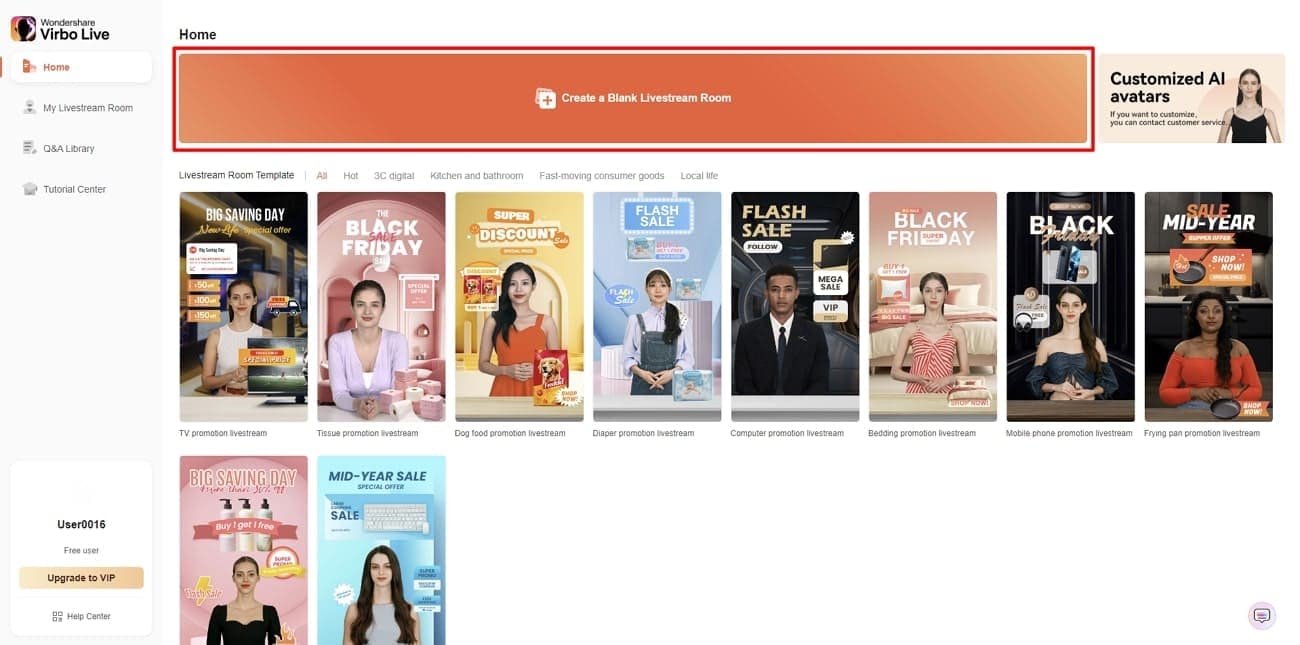
First, access the Wondershare Virbo Live website online to enter the primary interface. Now, hit the “Create Stream Room Now” button from the left side to enter a new window. Here, head to the top and press the “Create a Blank Livestream Room” button.

Get Started Online Free Download
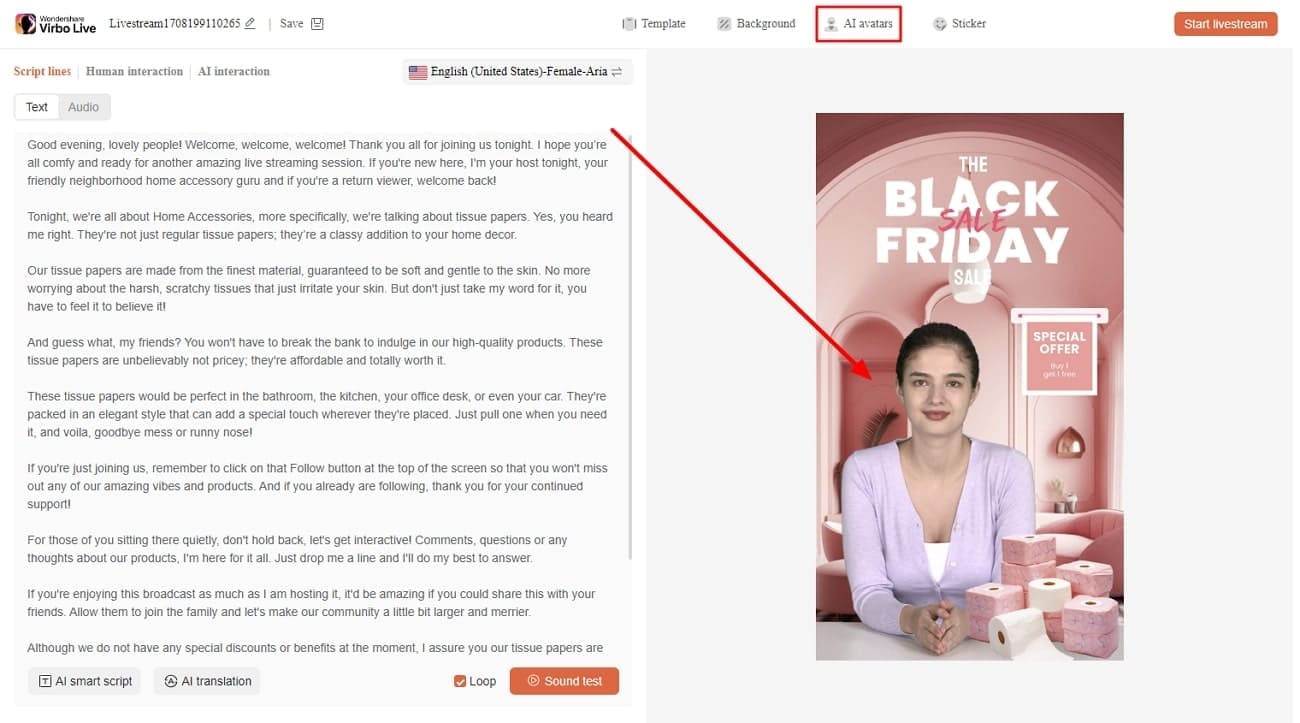
- Step 2. Pick and Personalize Your Preferred AI Avatars and AI Backgrounds
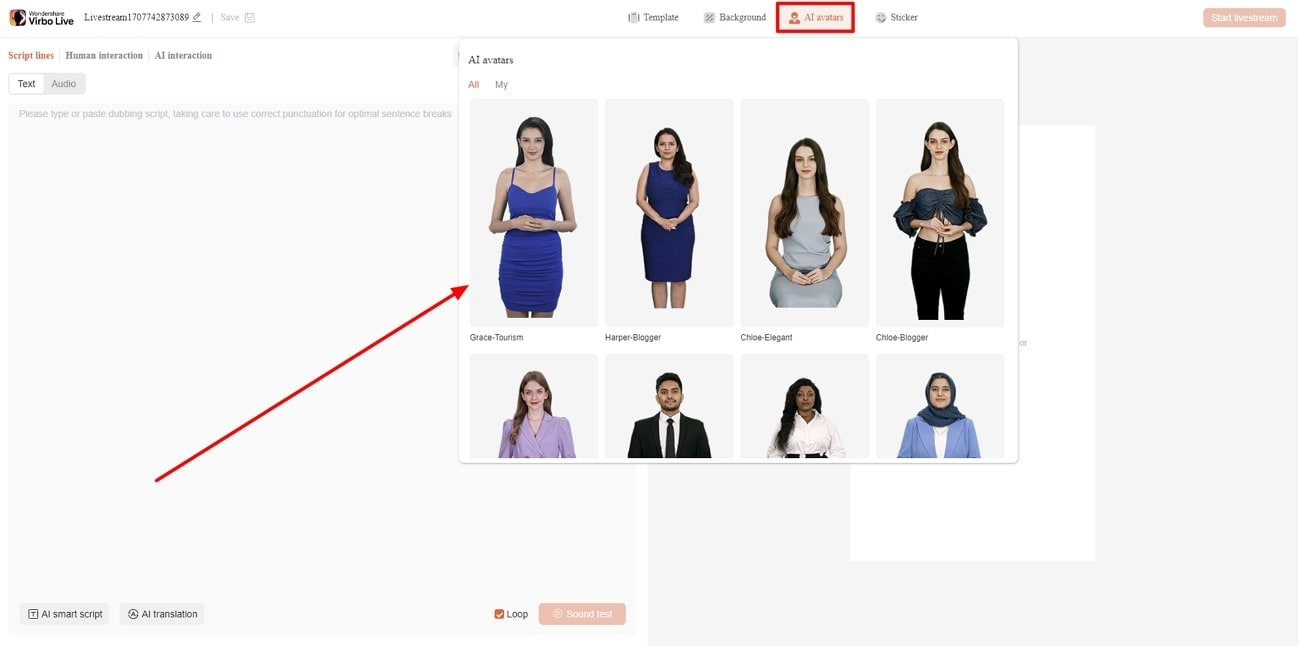
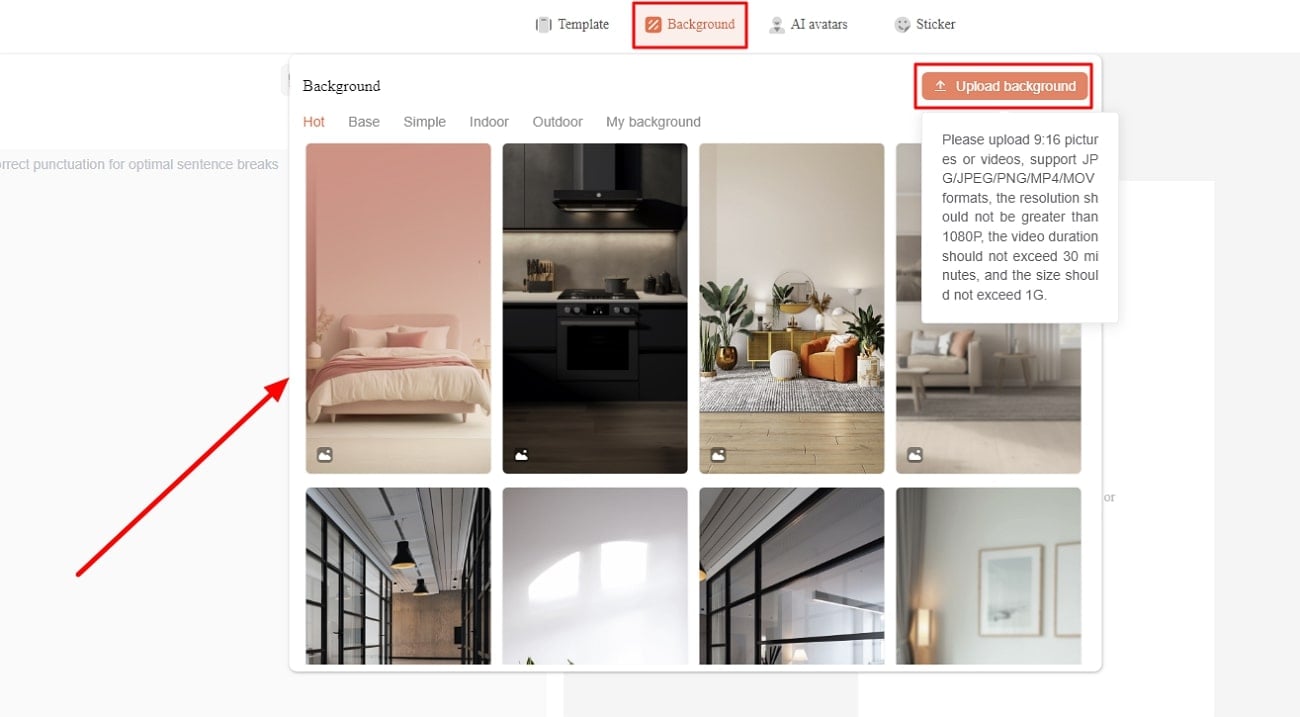
In the next step, you’ll be directed to a new window. Click on the “AI avatars” tab, which opens a dialogue box. You’ll find presets of avatars to choose from according to your needs. Afterward, switch the tab by tapping “Background” to modify the product’s outlook. Also, add “Stickers” according to the promotion you are offering against your product.

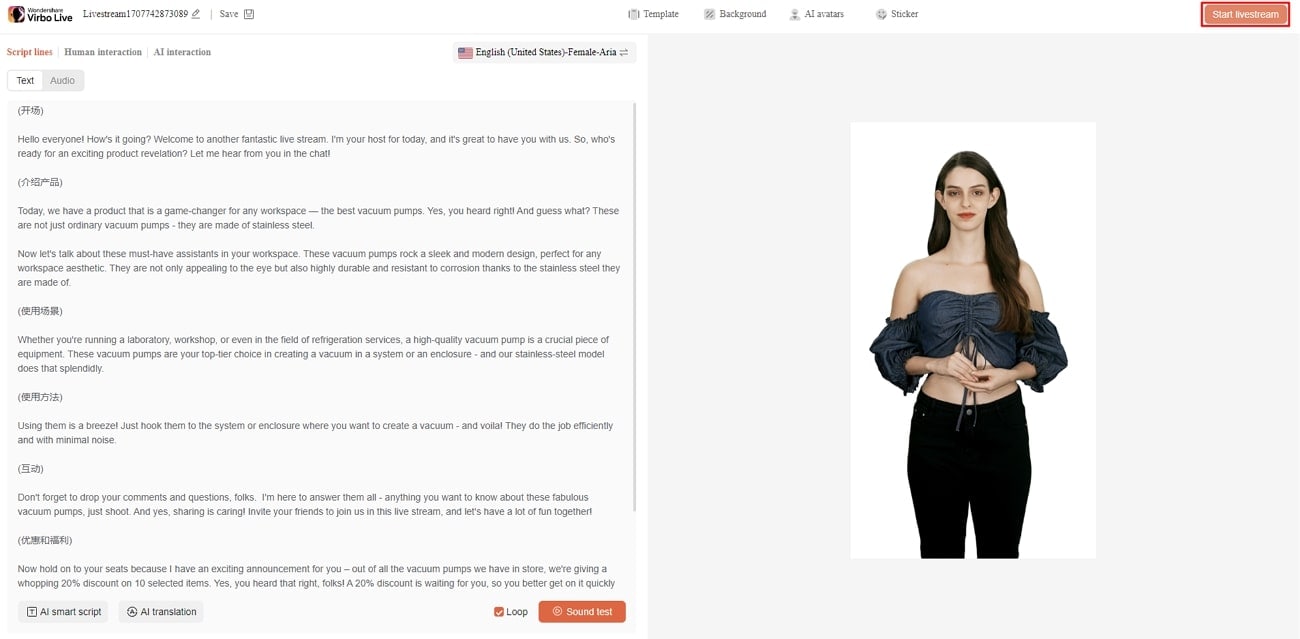
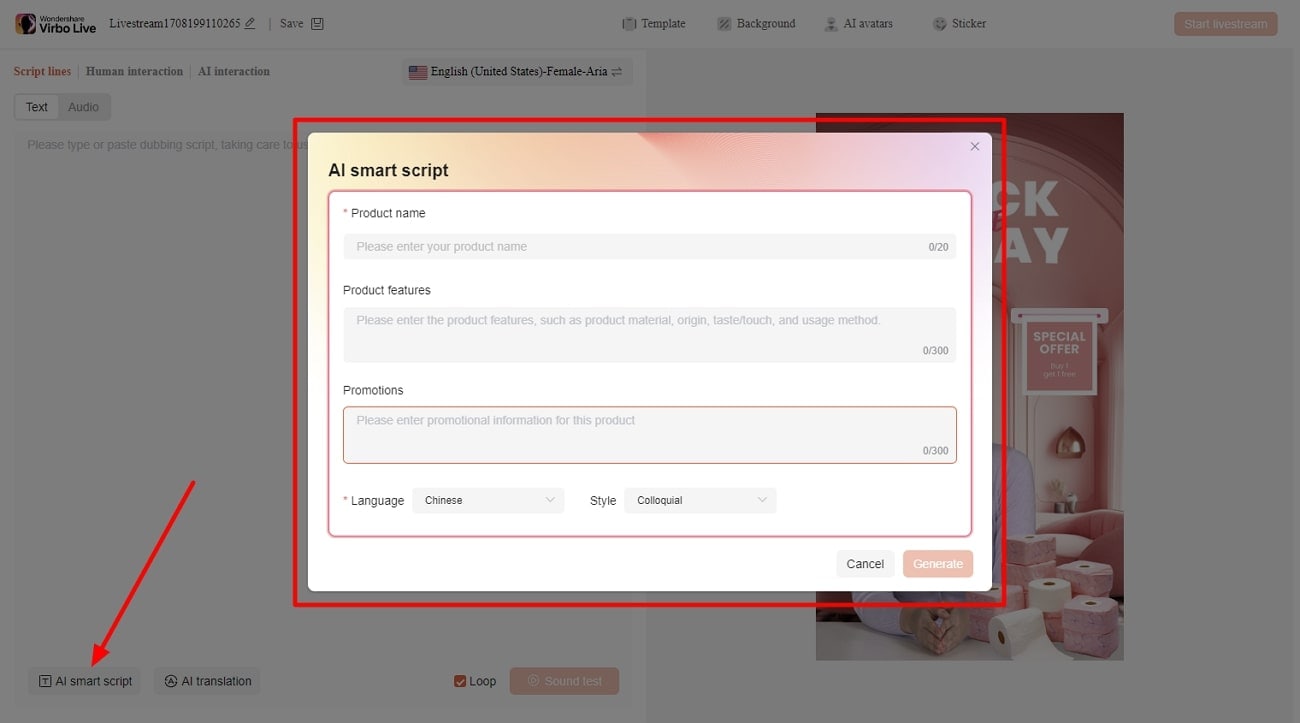
- Step 3. Generate Scripts for Your Livestreaming Session
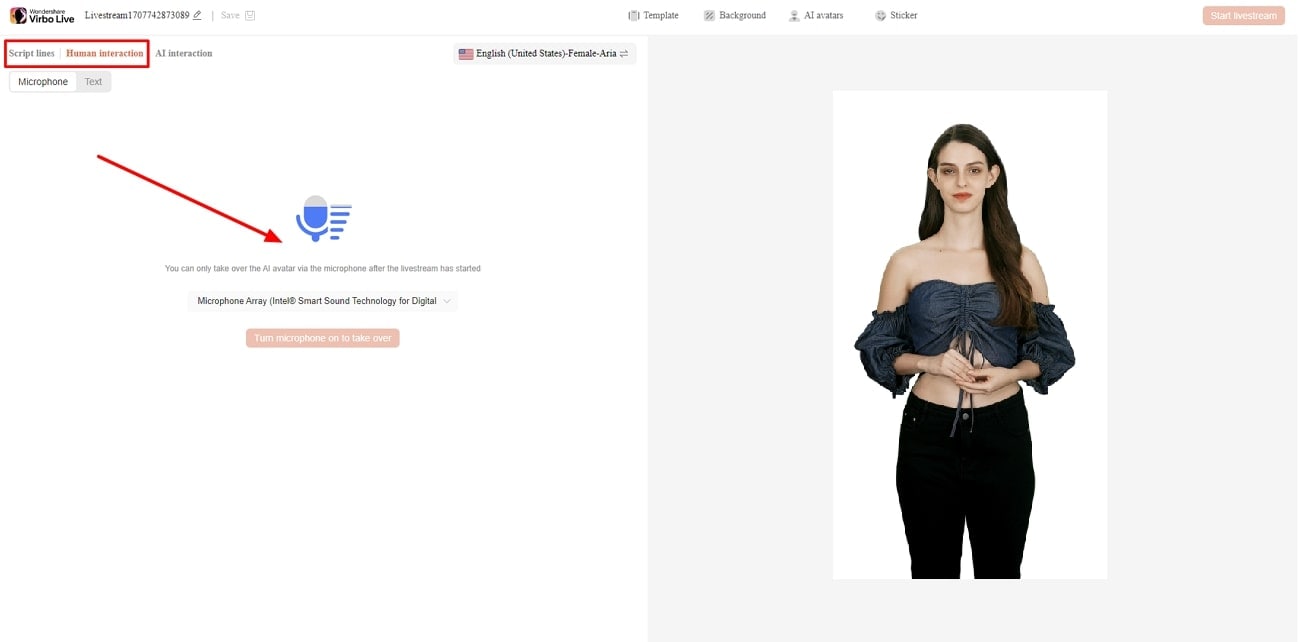
After picking the avatar and background, locate the text box on the left side of the window. Now, type in the preferred text or utilize AI-generated scripts. Conversely, you can also use the services of “Human Interaction,” where you only have to add a microphone for live interaction in the “Microphone” section.

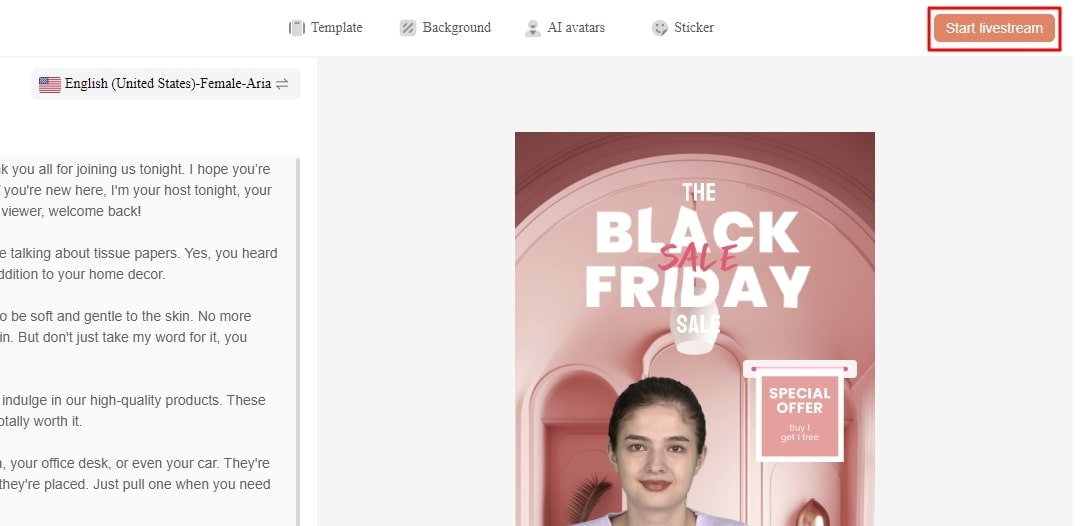
- Step 4. Initiate Live Streaming To Display Your Products on Any Platform
Once you’ve made your desired changes, hit the “Start livestream” button from the top right. By doing so, you can livestream on your preferred platform, such as Shopee.

Conclusion
All in all, Shopee’s live selling is changing how businesses reach customers. Throughout the article, we provide you with a genuine review of Shopee and how it operates. However, to streamline your livestreams, you need an AI tool like Wondershare Virbo Live. It is perfect for businesses looking to boost their sales through engaging live streams.
Live videos are becoming crucial for promoting and selling stuff in today’s online market. This trend is especially prevalent in Southeast Asian countries like China, Singapore, and Malaysia. People in these regions utilize live-streaming platforms and tools to promote their products. This guide explores one of these platforms called **Shopee Livestream.
We will explain how Shopee’s live videos work to help you create content that will interest people. Keep reading to learn how to be a Shopee live seller to sell things better with this platform and other live-streaming tools.
Part 1. A Review on Shopee Livestream: Learning the Basics
Shopee offers a platform for sellers to host interactive video streaming sessions within its app. This feature lets sellers connect with their audience in real-time to build a stronger bond. It is functional in the Philippines, Indonesia, Thailand, and other Southeast Asian countries. With millions of active users on this forum, sellers have the opportunity to boost sales.
Through this platform, users can get their orders delivered to their door without paying any extra shipping fees. This shopping platform allows you to talk directly to sellers while you shop. You can enjoy fun playing games and free stuff for an exciting shopping experience. Also, sellers and buyers get safe payment choices to ensure reliability.
Live Shopping Features Available on Shopee
With Shopee’s live-streaming service, there are many cool features to improve online shopping. Let’s explore the features of live selling in Shopee to see how this platform works:
- Livestream call lets the host answer viewer questions and stream with others using audio or video.
- It has business insights that show live stream data to improve your live selling based on clicks and orders.
- Different prize popups throughout the stream encourage viewers to follow your shop.
- The orange bag icon lets the host show products during the stream.
- Hosts can open a sharing panel to share the live stream on Instagram, WhatsApp, or Facebook.
It’s essential to note that you also need to use the smartphone app to operate the Shopee live show fully. This way, you can get a seamless and optimized experience across Shopee. It makes it easy to watch live streams and buy/sell things whenever you want.
Part 2. Some Basic Guidelines To Perform Live Shopping in Shopee
When starting live shopping at Shopee, it is essential to follow the rules to have a good time. This means you have to do what Shopee says when you’re selling things or buying them on the platform. Let’s explore these guidelines to ensure a better shopping experience:
- You can only add up to 500 products to the orange bag during one livestream.
- Sellers can’t use phrases like “Add to Orange Bag” or “Send PM” to share links. It is prohibited during the stream or on social media outside the Shopee app.
- If you have multiple shops, each shop needs its livestream. Also, ensure the items you promote fit within the live stream frame.
- Do not upload content with sensitive information, harassment, or cyberbullying.
- Users can’t use music they don’t own the rights to during their live shopping. Instead, you should use music that is free for anyone to use.
- You can rearrange the products and edit details like price discounts before you go live.
Part 3. The Simple Guide to Using the Live Shopping Service of Shopee
With the rise of online shopping, Shopee streamlines the process for its users. Users can perform live selling in Shopeethrough mobile apps and desktops. The friendly interface allows you to showcase things in real-time. Let’s discuss a step-by-step guide to elevate your online shopping experience.
Steps of Live Shopping in the Shopee Mobile App
Before starting the process, download the Shopee mobile app on your smartphone. Afterward, pass the eligibility test for being the seller. Next, you need to prepare the required equipment to go for a livestream. To start your Shopee Live, you can follow these steps.
- Step 1. After launching the app on your phone, head to the “Me” tab. Within this tab, press the “Live Streaming” option and then tap on the “Create Stream” feature.
- Step 2. In the upcoming screen, tap “Add a Title” to type in the label. You can also add a description as desired. Next, click the “Add Cover” button below the shopping bag to upload an image of 500x500. Then, hit “Add Related Products” to feature the desired products during a live session.
- Step 3. Once you’ve made changes, press the “Next” button at the bottom. This action will give you a 3-second preview of your video. Proceed by clicking on “Go Live” to stream your video. Now, all your followers get a notification to join the session.
Steps of Live Shopping on Shopee Live Desktop
In addition to the mobile app, you can also utilize Shopee live commerce on your Desktop. In the following section, you’ll find detailed instructions for live streaming on PCs:
- Step 1. First, launch your livestream software, such as OBS, on your desktop. Then, make the required changes for live streaming in the tool settings.
- Step 2. Then, head to the Shopee Live website and sign in with your relevant country page. To create streaming, provide all the details, including the cover photo and title. Now, hit the “Add Related Products” button to insert your desired ones in a live stream. Finally, click the “Next” button to proceed with this livestream generation.
- Step 3. Upon reaching a new window, copy the generated link and Stream key through the app and paste it into OBS. This facilitates the transition of streaming between the software and the Shopee website. After adjusting the settings, select the “Go Live” button to start showcasing your products.
Part 4. Make Livestreaming Selling Efficient With Wondershare Virbo Live
Like Shopee’s live selling tool, many other platforms offer live shopping. However, not all of them provide the comprehensive features needed to set up livestream events across multiple channels. This is where Wondershare Virbo Live stands out. It offers an all-in-one solution to manage a livestream selling system online with exclusive tools. Users can benefit from its ability to carry out continuous 24/7 broadcasting without interruptions.
Its AI-driven avatars or VTubers reduce the dependence on large human teams. You can customize your own AI avatar in different outfits and poses to build a unique identity. The customizable feature of the Q&A repository responds to customer’s queries quickly to engage them. Its compatibility with social platforms makes it the perfect tool to create videos to sell across any platform.
Features of Wondershare Virbo Live You Should Consider
- AI translation allows users to talk to viewers in their preferred language without a language barrier.
- You can also utilize AI for script generation to create interactive live streams.
- Users can simply write text or speak during the live stream to stimulate the AI streamer to respond accordingly.
Get Started Online Free Download
Steps of Creating a Stream Room via Wondershare Virbo Live
If you want to optimize the Shopee live stream, Wondershare Virbo Live can help you with its diverse features. Here are the simple steps to follow for boosting sales through AI-generated avatars:
- Step 1. Get the Tool Online To Create a Blank Livestream Room
First, access the Wondershare Virbo Live website online to enter the primary interface. Now, hit the “Create Stream Room Now” button from the left side to enter a new window. Here, head to the top and press the “Create a Blank Livestream Room” button.
Get Started Online Free Download
- Step 2. Pick and Personalize Your Preferred AI Avatars and AI Backgrounds
In the next step, you’ll be directed to a new window. Click on the “AI avatars” tab, which opens a dialogue box. You’ll find presets of avatars to choose from according to your needs. Afterward, switch the tab by tapping “Background” to modify the product’s outlook. Also, add “Stickers” according to the promotion you are offering against your product.
- Step 3. Generate Scripts for Your Livestreaming Session
After picking the avatar and background, locate the text box on the left side of the window. Now, type in the preferred text or utilize AI-generated scripts. Conversely, you can also use the services of “Human Interaction,” where you only have to add a microphone for live interaction in the “Microphone” section.
- Step 4. Initiate Live Streaming To Display Your Products on Any Platform
Once you’ve made your desired changes, hit the “Start livestream” button from the top right. By doing so, you can livestream on your preferred platform, such as Shopee.
Conclusion
All in all, Shopee’s live selling is changing how businesses reach customers. Throughout the article, we provide you with a genuine review of Shopee and how it operates. However, to streamline your livestreams, you need an AI tool like Wondershare Virbo Live. It is perfect for businesses looking to boost their sales through engaging live streams.
Must-Use Livestream Shopping Apps for Seamless Online System
Today, we mostly shop online to avoid the hassle of shopping in physical stores. Instead of just clicking on items to buy, you can watch live videos where people show off products. Moreover, live shopping is getting popular because it feels more real and interactive.
However, there is still room for improvement for live shopping apps to make shopping better. This article explores the best live shopping appsto innovate your shopping experience.

Part 1. Top 10 Live Streaming Shopping Platforms To Consider in 2024
People look forward for live-streaming platforms that are easy to use and have many different things to buy. In 2024, some platforms have become popular because they offer features such as live videos. Since this is the highlight of this article, the following are the top 10 livestream shopping apps that are getting attention from shoppers:
1. Wondershare Virbo Live
Wondershare Virbo Live is an innovative platform that simplifies the process of live selling for users. It offers a comprehensive solution in a single place. From creating live shopping rooms to seamless broadcasts, everything is managed within this platform. Plus, AI integration enhances content creation and engagement during live streams. With a cloud-based operation, Virbo Live operates directly without downloading.
You can utilize the platform’s AI avatars or VTubers to host live shopping events. These avatars mimic natural movements and can be customized according to customer needs. They reflect various ethnicities, poses, and attire by ensuring relatability in every interaction.
Get Started Online Free Download
Key Features
- Wondershare Virbo Live ensures a diverse global audience can connect with the content. It supports multiple languages and accents, including English, German, and Japanese.
- This best live shopping appstreamlines content creation with AI-driven script generation. Users can generate engaging shopping scripts for live streams to save time.
- It enables users to enhance audience interaction by setting up automatic responses. By creating a customized Q&A database, users can connect with their audience more smartly.
Steps of Creating a Stream Room in Virbo Live
The live streaming selling app uses AI technology and generates customized avatars. This helps sellers connect better with their viewers and sell more products. Let’s learn more on how to make your stream room and start selling with Wondershare Virbo Live:
Step 1. Access the Online Tool for Creating Your Stream Room
Start by opening your preferred web browser and lead to the official Virbo Live website. On the main interface, head to the left side of the screen and click on the “Create Stream Room Now” button.
Get Started Online Free Download
Step 2. Begin Customizing Your Livestream Room
After entering the editing window of the tool, you’ll be able to personalize your AI avatars for live selling content. Proceed towards the “Create a Blank Livestream Room” button on the upper part of the window.
Step 3. Choose Your Favorite AI Avatar
In the next window, select the “AI avatars” tab at the top right corner. This opens a dialog box displaying various avatars in different poses and outfits. From there, opt for the avatar that best suits your needs. You can preview your selection on the right side of the window.
Step 4. Customize the Background According to Video Requirements
Now, click on the “Background” tab and choose the background that you want to use for showcasing your products. Select the category that suits your needs and proceed with the live-streaming setup. You can also use the “Upload background” button for adding media under defined requirements from Virbo Live.
Step 5. Include Text or Add Microphone for Live Interaction
Navigate to the left side of the screen for adding the script or finalize the nature of the content that will be spoken across the live video. Use the “Script lines” option for adding or generating a script for the live video. Conversely, you can access the “Human interaction” section to select the microphone for live interaction during streaming.
Step 6. Start Broadcasting Your Products Live
After finalizing all your selections, it is time to start live streaming. Simply hit the “Start Livestream” button from the top right corner of the screen to watch as your input comes to life in real time.
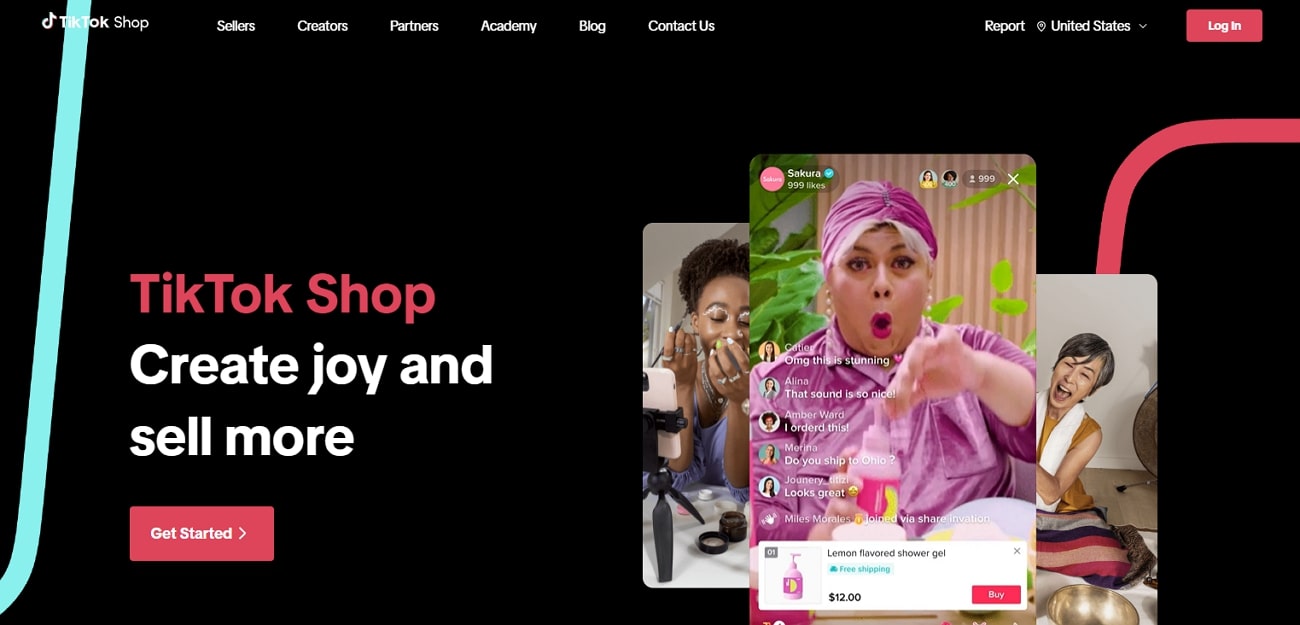
2. TikTok Shop
TikTok Shop offers a platform for seamless shopping experiences within the TikTok app. It integrates entertainment with commerce and allows brands to connect with audiences. With features like scalable ecosystems, TikTok Shop ensures a convenient shopping experience. Additionally, it offers integration with major platforms, including YouTube, Instagram, and Facebook.
Key Features
- Sellers can promote, sell, and engage with their audience in real time through live streaming.
- It has an Affiliate Program that allows shoppers to interact with thousands of content creators.
- This platform has an integrated in-app checkout to help in buyers’ journey. It streamlines the process by allowing users to discover and purchase items within the same platform.
3. Bambuser
Bambuser stands out due to its ability to increase engagement with social video commerce. It provides an immersive shopping experience that keeps customers coming back for more. Brands can welcome infinite customers into highly engaging shoppable videos on their native site. Also, Bambuser can be integrated into various platforms, including websites, social media channels, and mobile apps.
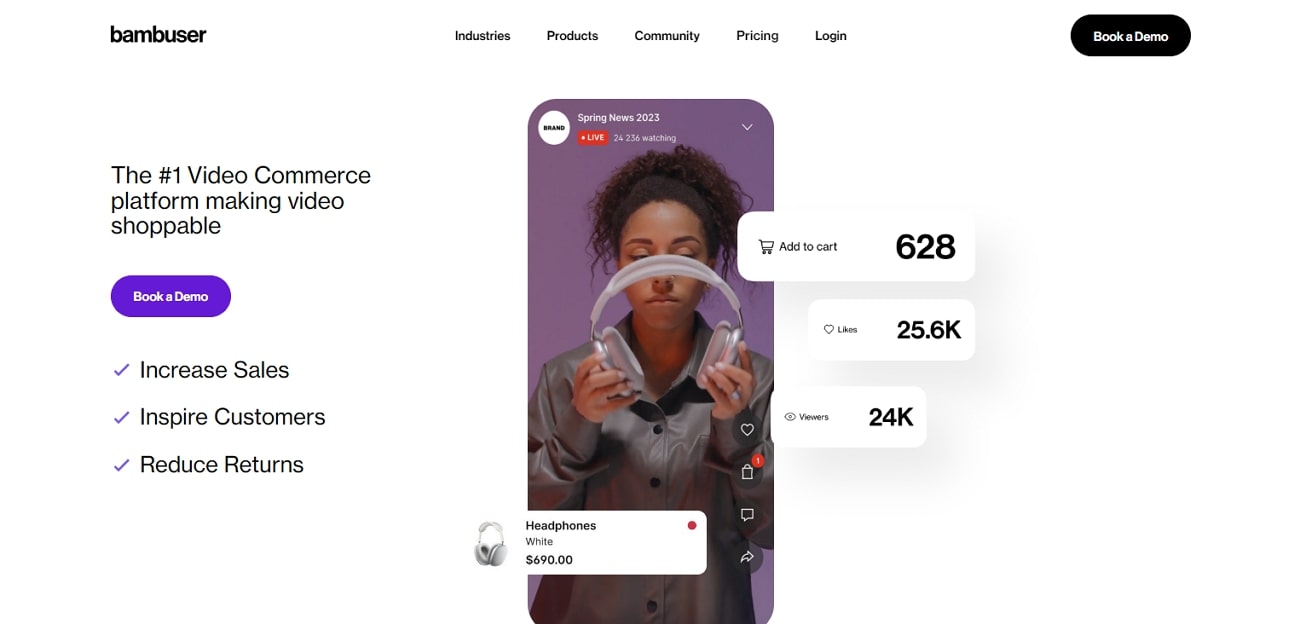
Key Features
- The app allows customers to complete their purchases while staying at the platform.
- The livestream shopping appoffers full white-labeling capabilities. This capability empowers users to customize the platform for their brand identity.
- Bambuser allows you to interact with the buyers with shoppable video calls.
4. Live Shopping by LiveMeUp
For engaging livestream shopping app, Live Shopping by LiveMeUp is a good option to consider. The platform brings the excitement of TikTok-style live video shopping or shoppable Instagram videos onto the Shopify-influenced ecosystem. This online forum stands out for its customizable video player and deep analytical procession. By integrating it into their Shopify store, businesses can drive higher conversion rates and customer interaction.
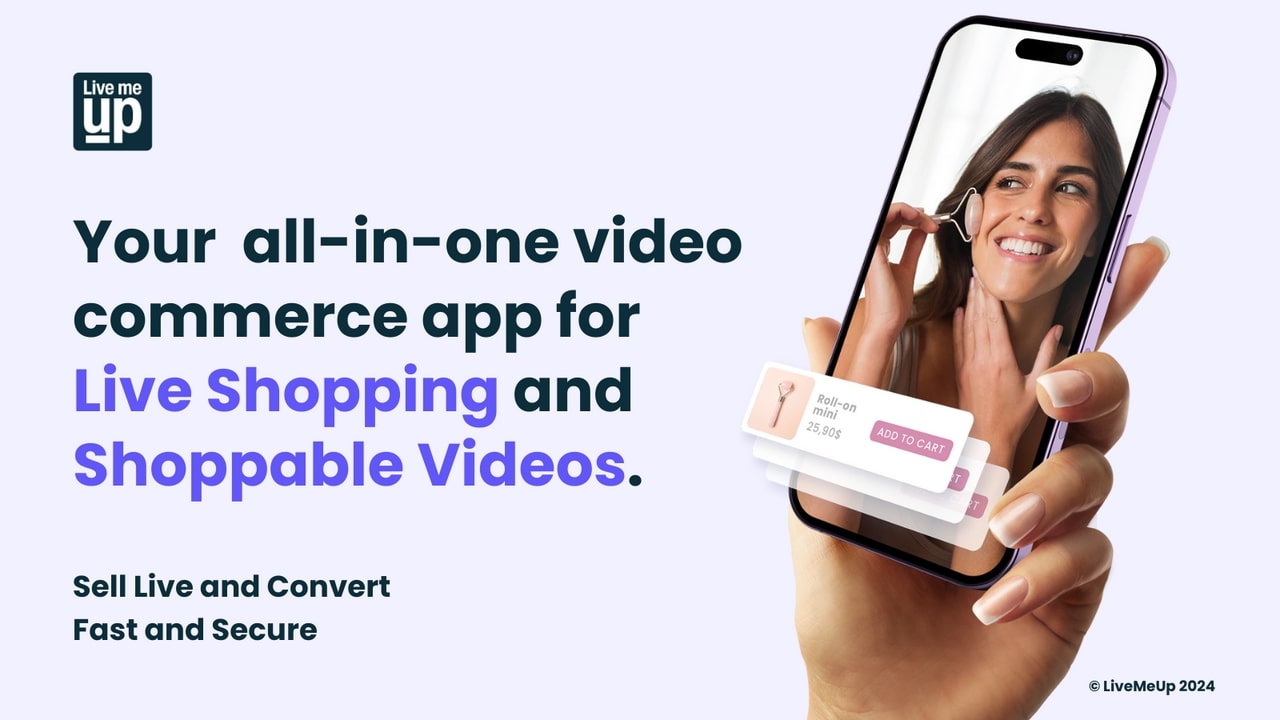
Key Features
- The app instantly loads videos without impacting your store’s speed.
- The integration with social platforms like YouTube, Facebook, and Instagram maximizes exposure.
- Live Shopping by LiveMeUp provides sellers with deep analytics related to customer data.
5. CommentSold
CommentSold is revolutionizing the live selling world with its diversified live selling features. This live-streaming selling app empowers businesses to transform their product listings. You can turn your online store into virtual events to broadcast across many channels. Apart from the basic social media platform support, it integrates with platforms like Shopify, Stripe, Sezzle, and more for a diversified experience.
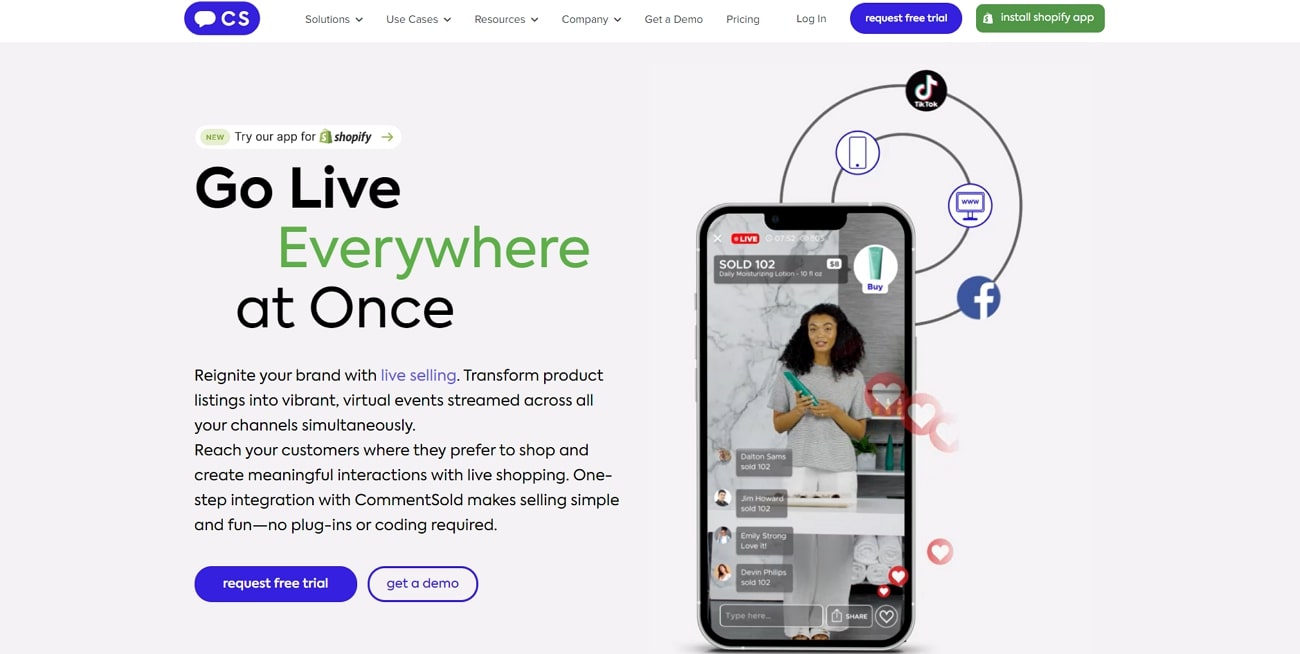
Key Features
- With one-step integration, businesses can reach customers where they prefer to shop.
- Customers can easily cart and purchase items during live-stream shopping events.
- It automates time-consuming administrative tasks such as invoicing and inventory management.
6. SoldLive: FB & IG Live Selling
There aren’t many live-streaming selling app that seamlessly integrate with social platforms such as Facebook and Instagram. With a direct integration into Shopify admin platform, SoldLive simplifies the selling process. This feature makes it easy for shoppers to purchase during live sales. The automation offered by the app streamlines operations and saves businesses valuable resources.
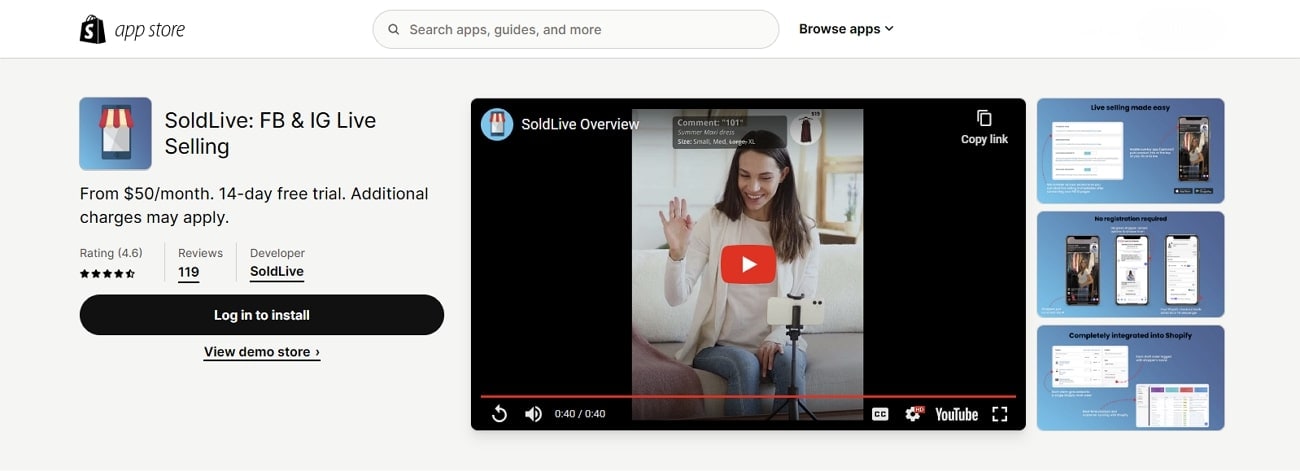
Key Features
- Its integration with Facebook Live and Instagram Live allows businesses to connect to various social pages.
- This platform automates the live selling process, including generating invoices.
- You can live stream on various social platforms simultaneously using SoldLive’s system.
7. QVC Live
The QVC App is a mobile livestreaming shopping app for a seamless smartphone shopping experience. You can get it on iPhone, Android, tablet, and Apple TV. It offers exclusive deals, product discovery, and effortless transactions. Also, it has integration with QVC’s live television, which broadcasts content across 3 networks. The app allows for a transition between browsing products and watching live demonstrations.
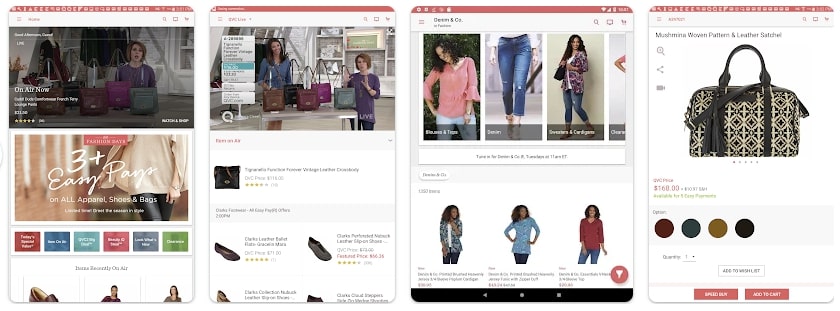
Key Features
- You can make use of Voice Search features to make navigation even easier.
- With live television broadcasts streamed through the app, users can shop while watching.
- Timely notifications ensure that users never miss out on special promotions.
8. Showday Live & Shoppable Video
When looking for innovation in online video shopping app, Showday Live offers several exceptional features. Customers can purchase showcased products without leaving the video with an in-video cart. It integrates with every Shopify theme, requiring no code for installation. This integration ensures that product feeds and transactions are in synchronization with the Shopify store.
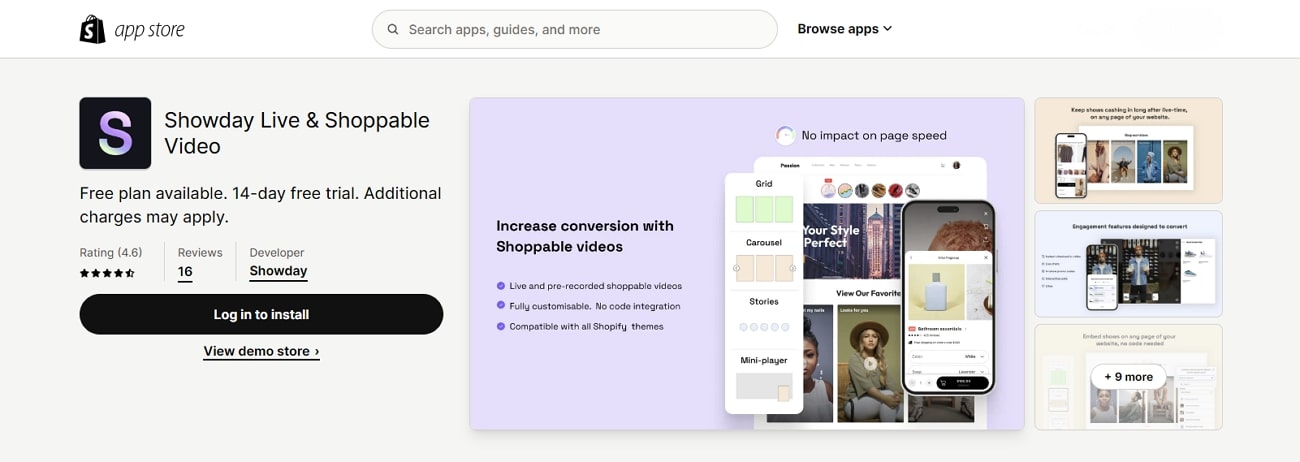
Key Features
- Showday can integrate with platforms, including Facebook, YouTube, and Google Analytics.
- It is equipped with a variety of engagement features like vouchers to convert viewers into customers.
- This app has marketing tools to gather and analyze valuable consumer data.
9. Facebook Live
Facebook Live enables businesses to connect with their audience or followers in real time. Also, you can drive meaningful communication with live polls and featured links. From personal broadcasts to large-scale events, it provides users with the tools they need. The app supports integrations with video conferencing software providers like Zoom and BlueJeans.
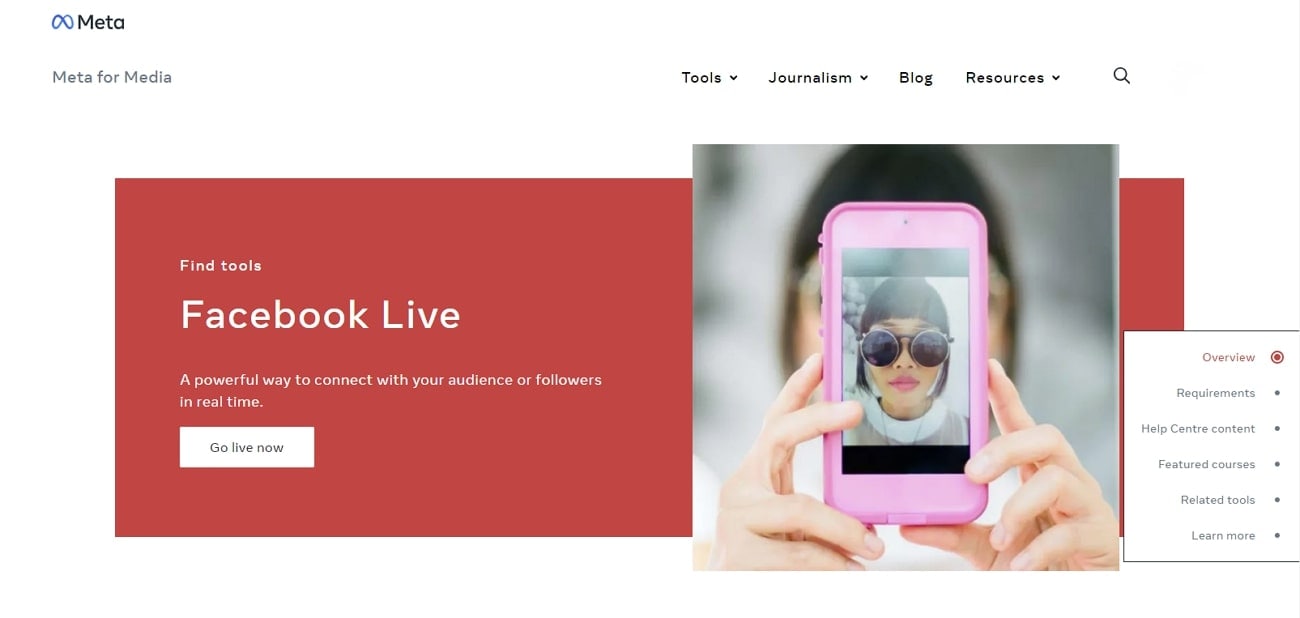
Key Features
- Sellers can respond to buyers’ questions and comments in real-time.
- By broadcasting live content directly to the Facebook Page, you can expand your reach.
- This lives selling apphelps you broadcast to Facebook Live from Messenger Rooms.
10. NTWRK
There are specific options in live selling when users want to showcase their products through live auctions. NTWRK is the premier destination for sellers looking to connect with a dynamic audience. Sellers can choose how they want to upload and manage their inventory. It can be done through the NTWRK seller dashboard or by syncing their Shopify account.

Key Features
- It provides sellers with innovative ways, including hosting live auctions and selling drops.
- You can integrate this app into an existing Shopify account.
- NTWRK is available on Google Play and App Store for mobile access.
Part 2. Comparative Overview of Top Live-Streaming Shopping Platforms
In this section, we’ll compare different the discussed live shopping apps that let businesses live-stream events. Each platform has its own special features, thus let’s see how they measure up against each other:
| Platforms | Ratings | Availability and Integration | Effectiveness | AI Avatars | AI Voices | Ease-of-Use |
|---|---|---|---|---|---|---|
| Virbo Live | 4.9 | Web Based, Integrates with Most of Streaming Platforms | High | ✓ | ✓ | ✓ |
| TikTok Shop | 4.6 | TikTok app | High | X | X | ✓ |
| Bambuser Live Video Shopping | 4.8 | Websites, Social Media Channels, Mobile apps | High | X | X | X |
| Live Shopping by LiveMeUp | 4.3 | Shopify, YouTube, Facebook, and Instagram | Low | X | X | ✓ |
| CommentSold | 4.5 | Facebook, Instagram, Messenger, Shopify | Medium | X | X | X |
| SoldLive: FB & IG Live Selling | 4.7 | Shopify | High | X | X | ✓ |
| QVC Live | 4.4 | iOS, Android, Tablet, Apple TV | Low | X | X | X |
| Showday Live & Shoppable Video | 4.6 | Shopify | Medium | X | X | ✓ |
| Facebook Live | 4.3 | Web, Mobile | High | X | X | ✓ |
| NTWRK | 4.2 | Online, iOS, Android | Low | X | X | X |
Conclusion
In conclusion, we’ve learned that live streaming is becoming essential for online shopping. Businesses are using it to connect with customers in real-time. In our comparison, we looked at different shoppable video streaming app. One standout platform is Wondershare Virbo Live, which is excellent at helping businesses create engaging streams. Its AI-powered avatars enhance customer interactions and generate more sales.
Learn The Best 6 Alternative Streaming Platforms
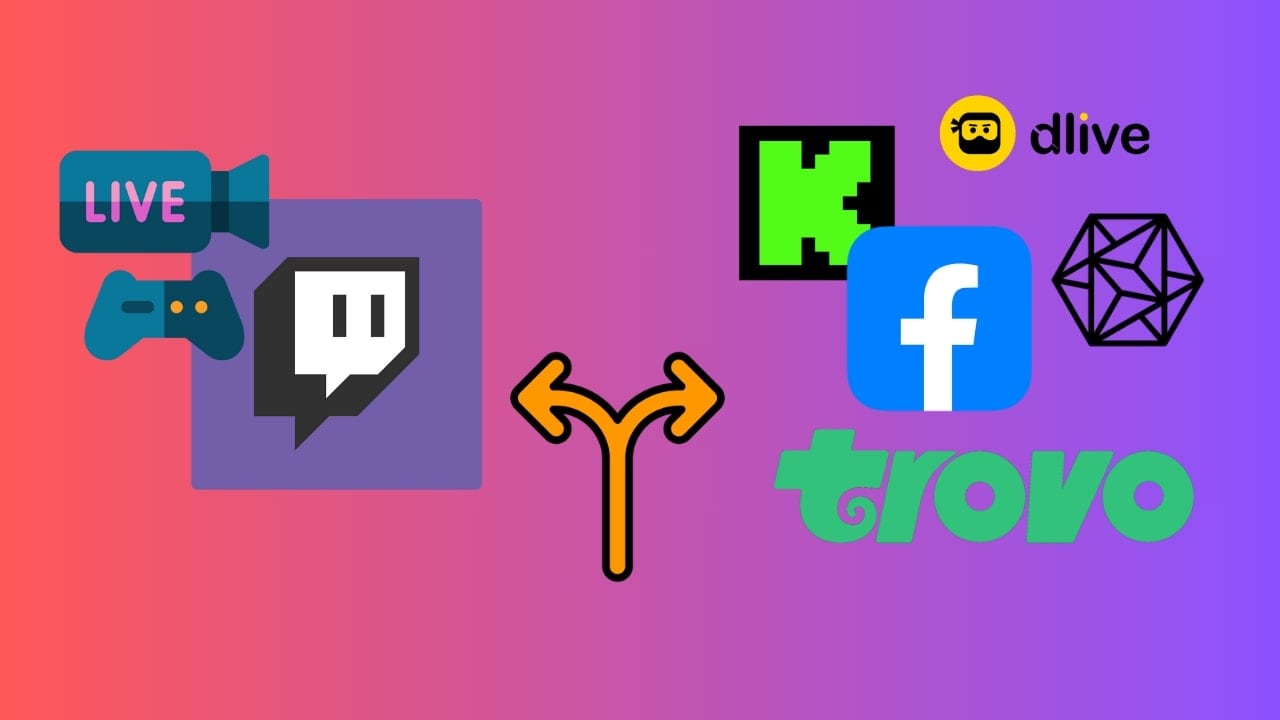
Fans worldwide love watching others play video games online, which is becoming a big deal in entertainment. In addition to being fun for viewers, these livestreams are also an excellent source for gamers to make money. For this purpose, Twitch is the most prominent place for live-streaming games, with a traffic of around 140 million people.
However, various other streaming platforms, like Twitch, are coming out as better alternatives. In this article, we’ll explore the best Twitch alternatives for gamers to maximize their gaming talents.
Part 1. A General Overview of Twitch Platform
As mentioned earlier, Twitch is one of the biggest platforms where people can watch others play games live. It started in 2011 and has over 140 million people using it monthly. You can freely chat and follow streamers playing games on this platform. Also, this site helps popular streamers make money through subscriptions, ads, and sponsorships.
Other than that, they have events like TwitchCon, where people in the industry get together. To stream on Twitch, you must have an account first. You can create your channel where your streams will be shown. However, registration is not necessary to view live-streaming events:
Key Features of Twitch
- On Twitch, viewers can talk to streamers through live chat while streaming online.
- Game streams on Twitch are organized into different categories for the viewers’ ease.
- Various social tools translate chat for people from different countries to understand polls.
- It has a Moobot feature that helps streamers automate messages to interact with viewers.
Part 2. Discovering the Best Alternatives to Twitch Available in 2024
Since Twitch is famous for gaming and live streaming, many other platforms are emerging, too. All these Twitch alternatives have excellent features to engage their users. They can fit your interests better with advanced capabilities. The following are other live streaming platforms like Twitch to assist you in choosing the best alternative:
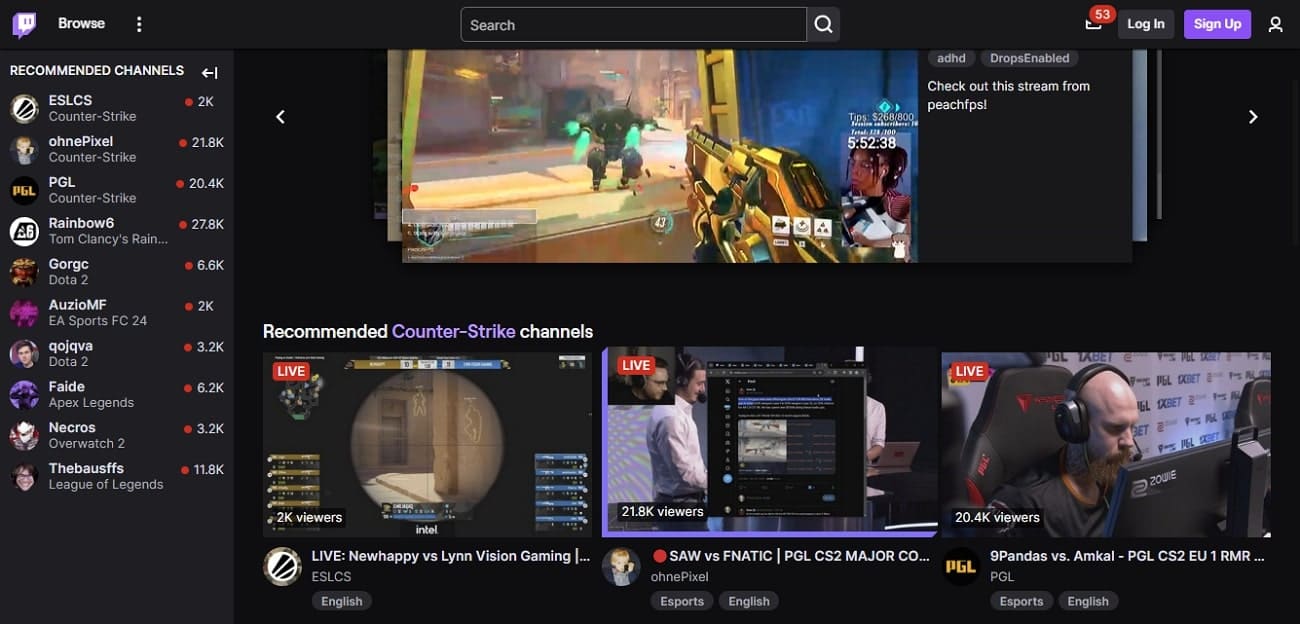
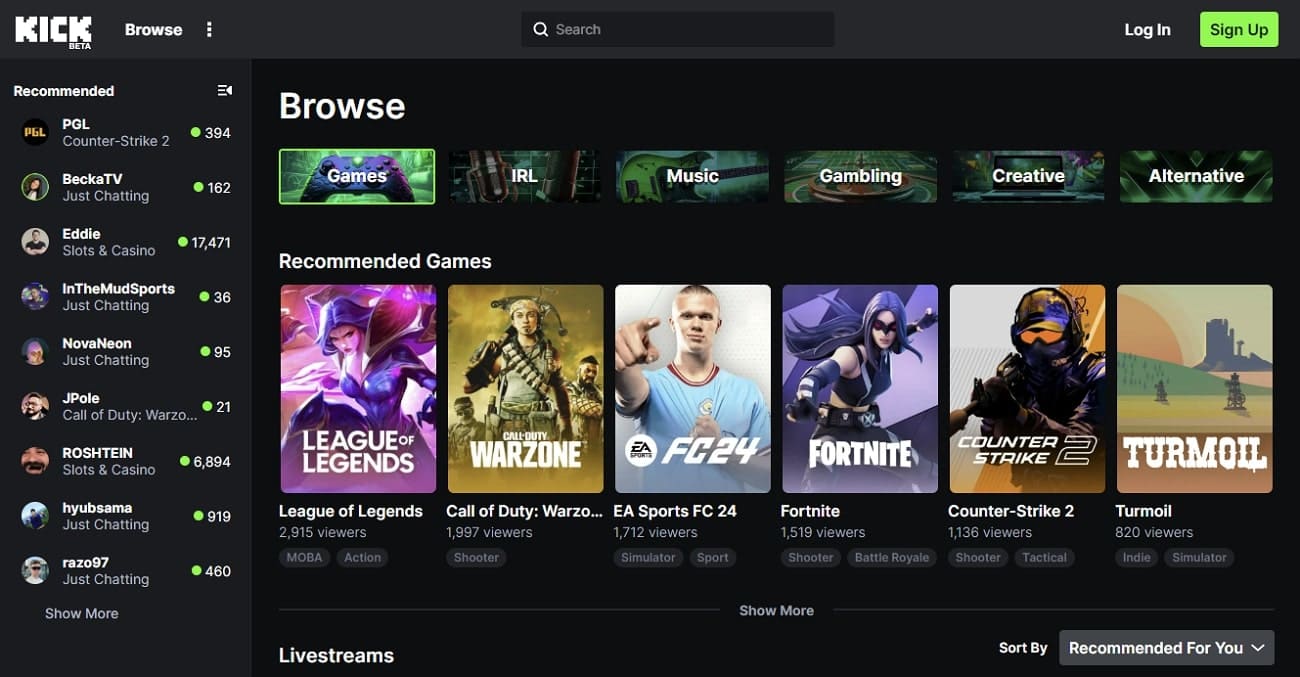
1. Kick
Kick.com is one of the best live-streaming platforms, challenging Twitch’s dominance. This site was founded in December 2022 with the partnerships of Adin Ross, xQc, and others. Its viewership skyrocketed by 404%, attracting millions of active streamers and viewers alike. During broadcasting live sessions, the host can mute any viewer, spreading negativity. It allows you to pop out the chat to display on the big screen to engage your audience.
Key Features
- Kick has a lower entry barrier, making it easier for newcomers to get noticed.
- It offers a massive 95% revenue split to content creators, compared to Twitch’s 50%.
- You can find various communities on this forum, each with a unique vibe and rules.
Pricing
Free to Use
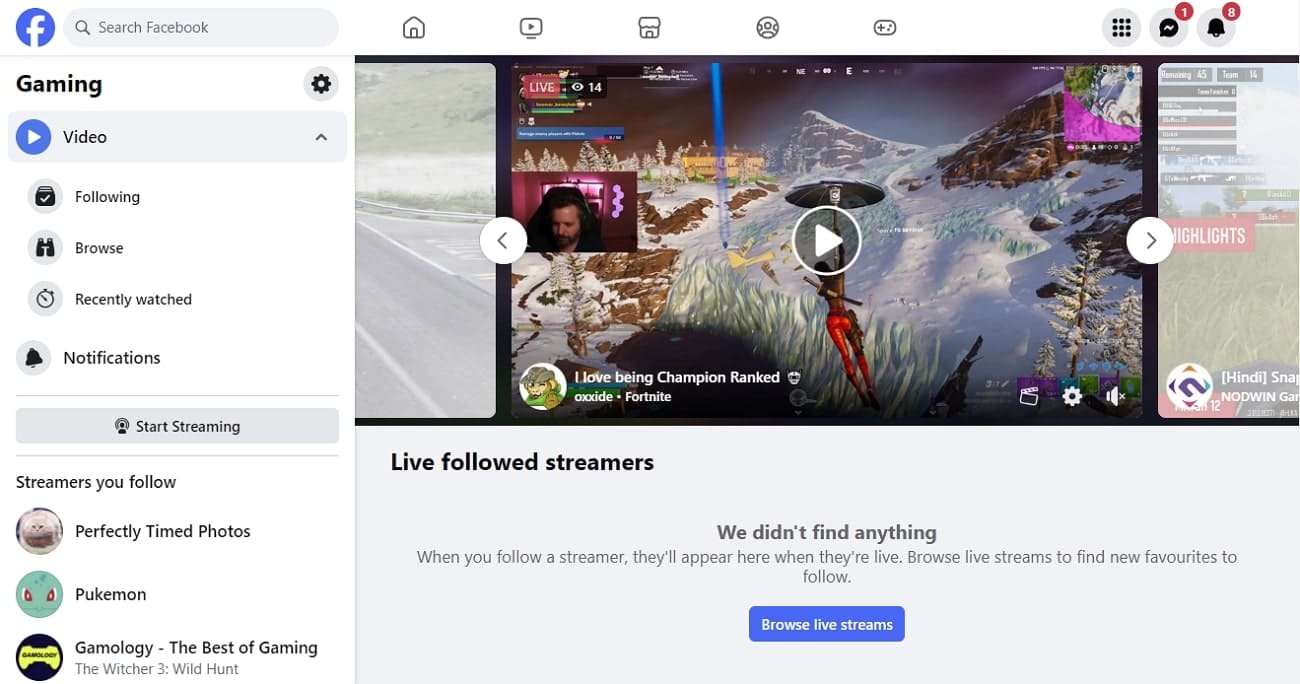
2. Facebook Gaming
If you want to expand your gameplay streaming, Facebook is streaming services like Twitch. It allows you to use its mobile app to go live from your phone, wherever you are. You can connect streaming software like Streamlabs, OBS, and XSplit with your Facebook page and go for a live session. One of its leading advantages over Twitch is using an existing fan base to get an organic boost.
Key Features
- You can find your expiring, saved, and dismissed streams in an organized way to track the record.
- Before going live, you can customize the chat rules for your viewers for a smooth experience.
- The posts and stories tab manages live videos and upcoming content items for you.
Pricing
Free to Use
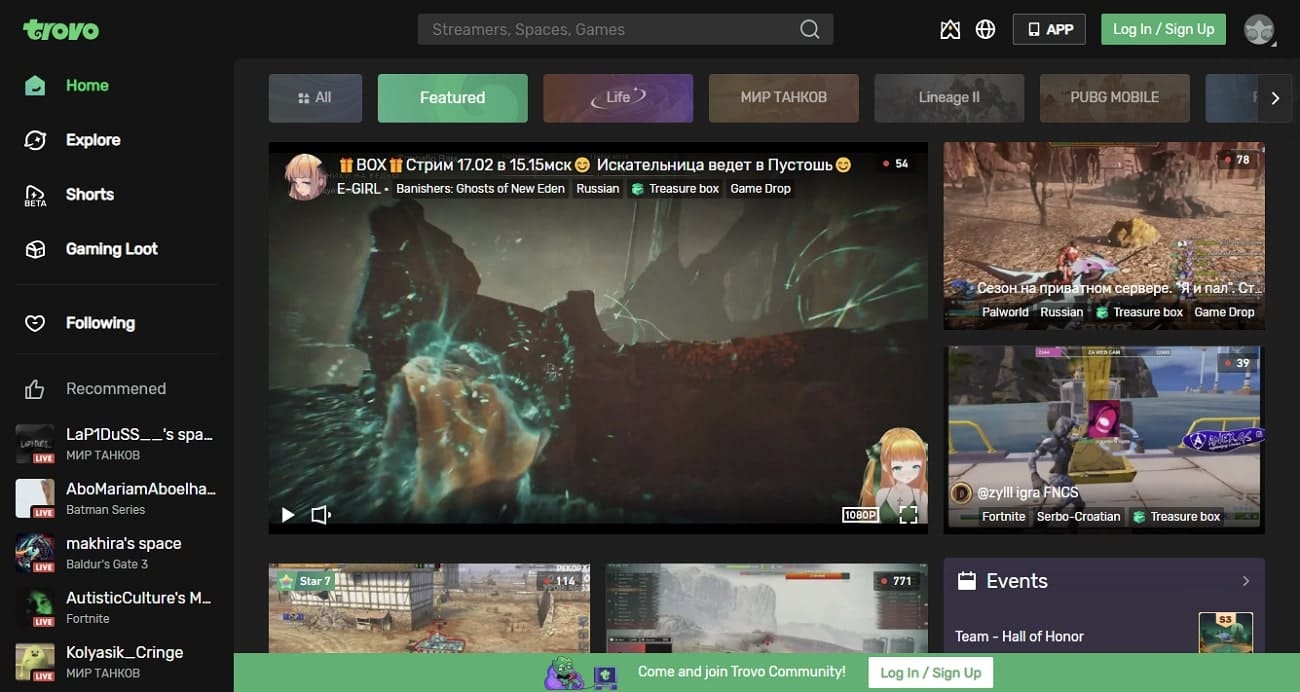
3.Trovo
The ultimate destination for gamers where they can take center stage is Trovo. This live streaming platform, like Twitch,offers a range of advanced features to elevate your stream. It stands out from Twitch with its focus on building community by providing discoverability tools. The streaming service makes it easy for viewers to find you and find your audience for you.
Key Features
- With Boost Rocket and Vibetags, you can get featured on the front page and explore trends.
- You can engage with the audience with features like earning gems and winning treasure boxes.
- It allows you to attend Discord discussions and Dev Corner Stream events with fellow gamers.
Pricing
Tier-up paid subscription for every channel.
4. Dlive
Dlive serves as a revolutionary streaming website like Twitch.This platform aims to empower creators and viewers through a unique reward system. Unlike Twitch, it is built on blockchain technology to put platform ownership in the hands of its users. Its 75% distribution of each subscription and gift to the content creator’s wallet sets it apart.
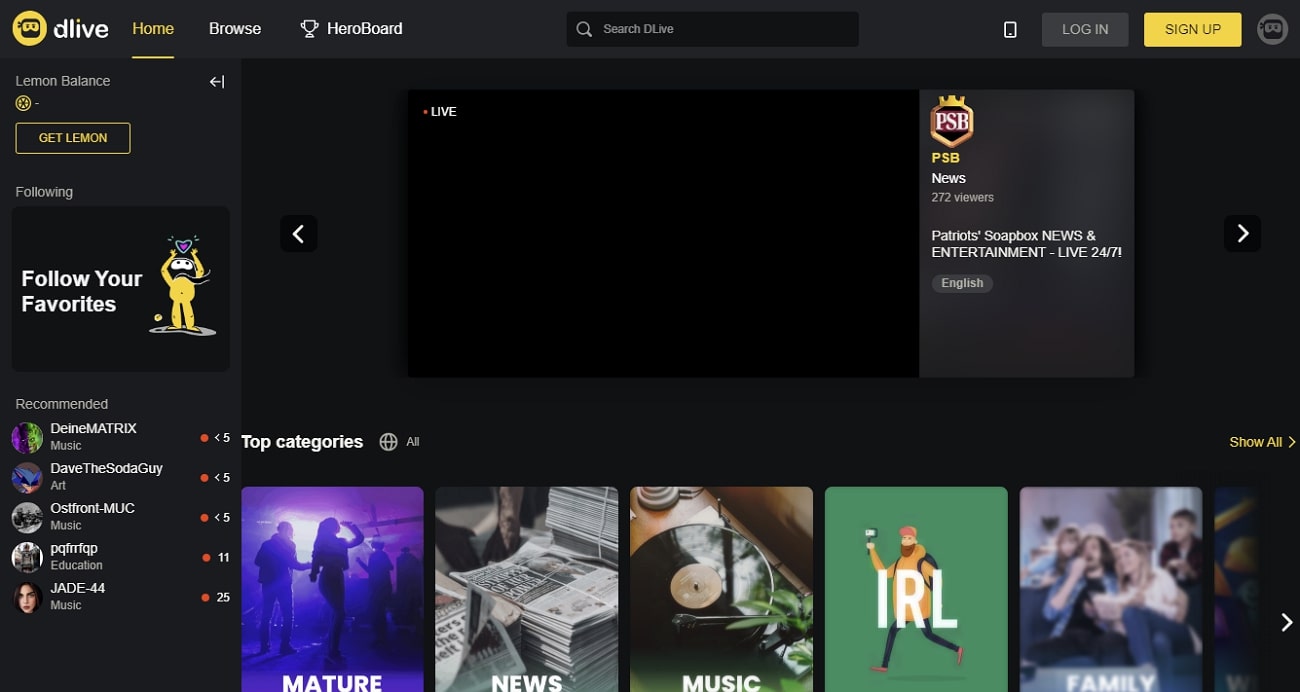
Key Features
- Users can earn rewards for watching, chatting, and sharing content through virtual currencies like Lemon and BTT.
- It offers an ad-free experience for viewers to enjoy uninterrupted videos without commercials.
- The platform provides a supportive community of broadcasters and viewers to share interests.
Pricing
No Premium Subscription
5. YouTube Gaming
YouTube Gaming is a live streaming platform like Twitch where gamers can stream their gameplay. Also, it allows them to interact with viewers. Audiences can get an enjoyable experience by watching live streams with chat rooms. Also, this platform enables you to create thumbnails for live streams. Hosts can keep up to 70% of the subscription revenue using this platform.
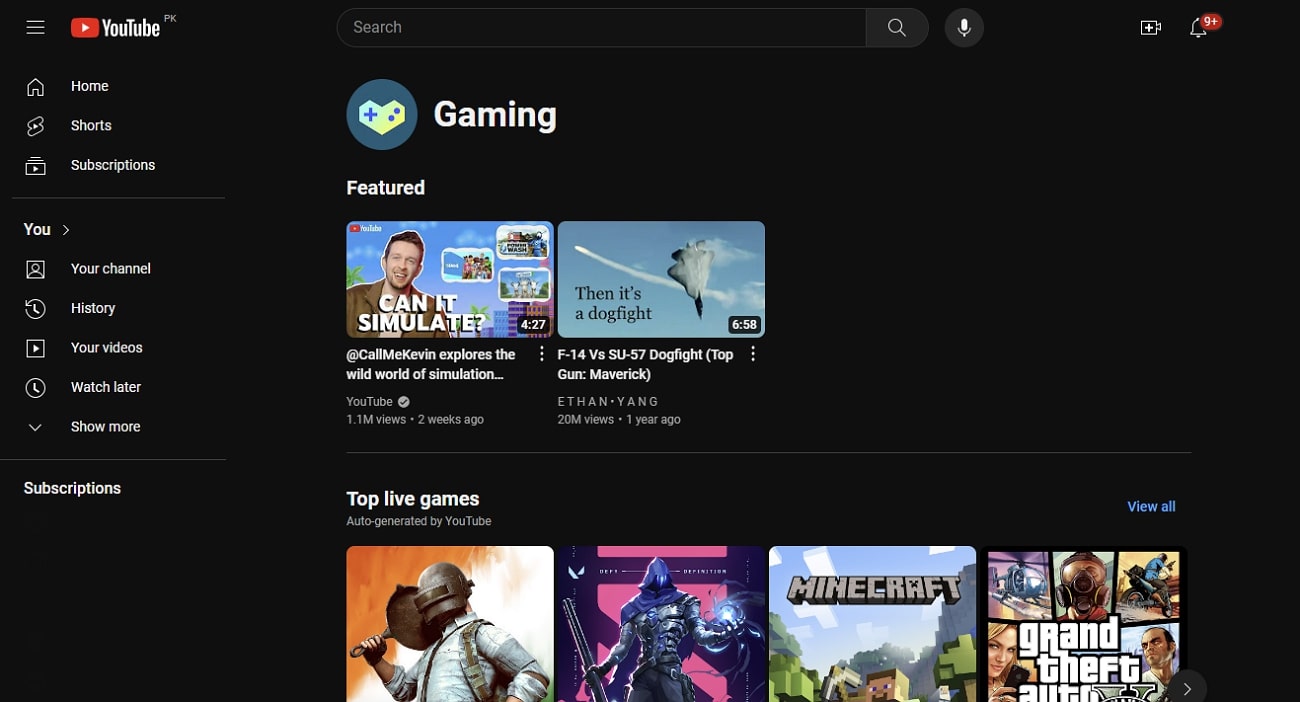
Key Features
- Better discoverability and the monetization of on-demand videos make it a preferred option.
- Viewers don’t need to subscribe to the channel to interact with streaming content on YouTube.
- It allows for streaming in 4K resolution to enhance the viewership.
Pricing
Free to Use
6. Caffeine
Caffeine offers opportunities to connect with your audience in real-time during live streaming. You can monetize your content without hurdles on this streaming service like Twitch. Also, it has many games, so you can find something you like. Compared to Twitch, Caffeine is easier to use, has less clutter, and has fewer ads.
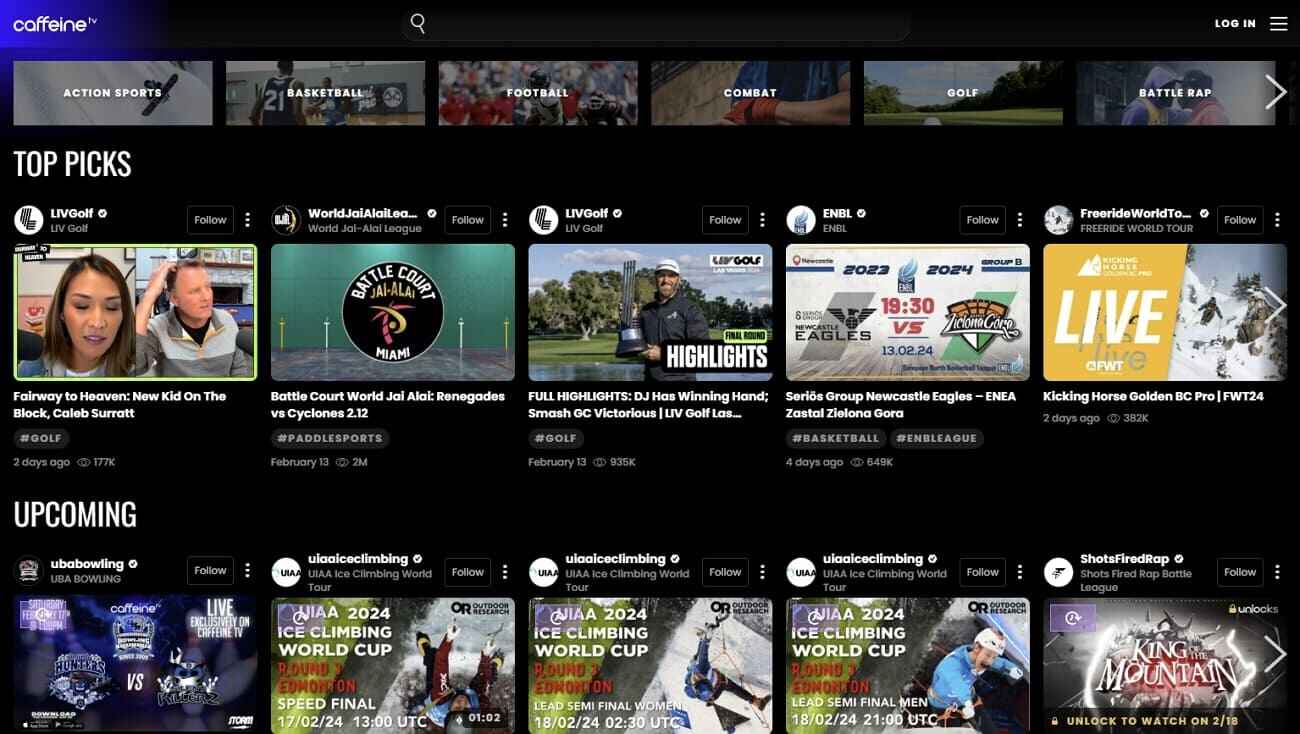
Key Features
- The fast video streaming technology lets you connect with fans with instant reactions.
- It allows you to immediately make money from your content; no partner program is needed.
- Users can enjoy exclusive partnership opportunities with finance, production, and marketing teams.
Pricing
No charges except paid invitations.
Part 3. Stream Better Gaming Content With Wondershare Virbo Live
In a crowded online world, we can find diverse content for entertainment purposes. However, to make yourself stand out, you need to do something new in the online ecosystem. One big problem is finding the best engaging material for publishing online to win the audience’s attention. However, many innovative solutions have emerged to address these concerns.
Wondershare Virbo Live emerges as one of the leading tools to let you elevate your gaming content. You can create customizable Q&A repositories to respond to viewer questions and comments in real-time. It offers continuous 24/7 broadcasting on different social platforms without interruptions. The microphone integration enables voice-driven interactions during your stream.
Features That Highlight Wondershare Virbo Live
- Adding Interactivity For User Communication: AI-driven streamers can add excitement and interactivity to gaming sessions for your audience.
- Supports Multiple Language Translations: It offers the integration of multiple languages and accents to connect with gamers across the world.
- AI Script Generation: You can keep your viewers hooked with engaging AI scripts to fill every moment with action.
Step-by-Step Guide to Creating a Stream Room on Wondershare Virbo Live
With Wondershare Virbo Live, you have everything you need to create compelling gaming content. After creating interactive content, you can go live on streaming platforms like Twitch. Here are the simple steps to follow for creating a steam room for your gaming sessions:
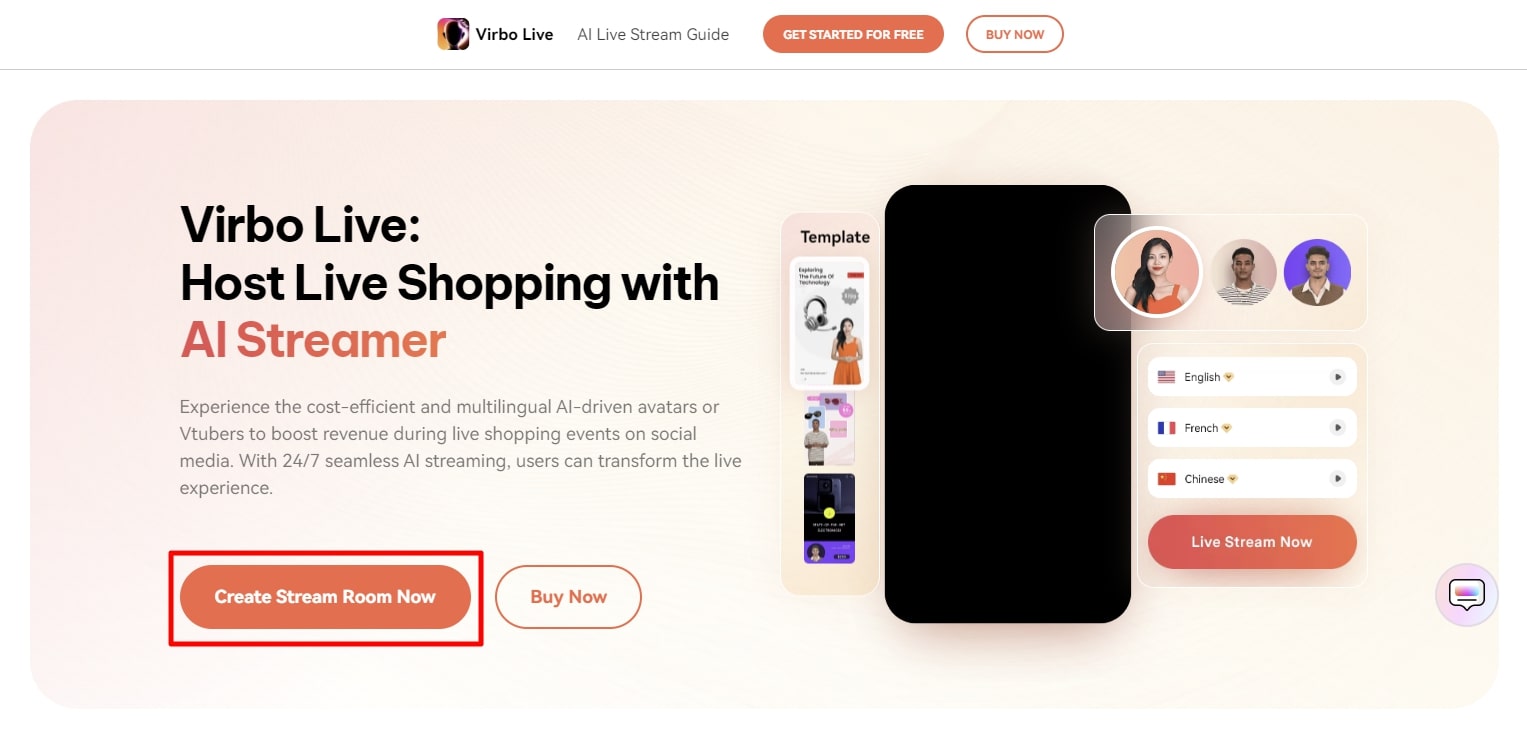
- Step 1. Visit the Official Website To Create Stream Room
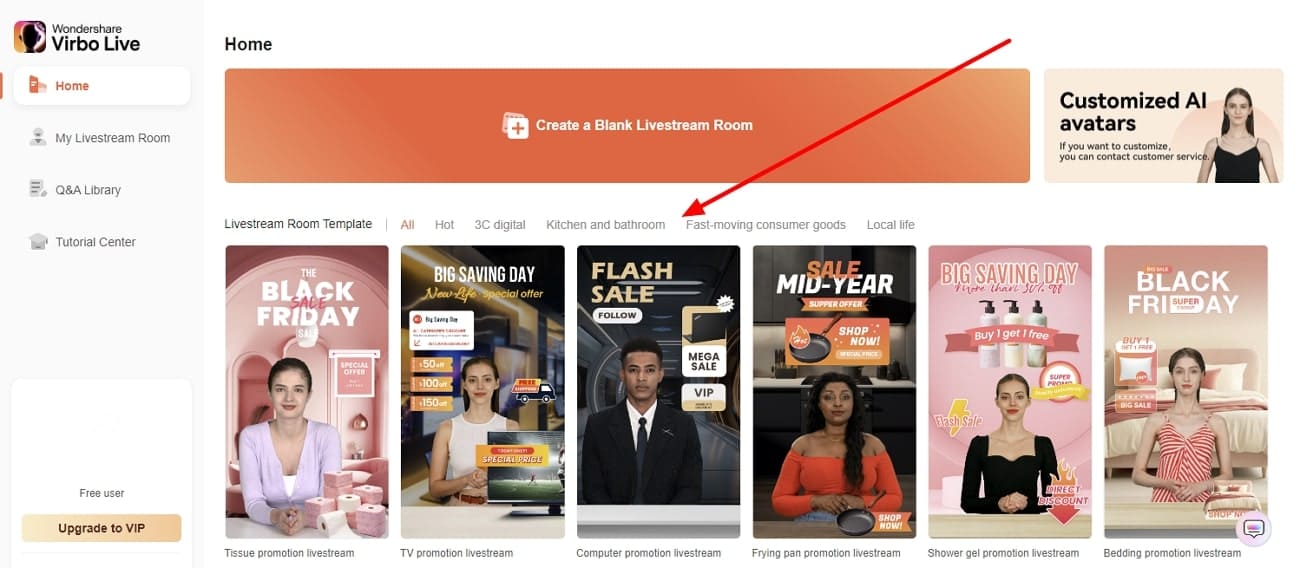
To start the process, search the official website of the tool through the internet. After accessing the main page, choose the “Create Stream Room Now” button from the left side. This will move you to a new window to select a template from the available options.
- Step 2. Choose Your Preferred Preset Template
Under the “Livestream Room Template,” opt for the template that fits your requirements. Now, you’ll be directed to a new window for further customization of the selected template.
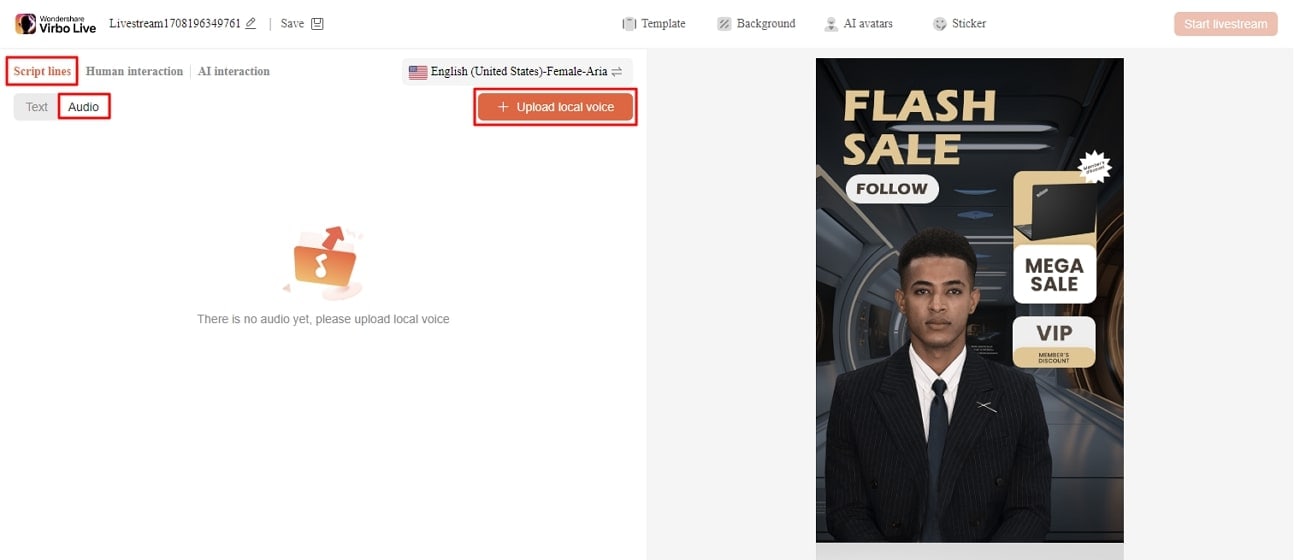
- Step 3. Upload Audio From the System
In the upcoming window, head to the left and click on the “Audio” tab under the “Script lines” section. Then, tap the “Upload Local Voice” button to browse the audio file from the system to use from gameplay.
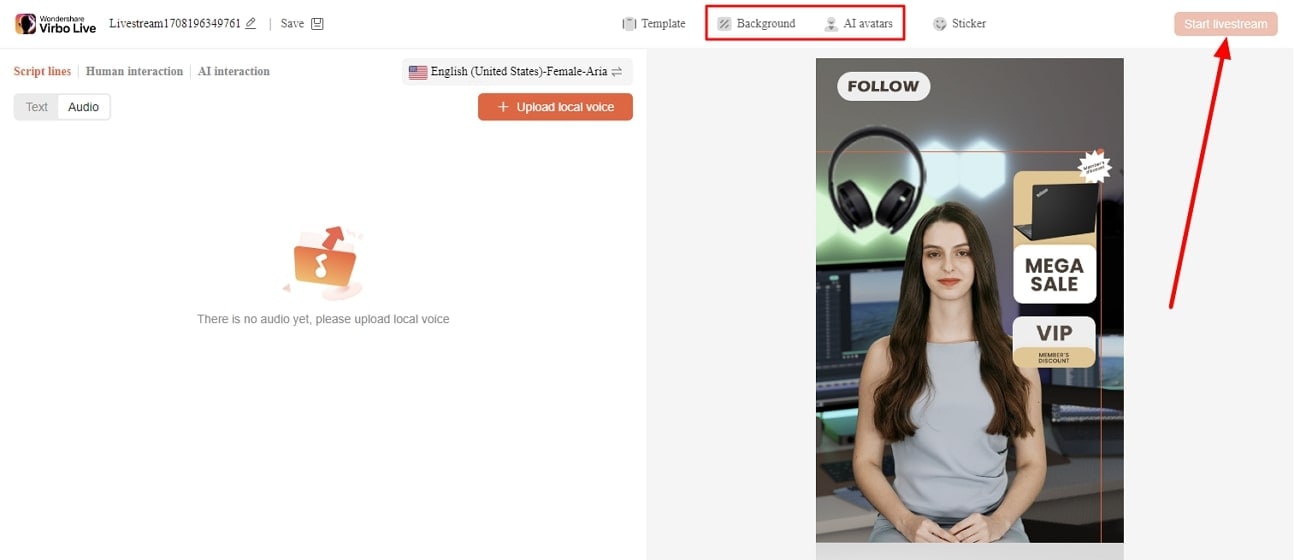
- Step 4. Customize the Template and Go for Live Streaming
Next, you can click the “Background” tab to alter the background according to the game. You can change the streamer within the same template after pressing the “AI Avatars” tab. Finally, select the “Start Livestream” button at the top right to publish your video on streaming websites like Twitch.
Conclusion
Technological evolution opens a new gateway for gamers to show their skills. Throughout the article, we explored the best Twitch alternatives to stream the content. We also discussed the need for new, better ways to get noticed online. This is where Wondershare Virbo Live is a great option for users, as they can utilize its AI capabilities to elevate their gameplay sessions.
Professionals and content creators now use different social media platforms for live streaming. There are many big names on these platforms, such as Instagram . Instagram is one of the most-used networks, with over 2 billion monthly active users. Using this live-stream platform is always a plus for companies and individuals.However, the discussion is about how to stream to Instagram with an RTMP. This detailed guide helps you in using RTMP Instagram for live streaming. Furthermore, you will also learn about a recommended tool that offers AI-powered features for broadcasting.
Part 1. Some Rules and Requirements To Understand Before Live Streaming on Instagram
Like every platform, Instagram has some protocols for broadcasting content to global audiences. Therefore, learning the rules and requirements before going live on Instagram is necessary. First, your account should be at least 30 days old; otherwise, they can restrict your stream.
There is a rule that you can go live for 4 hours per stream without retakes. This length was increased from 60 minutes in the recent update. Also, you can repost a live video on your profile if it is more than 15 minutes long. Instagram allows you to schedule a stream from 1 hour to 90 days in advance.
The initial requirement of Instagram Live RTMP is that your content be respectful and updated. Additionally, you need to set your stream to 1920x1080 resolution on a vertical camera. Meanwhile, Instagram gives leverage on the number of followers so that you can start with minimum viewers. Also, there is no need to have a business account for live streaming.
Part 2. How To Live Stream to Instagram With an RTMP?
Setting high-quality live streams encourages people to tune into your broadcast. For this purpose, you need a seamless encoder like OBS . Unfortunately, Instagram doesn’t officially support third-party encoders. To solve this query, you need an effective solution.
Therefore, the following steps guide streaming on Instagram with an RTMP (Real-Time Messaging Protocol). You will also learn how to set the required parameters in this comprehensive guide:
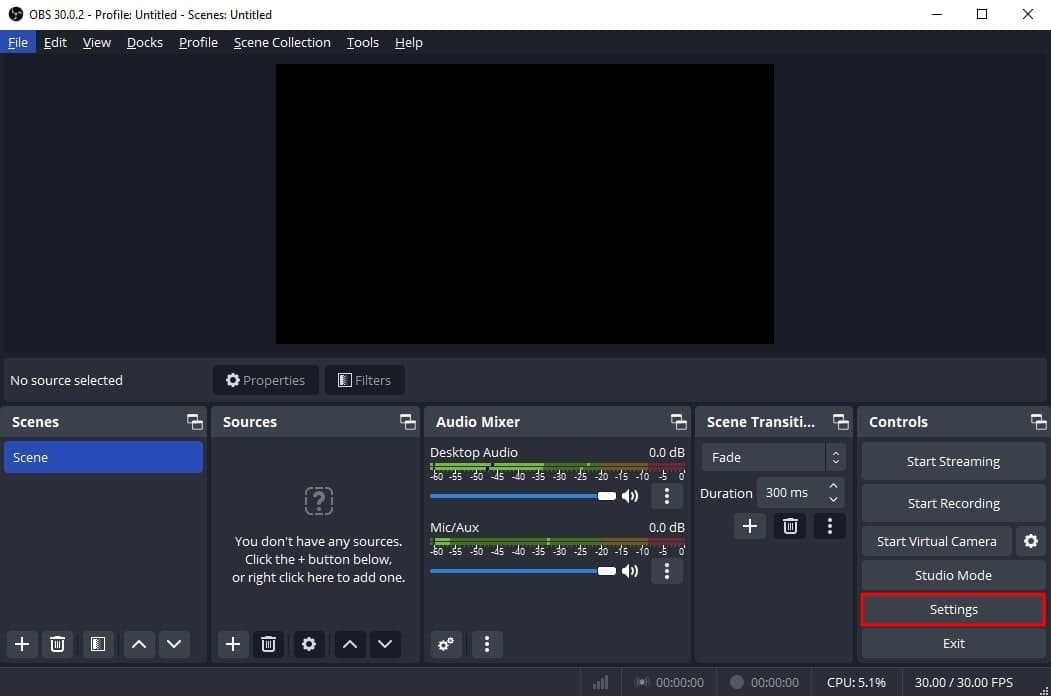
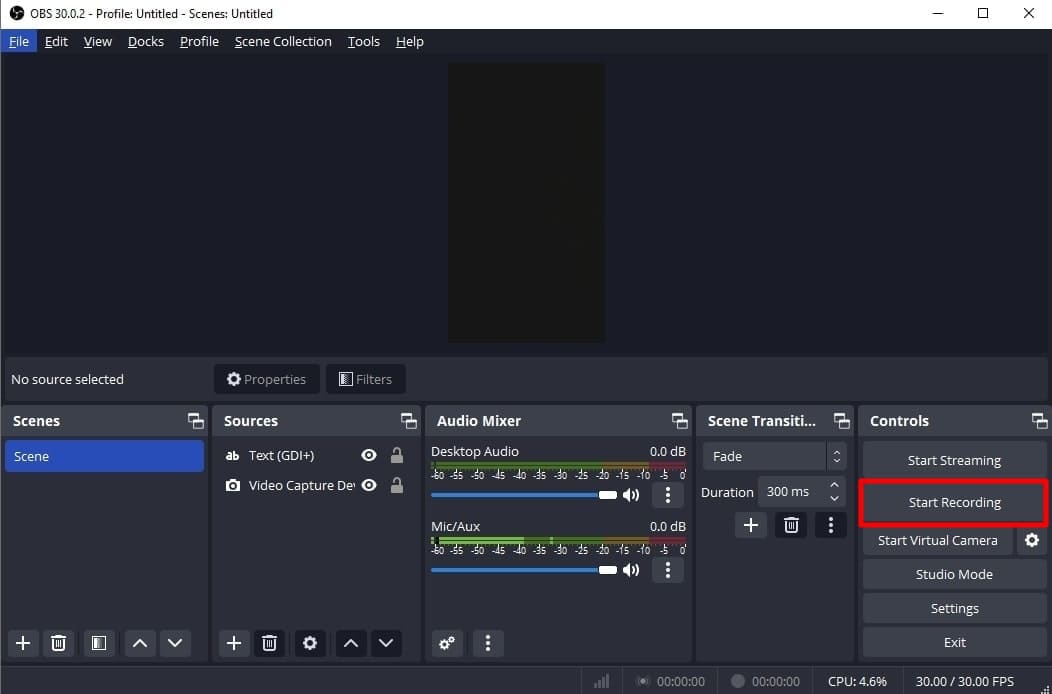
- Step 1. Start with downloading and launching OBS Studio on your PC. The first thing to do is set up vertical camera dimensions for RTMP Instagram live streaming. To access the settings window, hit the “Settings” option in the “Controls” panel.
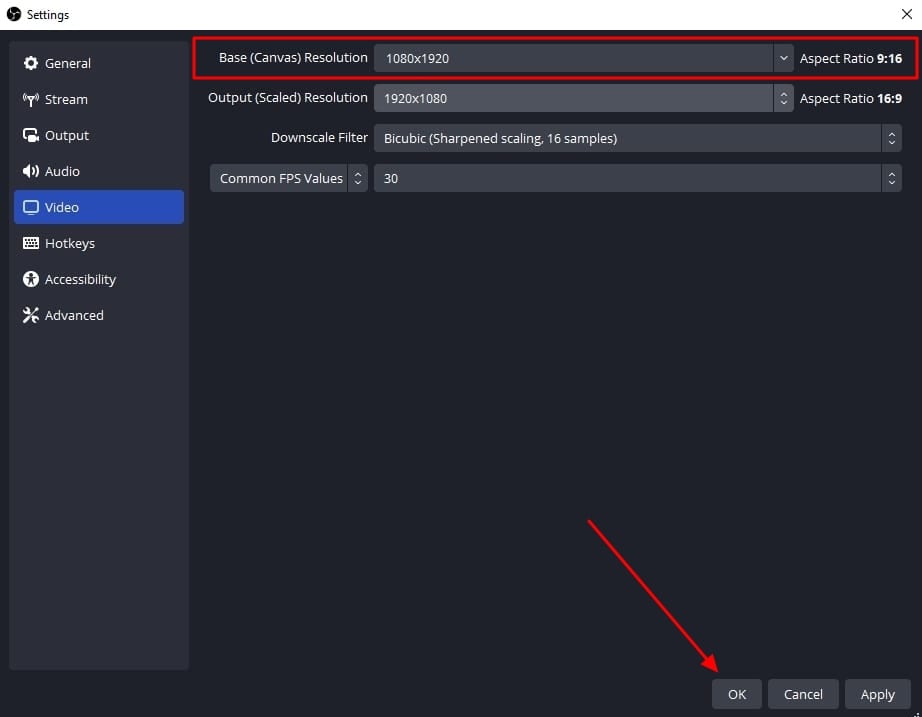
- Step 2. Look for the “Video” tab in the “Settings” window that opens. After that, enter “1080x1920” in the “Base (Canvas) Resolution” bar. Similarly, add a “1080x1920” value in the “Output (Scaled) Resolution” bar to set a 9:16 aspect ratio for vertical display. Then, hit the “OK” button to apply these changes to your Instagram streams.
- Step 3. After that, you need to add external sources to the scene. Click on the “+” icon in the “Scenes” panel or rename the scene. Once the scene is created, hit the “+” icon of the “Sources” panel. Then, select the “Video Capture Device” option from the menu and rename the device to your liking. After that, choose the video capture device from the “Device” dropdown and hit the “OK” option. Similarly, you can select the “Audio Input Capture” option to introduce an audio device.

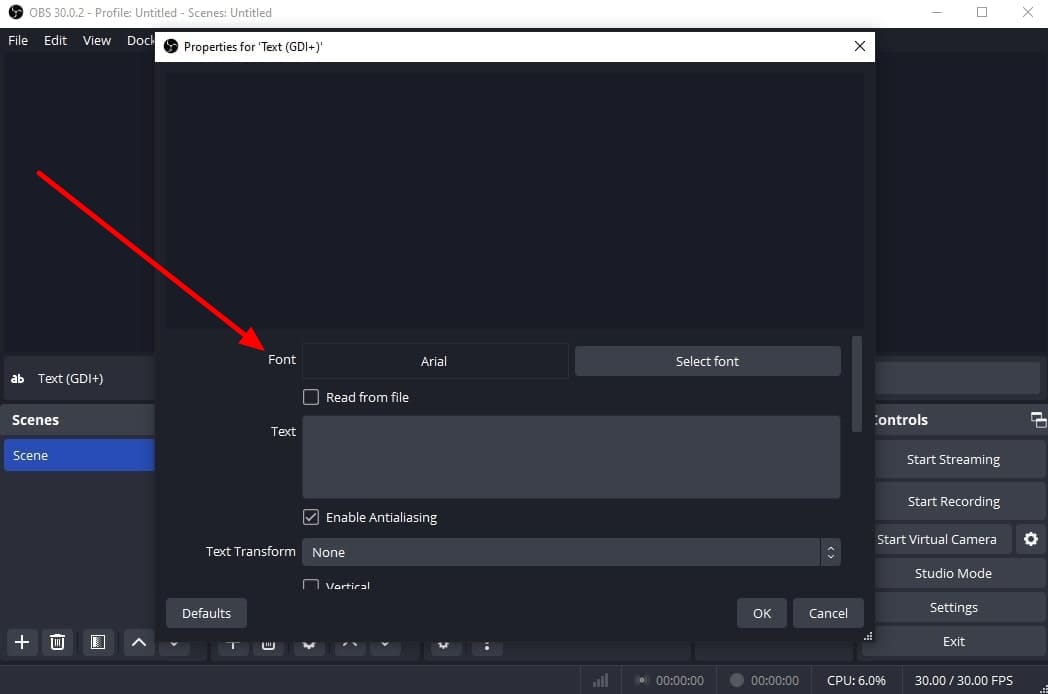
- Step 4. To add text overlays on your stream, hit the “+” icon again in the “Sources” panel. Choose the “Text (GDI+)” option and rename your overlay. On the next window, insert your text in the “Text” box. Then, click the “Select Font” button and choose your required font style and size. Additionally, you can change font color, opacity, alignment, background, and more. After customizing the text, hit the “OK” button to save the overlay in the sources section.
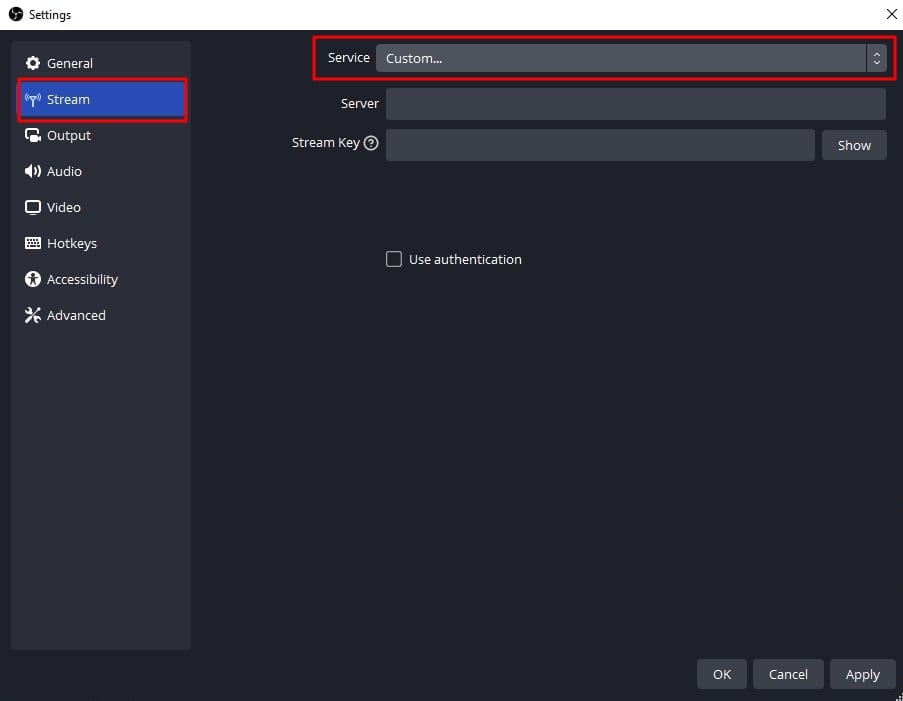
- Step 5. Afterward, select the “Stream” option in the settings window of OBS Studio. Set the “Service” to “Custom” from the dropdown. Then, you need to enter the server and stream key to proceed.
- Step 6. To get the server and stream key, visit rtmp.in on your browser. On the main interface of this Instagram RTMP, hit the “GO LIVE ON INSTAGRAM” widget. Then, it asks you to log in to your Instagram account.
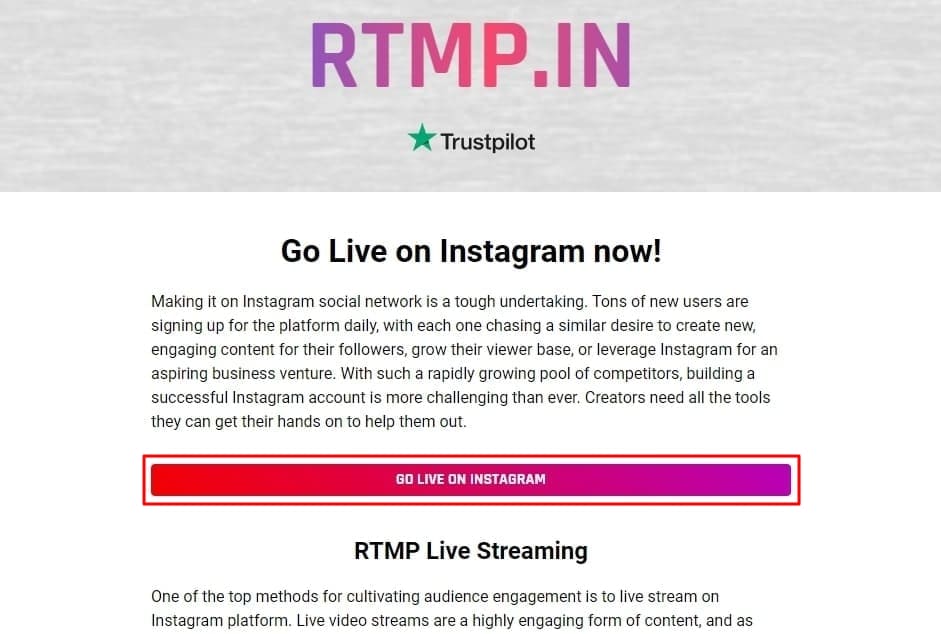
- Step 7. Once you’re logged in, it gives you a stream server URL and Stream key. First, copy the Server link and return to the OBS Studio software. Then, paste the link in the “Server” bar. After that, open the RTMP site again and hit the “Create New Broadcast” option.
You can also give a name to your broadcast in the “Broadcast Title” bar. After creating the broadcast, it shows the “Stream Key,” which you can copy. Then, move again to the OBS Stream setting panel and paste the key in the “Stream Key” bar. Lastly, hit the “Apply” option to save all these settings for your stream.

- Step 8. After getting ready, choose the “Start Streaming” option from the “Controls” panel. It starts your stream with selected parameters. To stop the stream, you can select the “Stop Streaming” option.
Part 3. How To Attract a Better Audience During Live Streaming on Instagram?
OBS Studio is an efficient software but offers limited functionality when it comes to engaging streams. Thus, you need an advanced solution that can help you reach global audiences through live streaming. For this purpose, Wondershare Virbo Live becomes an unsung hero for you. It provides AI-powered functions that help to start creative streams and generate more leads.
Moreover, the handy controls of Wondershare Virbo Live allow you to customize live streams to your requirements. Therefore, you can start streaming for different purposes, such as marketing, brand awareness, and more. Additionally, it allows you to set automatic responses and create a Q&A database to keep your audience engaged. Plus, it allows you to select creative AI avatars with different poses and outfits.
Key Features of Virbo Live
- You can choose different templates and backgrounds for a stunning streaming appearance.
- Users can write or generate scripts manually using the AI Smart Script feature. For this, they need to add prompts according to the script’s purpose.
- This tool helps to translate scripts into multiple languages and accents. Also, you can get dubbed audio in different AI voices.
Simple Guide To Start Live Streaming Using Wondershare Virbo Live
Many live streaming tools exist, but Wondershare Virbo Live provides more controls. Now, the thing is how to create a live stream room with this tool. For this, follow the given steps one by one to start live streaming with Virbo Live:
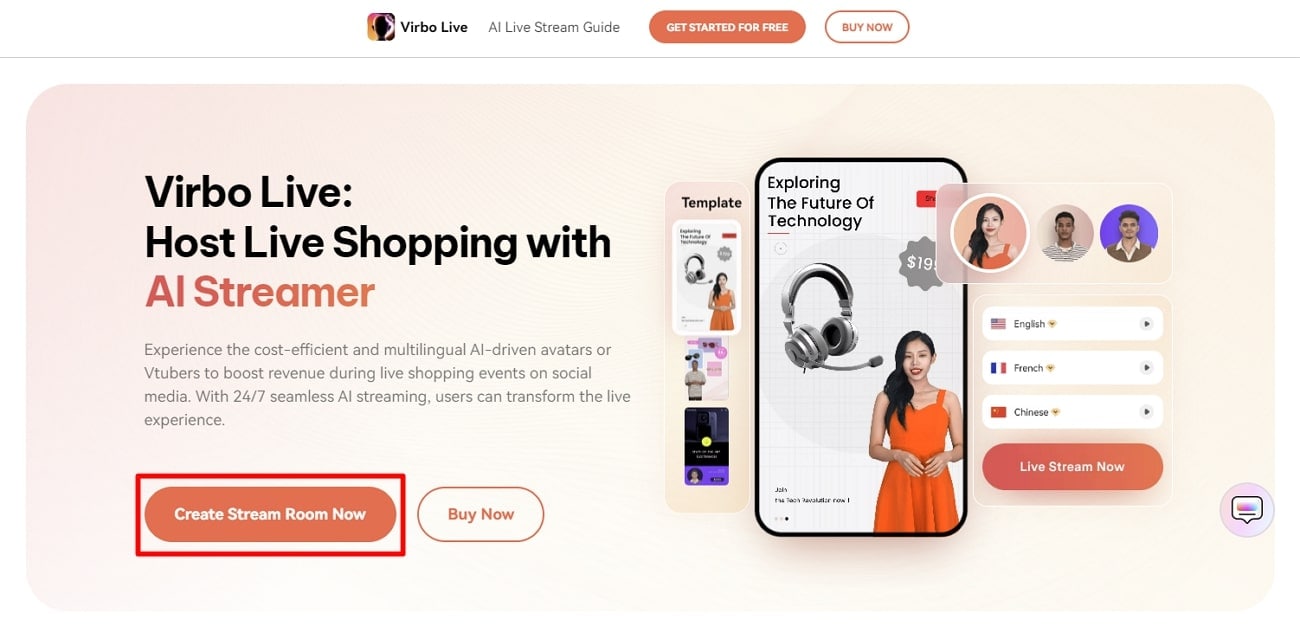
- Step 1. Visit the Official Site To Create a Stream Room
First,open theofficial website of Wondershare Virbo Live tool on your device. Navigate to the window and hit the “Create Stream Room Now” button. Upon doing that, it takes you inside the main interface of the tool.
Get Started Online Free Download
- Step 2. Advance To Create a Blank Livestream Room
Once you get to the tool’s home screen, select the “Create a Blank Livestream Room” option. Then, you can try different customization features to make your livestream room look stunning.

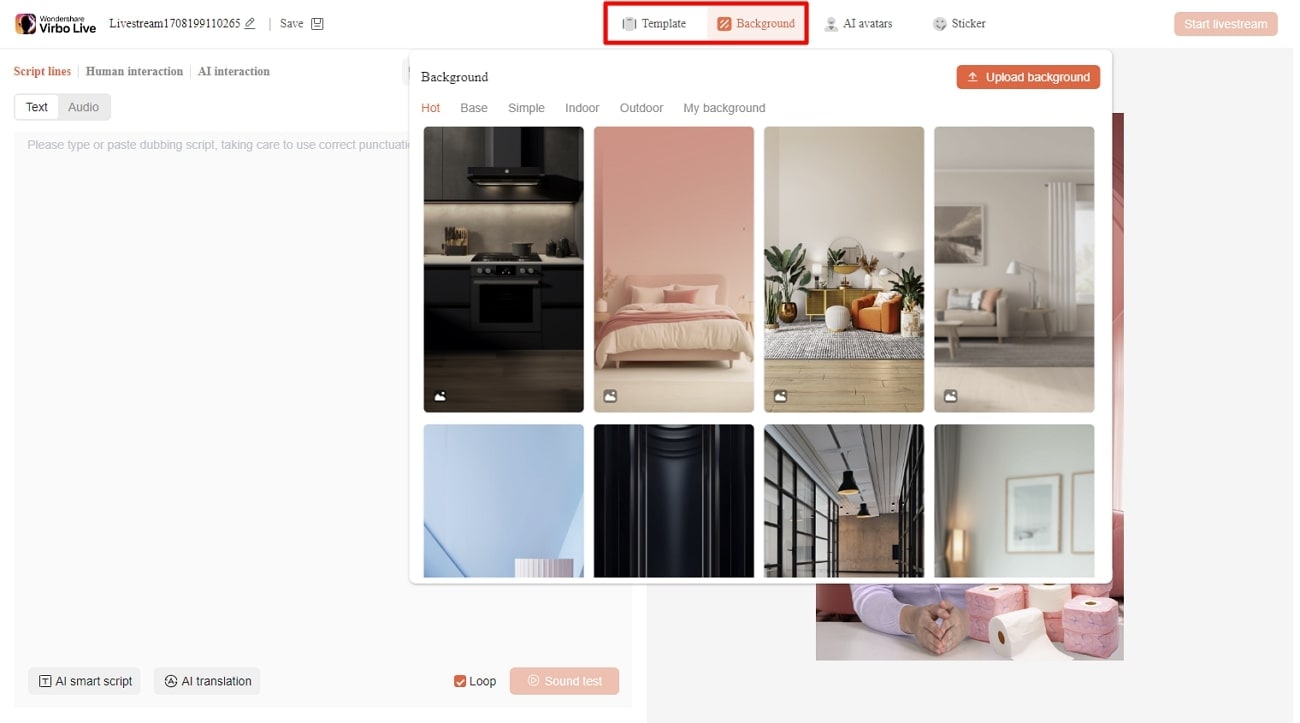
- Step 3. Customize Your Livestream Template and Background
After that, click on the “Template” tab to explore different templates. Choose a template that suits live streaming needs. Furthermore, open the “Background” tab from the same window to check exciting background options. You can select different backgrounds from variating categories in the same window.
- Step 4. Add Script or Use AI Script Generator
Then, you need to provide the script for translation or dubbing. Select the “Text” given in the left side section for this. It provides a text box to type or paste your script text. Choose the “AI Smart Script” option from the bottom left corner if you don’t have a script. Add prompts there, and it will generate your scripts instantly.
- Step 5. Select Creative AI Avatars According to Requirement
Select the “AI avatars” tab to unveil creative avatars. There is also a whole range of AI avatars to choose from. After selecting the one that suits your motive, you can preview your selected AI avatar before launching the stream.
- Step 6. Start Your Livestream With All Selections
After finalizing all the options, you canproceed to start your stream. Select the “Start livestream” option from the top right corner in the same window.
Conclusion
Conclusively, this article intends to provide information about rules and requirements for live streaming on Instagram. You also learned how to live stream to Instagram with an RTMP like OBS Studio. Tools like Wondershare Virbo Live simplify your live streams with AI integration. Also, you can make your broadcast exciting for viewers by using different interactive elements.
Professionals and content creators now use different social media platforms for live streaming. There are many big names on these platforms, such as Instagram . Instagram is one of the most-used networks, with over 2 billion monthly active users. Using this live-stream platform is always a plus for companies and individuals.
However, the discussion is about how to stream to Instagram with an RTMP. This detailed guide helps you in using RTMP Instagram for live streaming. Furthermore, you will also learn about a recommended tool that offers AI-powered features for broadcasting.
Part 1. Some Rules and Requirements To Understand Before Live Streaming on Instagram
Like every platform, Instagram has some protocols for broadcasting content to global audiences. Therefore, learning the rules and requirements before going live on Instagram is necessary. First, your account should be at least 30 days old; otherwise, they can restrict your stream.
There is a rule that you can go live for 4 hours per stream without retakes. This length was increased from 60 minutes in the recent update. Also, you can repost a live video on your profile if it is more than 15 minutes long. Instagram allows you to schedule a stream from 1 hour to 90 days in advance.
The initial requirement of Instagram Live RTMP is that your content be respectful and updated. Additionally, you need to set your stream to 1920x1080 resolution on a vertical camera. Meanwhile, Instagram gives leverage on the number of followers so that you can start with minimum viewers. Also, there is no need to have a business account for live streaming.
Part 2. How To Live Stream to Instagram With an RTMP?
Setting high-quality live streams encourages people to tune into your broadcast. For this purpose, you need a seamless encoder like OBS . Unfortunately, Instagram doesn’t officially support third-party encoders. To solve this query, you need an effective solution.
Therefore, the following steps guide streaming on Instagram with an RTMP (Real-Time Messaging Protocol). You will also learn how to set the required parameters in this comprehensive guide:
- Step 1. Start with downloading and launching OBS Studio on your PC. The first thing to do is set up vertical camera dimensions for RTMP Instagram live streaming. To access the settings window, hit the “Settings” option in the “Controls” panel.
- Step 2. Look for the “Video” tab in the “Settings” window that opens. After that, enter “1080x1920” in the “Base (Canvas) Resolution” bar. Similarly, add a “1080x1920” value in the “Output (Scaled) Resolution” bar to set a 9:16 aspect ratio for vertical display. Then, hit the “OK” button to apply these changes to your Instagram streams.
- Step 3. After that, you need to add external sources to the scene. Click on the “+” icon in the “Scenes” panel or rename the scene. Once the scene is created, hit the “+” icon of the “Sources” panel. Then, select the “Video Capture Device” option from the menu and rename the device to your liking. After that, choose the video capture device from the “Device” dropdown and hit the “OK” option. Similarly, you can select the “Audio Input Capture” option to introduce an audio device.
- Step 4. To add text overlays on your stream, hit the “+” icon again in the “Sources” panel. Choose the “Text (GDI+)” option and rename your overlay. On the next window, insert your text in the “Text” box. Then, click the “Select Font” button and choose your required font style and size. Additionally, you can change font color, opacity, alignment, background, and more. After customizing the text, hit the “OK” button to save the overlay in the sources section.
- Step 5. Afterward, select the “Stream” option in the settings window of OBS Studio. Set the “Service” to “Custom” from the dropdown. Then, you need to enter the server and stream key to proceed.
- Step 6. To get the server and stream key, visit rtmp.in on your browser. On the main interface of this Instagram RTMP, hit the “GO LIVE ON INSTAGRAM” widget. Then, it asks you to log in to your Instagram account.
- Step 7. Once you’re logged in, it gives you a stream server URL and Stream key. First, copy the Server link and return to the OBS Studio software. Then, paste the link in the “Server” bar. After that, open the RTMP site again and hit the “Create New Broadcast” option.
You can also give a name to your broadcast in the “Broadcast Title” bar. After creating the broadcast, it shows the “Stream Key,” which you can copy. Then, move again to the OBS Stream setting panel and paste the key in the “Stream Key” bar. Lastly, hit the “Apply” option to save all these settings for your stream.
- Step 8. After getting ready, choose the “Start Streaming” option from the “Controls” panel. It starts your stream with selected parameters. To stop the stream, you can select the “Stop Streaming” option.
Part 3. How To Attract a Better Audience During Live Streaming on Instagram?
OBS Studio is an efficient software but offers limited functionality when it comes to engaging streams. Thus, you need an advanced solution that can help you reach global audiences through live streaming. For this purpose, Wondershare Virbo Live becomes an unsung hero for you. It provides AI-powered functions that help to start creative streams and generate more leads.
Moreover, the handy controls of Wondershare Virbo Live allow you to customize live streams to your requirements. Therefore, you can start streaming for different purposes, such as marketing, brand awareness, and more. Additionally, it allows you to set automatic responses and create a Q&A database to keep your audience engaged. Plus, it allows you to select creative AI avatars with different poses and outfits.
Key Features of Virbo Live
- You can choose different templates and backgrounds for a stunning streaming appearance.
- Users can write or generate scripts manually using the AI Smart Script feature. For this, they need to add prompts according to the script’s purpose.
- This tool helps to translate scripts into multiple languages and accents. Also, you can get dubbed audio in different AI voices.
Simple Guide To Start Live Streaming Using Wondershare Virbo Live
Many live streaming tools exist, but Wondershare Virbo Live provides more controls. Now, the thing is how to create a live stream room with this tool. For this, follow the given steps one by one to start live streaming with Virbo Live:
- Step 1. Visit the Official Site To Create a Stream Room
First,open theofficial website of Wondershare Virbo Live tool on your device. Navigate to the window and hit the “Create Stream Room Now” button. Upon doing that, it takes you inside the main interface of the tool.
Get Started Online Free Download
- Step 2. Advance To Create a Blank Livestream Room
Once you get to the tool’s home screen, select the “Create a Blank Livestream Room” option. Then, you can try different customization features to make your livestream room look stunning.
- Step 3. Customize Your Livestream Template and Background
After that, click on the “Template” tab to explore different templates. Choose a template that suits live streaming needs. Furthermore, open the “Background” tab from the same window to check exciting background options. You can select different backgrounds from variating categories in the same window.
- Step 4. Add Script or Use AI Script Generator
Then, you need to provide the script for translation or dubbing. Select the “Text” given in the left side section for this. It provides a text box to type or paste your script text. Choose the “AI Smart Script” option from the bottom left corner if you don’t have a script. Add prompts there, and it will generate your scripts instantly.
- Step 5. Select Creative AI Avatars According to Requirement
Select the “AI avatars” tab to unveil creative avatars. There is also a whole range of AI avatars to choose from. After selecting the one that suits your motive, you can preview your selected AI avatar before launching the stream.
- Step 6. Start Your Livestream With All Selections
After finalizing all the options, you canproceed to start your stream. Select the “Start livestream” option from the top right corner in the same window.
Conclusion
Conclusively, this article intends to provide information about rules and requirements for live streaming on Instagram. You also learned how to live stream to Instagram with an RTMP like OBS Studio. Tools like Wondershare Virbo Live simplify your live streams with AI integration. Also, you can make your broadcast exciting for viewers by using different interactive elements.
How To Start a Private Live Stream on YouTube
In today’s digital age, live streaming has become a powerful tool for connecting with audiences in real-time. This method has especially been crucial for businesses looking to get into live selling or gamers wanting to stream their games. But say, for example, that you want to keep your stream private, accessible only to select viewers; how do you do that?
Here’s where private live streaming comes in. This option allows you to share your content with specific individuals, ensuring a more intimate and controlled environment. This guide will teach you how to set up private YouTube streams and give you special tips to let AI help you with your streams with Wondershare Virbo.

Part 1: What Do You Need To Get Started With YouTube Private Live Streaming?
Before diving into the exciting world of private live streaming, here is the equipment to ensure a smooth and seamless experience.
- YouTube account. First things first, you’ll need a YouTube account. This is your gateway to the platform and your key to unlock the world of live streaming.
- A capable PC. Next, prepare your PC and the command center for your private stream. While specific requirements vary depending on the complexity of your stream, here are some general recommendations:
- **Processor:**Intel Core i5 or equivalent (or newer)
- **RAM:**8GB or more
- **Graphics Card:**Dedicated GPU recommended for enhanced performance
- **Internet Connection:**A stable and fast internet connection with sufficient upload bandwidth (consider at least 3 Mbps for standard definition)
- A streaming tool. Now, you’ll need a streaming tool to capture your video and audio and send it live to YouTube. Wondershare Virbo is recommended, especially for live-selling purposes. Other options include OBS and similar stream apps for other purposes.
With these essential elements in place, you’re on your way to launching your private YouTube adventure.
Part 2: How To Start a Private YouTube Live Stream?
Ready to share your talents or ideas with a select audience? Dive into the steps to create a private live stream on YouTube by following the guide below. It’s pretty straightforward.
- Step 1: Access YouTube Studio.Head to your YouTube Studio page (studio.youtube.com) and log in using your Google account linked to your YouTube channel.
- Step 2: Prepare for live streaming**.** Click Create in the top left corner of the Studio dashboard, and select Go Live from the dropdown menu. Alternatively, click the camera icon next to your profile picture and choose Go Live.

- Step 3: Now, set your visibility. Before starting your broadcast, ensure your stream is private. Under the Visibility setting, click the dropdown menu and choose Private. This option restricts viewership to individuals you specifically invite.

- Step 4: There are two methods existing for inviting viewers:
- **Email Invitations:**Click on Share Privately and enter the email addresses of individuals you wish to grant access. You can also choose to notify them via email.
- **Link sharing:**Although not recommended for complete privacy, you can copy the stream link and share it directly with trusted individuals. Remember, anyone with the link can access the stream, even uninvited guests.

- Step 5: Once everything is set and your viewers are invited, click Go Live to launch your private YouTube stream. Remember, only invited individuals using their YouTube accounts can view your content.
Additional Tips for Private YouTube Live Streams
Here are some additional tips that you can follow before starting a private YouTube stream:
- Test streaming. Consider using a test stream before inviting viewers to ensure everything runs smoothly.
- Giving guidelines to your viewers. Encourage guests to use their YouTube accounts for optimal viewing experience and security. Further, you can add house rules, especially for more intimate streams or live selling/auctions.
- **Exploring advanced privacy settings.**Explore advanced privacy settings within YouTube Studio for further control over viewer permissions.
- Using AI. Tools like Wondershare Virbo can help integrate AI into your private YouTube streams. This way, you won’t always have to glue your eyes on your stream. Discover more about this feature in the following section.
By following these steps and keeping privacy in mind, you can effectively host engaging live streams on YouTube, connecting with your chosen audience in a controlled and intimate setting. Remember to personalize your content, interact with your viewers, and enjoy the unique experience of private live streaming.
Part 3: Breaking the Limitations of Live Streams With Wondershare Virbo
Live streaming constantly evolves, offering creators new ways to connect with audiences. While traditional live streams require your physical presence, imagine having an engaging and interactive stream running 24/7, even when you’re not there. This is great, especially for private YouTube streams, where the need to engage the select viewers becomes more apparent.
Enter Wondershare Virbo , a revolutionary tool that leverages AI to create realistic and captivating live streams around the clock.
Introducing Wondershare Virbo
Gone are the days of relying solely on manual effort to keep your audience engaged. Virbo Live transcends these limitations, offering:
Get Started Online Free Download
- **24/7 content delivery.**Whether taking a break or focusing on other tasks, Virbo Live ensures your stream continues with AI-powered content, keeping viewers entertained and informed.
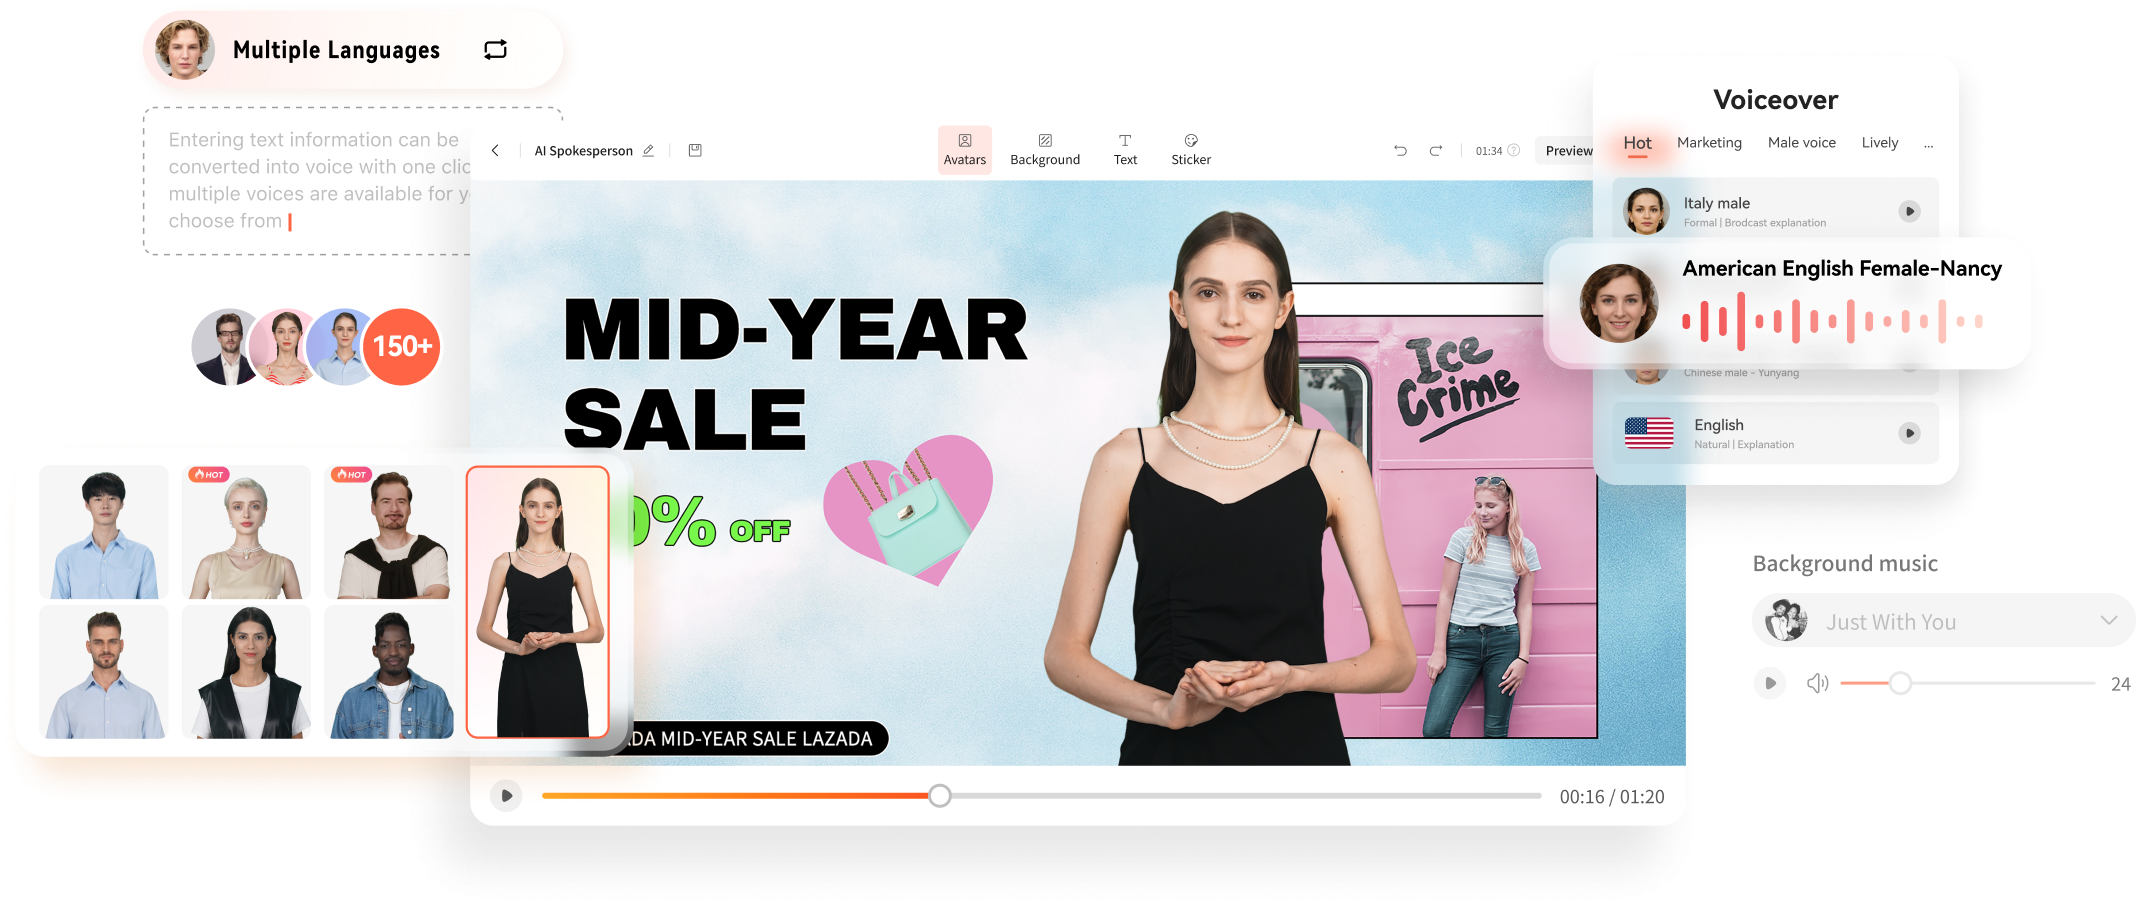
- **Virtual host template library.**No more scrambling for guest hosts or struggling with solo presentations. Virbo Live’s diverse library of 150+ customizable AI avatars can be your virtual co-host, presenter, or even a captivating character, interacting with viewers, answering questions, and conducting interviews.
- Content creation is made easy with templates. Forget starting from scratch. Virbo Live provides 180+ professionally designed video templates across various themes and styles, saving you time and effort. Plus, enjoy a library of royalty-free music to add the perfect soundtrack.
- **Engaging AI voices.**Bring your content to life with 120 AI voices, offering a variety of tones and accents, ensuring your message resonates with a global audience.
Integrating AI into Your Live Stream
Adding Virbo Live to your existing setup is simple and intuitive. Add Virbo as a live OBS window and use the YouTube stream key. Here’s a step-by-step guide:
- Step 1: Install Wondershare Virbo or access the web app.
Get Started Online Free Download
- Step 2: Click Create a Blank Livestream Room to customize your stream’s interface.

- Step 3: Choose from templates, backgrounds, AI avatars, and stickers to create a visually engaging environment.

- Step 4: Under Script Lines, write the script your AI host will deliver throughout the stream. Use AI Interaction to set responses for specific questions and Human interaction for actual responses from your end.

- Step 5: Once everything is set, click Start Livestream and connect it to your preferred platform through OBS. Paste your streaming key for seamless integration.
Use-Cases for Wondershare Virbo and Private YouTube Live Streaming
Virbo Live empowers you to explore new avenues in content creation. Imagine using it for:
- **E-commerce shopping.**Showcase products with AI hosts demonstrating their features and answering customer questions in real-time, even outside business hours.
- **Educational live tutorials.**Host interactive learning experiences with AI tutors delivering engaging lectures and responding to student inquiries.
- **Live Q&A sessions.**Let your AI host manage large-scale Q&A sessions and field questions and keep the conversation flowing smoothly.
With Wondershare Virbo Live, the possibilities are endless. Unleash your creativity, explore new ways to connect with your audience, and experience the power of 24/7 private YouTube streams. Remember, this is just a starting point – personalize your content, experiment with different features, and discover the unique potential Virbo Live brings to your streaming journey.
Conclusion
In today’s digital age, live streaming has become a powerful tool for connecting with audiences in real-time. YouTube live streaming offers a versatile platform to share your passions and connect with a select group of viewers. This article has guided you through setting up a private live stream on YouTube, ensuring your content reaches only your guests.
Remember, key considerations include enabling private streaming within YouTube Studio, inviting viewers via email or link sharing, and personalizing your content to create an engaging experience. If you want to take your live streams to the next level, consider Wondershare Virbo, a user-friendly tool designed to simplify private live streaming on YouTube with the help of AI.
In today’s digital age, live streaming has become a powerful tool for connecting with audiences in real-time. This method has especially been crucial for businesses looking to get into live selling or gamers wanting to stream their games. But say, for example, that you want to keep your stream private, accessible only to select viewers; how do you do that?
Here’s where private live streaming comes in. This option allows you to share your content with specific individuals, ensuring a more intimate and controlled environment. This guide will teach you how to set up private YouTube streams and give you special tips to let AI help you with your streams with Wondershare Virbo.
Part 1: What Do You Need To Get Started With YouTube Private Live Streaming?
Before diving into the exciting world of private live streaming, here is the equipment to ensure a smooth and seamless experience.
- YouTube account. First things first, you’ll need a YouTube account. This is your gateway to the platform and your key to unlock the world of live streaming.
- A capable PC. Next, prepare your PC and the command center for your private stream. While specific requirements vary depending on the complexity of your stream, here are some general recommendations:
- **Processor:**Intel Core i5 or equivalent (or newer)
- **RAM:**8GB or more
- **Graphics Card:**Dedicated GPU recommended for enhanced performance
- **Internet Connection:**A stable and fast internet connection with sufficient upload bandwidth (consider at least 3 Mbps for standard definition)
- A streaming tool. Now, you’ll need a streaming tool to capture your video and audio and send it live to YouTube. Wondershare Virbo is recommended, especially for live-selling purposes. Other options include OBS and similar stream apps for other purposes.
With these essential elements in place, you’re on your way to launching your private YouTube adventure.
Part 2: How To Start a Private YouTube Live Stream?
Ready to share your talents or ideas with a select audience? Dive into the steps to create a private live stream on YouTube by following the guide below. It’s pretty straightforward.
- Step 1: Access YouTube Studio.Head to your YouTube Studio page (studio.youtube.com) and log in using your Google account linked to your YouTube channel.
- Step 2: Prepare for live streaming**.** Click Create in the top left corner of the Studio dashboard, and select Go Live from the dropdown menu. Alternatively, click the camera icon next to your profile picture and choose Go Live.
- Step 3: Now, set your visibility. Before starting your broadcast, ensure your stream is private. Under the Visibility setting, click the dropdown menu and choose Private. This option restricts viewership to individuals you specifically invite.
- Step 4: There are two methods existing for inviting viewers:
- **Email Invitations:**Click on Share Privately and enter the email addresses of individuals you wish to grant access. You can also choose to notify them via email.
- **Link sharing:**Although not recommended for complete privacy, you can copy the stream link and share it directly with trusted individuals. Remember, anyone with the link can access the stream, even uninvited guests.
- Step 5: Once everything is set and your viewers are invited, click Go Live to launch your private YouTube stream. Remember, only invited individuals using their YouTube accounts can view your content.
Additional Tips for Private YouTube Live Streams
Here are some additional tips that you can follow before starting a private YouTube stream:
- Test streaming. Consider using a test stream before inviting viewers to ensure everything runs smoothly.
- Giving guidelines to your viewers. Encourage guests to use their YouTube accounts for optimal viewing experience and security. Further, you can add house rules, especially for more intimate streams or live selling/auctions.
- **Exploring advanced privacy settings.**Explore advanced privacy settings within YouTube Studio for further control over viewer permissions.
- Using AI. Tools like Wondershare Virbo can help integrate AI into your private YouTube streams. This way, you won’t always have to glue your eyes on your stream. Discover more about this feature in the following section.
By following these steps and keeping privacy in mind, you can effectively host engaging live streams on YouTube, connecting with your chosen audience in a controlled and intimate setting. Remember to personalize your content, interact with your viewers, and enjoy the unique experience of private live streaming.
Part 3: Breaking the Limitations of Live Streams With Wondershare Virbo
Live streaming constantly evolves, offering creators new ways to connect with audiences. While traditional live streams require your physical presence, imagine having an engaging and interactive stream running 24/7, even when you’re not there. This is great, especially for private YouTube streams, where the need to engage the select viewers becomes more apparent.
Enter Wondershare Virbo , a revolutionary tool that leverages AI to create realistic and captivating live streams around the clock.
Introducing Wondershare Virbo
Gone are the days of relying solely on manual effort to keep your audience engaged. Virbo Live transcends these limitations, offering:
Get Started Online Free Download
- **24/7 content delivery.**Whether taking a break or focusing on other tasks, Virbo Live ensures your stream continues with AI-powered content, keeping viewers entertained and informed.
- **Virtual host template library.**No more scrambling for guest hosts or struggling with solo presentations. Virbo Live’s diverse library of 150+ customizable AI avatars can be your virtual co-host, presenter, or even a captivating character, interacting with viewers, answering questions, and conducting interviews.
- Content creation is made easy with templates. Forget starting from scratch. Virbo Live provides 180+ professionally designed video templates across various themes and styles, saving you time and effort. Plus, enjoy a library of royalty-free music to add the perfect soundtrack.
- **Engaging AI voices.**Bring your content to life with 120 AI voices, offering a variety of tones and accents, ensuring your message resonates with a global audience.
Integrating AI into Your Live Stream
Adding Virbo Live to your existing setup is simple and intuitive. Add Virbo as a live OBS window and use the YouTube stream key. Here’s a step-by-step guide:
- Step 1: Install Wondershare Virbo or access the web app.
Get Started Online Free Download
- Step 2: Click Create a Blank Livestream Room to customize your stream’s interface.
- Step 3: Choose from templates, backgrounds, AI avatars, and stickers to create a visually engaging environment.
- Step 4: Under Script Lines, write the script your AI host will deliver throughout the stream. Use AI Interaction to set responses for specific questions and Human interaction for actual responses from your end.
- Step 5: Once everything is set, click Start Livestream and connect it to your preferred platform through OBS. Paste your streaming key for seamless integration.
Use-Cases for Wondershare Virbo and Private YouTube Live Streaming
Virbo Live empowers you to explore new avenues in content creation. Imagine using it for:
- **E-commerce shopping.**Showcase products with AI hosts demonstrating their features and answering customer questions in real-time, even outside business hours.
- **Educational live tutorials.**Host interactive learning experiences with AI tutors delivering engaging lectures and responding to student inquiries.
- **Live Q&A sessions.**Let your AI host manage large-scale Q&A sessions and field questions and keep the conversation flowing smoothly.
With Wondershare Virbo Live, the possibilities are endless. Unleash your creativity, explore new ways to connect with your audience, and experience the power of 24/7 private YouTube streams. Remember, this is just a starting point – personalize your content, experiment with different features, and discover the unique potential Virbo Live brings to your streaming journey.
Conclusion
In today’s digital age, live streaming has become a powerful tool for connecting with audiences in real-time. YouTube live streaming offers a versatile platform to share your passions and connect with a select group of viewers. This article has guided you through setting up a private live stream on YouTube, ensuring your content reaches only your guests.
Remember, key considerations include enabling private streaming within YouTube Studio, inviting viewers via email or link sharing, and personalizing your content to create an engaging experience. If you want to take your live streams to the next level, consider Wondershare Virbo, a user-friendly tool designed to simplify private live streaming on YouTube with the help of AI.
How To Perform a Successful Streaming on Twitch
Live streaming has become a regular source of enjoyment for many people in recent years, especially on a platform like Twitch. In the first quarter of 2023 alone, Twitch users watched over 5.3 billion hours of video.
If you’re a content creator, you should definitely consider leveraging this power of Twitch video streaming, as it tends to have higher levels of engagement compared to pre-recorded content. But with so many Twitch streamers out there, standing out from the crowd can be challenging.
If you’re new to the scene, we can help you start your Twitch streaming journey off right with the right gear and some useful tips.

Part 1: Essential Preparations Before Beginning Your Twitch Streaming Journey
Whether you’re playing games, hosting events, or just chatting, streaming on Twitch is an exciting and rewarding way to engage with your audience in real-time. But to do well on Twitch, you need to prepare properly so your viewers can enjoy watching your content.
To start streaming on Twitch, here’s what you’ll need:
Twitch Streaming Software
First, you need to download streaming software for your Twitch video streaming. OBS Studio is the popular one, but Twitch has released its Twitch Studio, which is more beginner-friendly.
- OBS Studio
OBS Studio is a free streaming software that works on any device. You can use it to make your Twitch streams live more attractive by adding alerts, creating starting screens, and using different audio and video sources.
- Twitch Studio
Twitch Studio is the official free streaming application developed to simplify the streaming process for new streamers on Twitch. It offers an intuitive interface and pre-made scenes designed to streamline the user experience.
Streaming equipment
- A device to stream from
To kickstart your Twitch streaming journey, the first step you need to take is selecting the device from which you’ll broadcast. You can use your desktop, mobile phone, or gaming console. Your choice will depend on your existing equipment and the nature of your intended content.
If you plan to make gaming content for your Twitch Live, we recommend using a PC with these specifications:
- CPU
When streaming and gaming, it’s crucial to have a powerful CPU to minimize lagging. The number of cores in a CPU determines its processing power, ranging from dual to eight cores. Some good options to consider are the AMD Ryzen 9 5900X, Intel i9 – 12900K, or the more budget-friendly Intel Core i5-12400.
- GPU or graphic cards
Nvidia RTX graphics cards come equipped with built-in hardware encoders, which can lighten the CPU’s workload when used with OBS Studio. Alternatively, you can consider the Radeon RX 570 and the GeForce GTX 1660 Ti for quality GPU options.
- Microphone
Although you might get by using a gaming headset’s built-in microphone for a bit, it’s better to invest in a standalone mic from the start. Some top microphone options for Twitch streaming include the Elgato Wave:3, HyperX QuadCast S, Audio-Technica AT2020, Razer Seiren Mini, and Blue Yeti X.
- Webcam
If your Twitch stream content involves showcasing your reactions or facial expressions, investing in a camera is a wise choice. Webcams are convenient as they can easily connect to your computer or laptop.
You can consider some popular webcam choices like the Logitech HD Pro C920, Logitech StreamCam, Logitech BRIO, Microsoft LifeCam HD-3000, and Razer Kiyo.

Understanding Twitch Streaming Rules
Aside from preparing your streaming gear, you must also understand Twitch streaming rules to avoid any potential violations that could result in penalties or even suspension of your account. Twitch’s community guidelines cover a wide range of topics, including harassment, hate speech, copyright infringement, and mature content. You can read the full Twitch streaming rules here .
Part 2: Comprehensive Guide To Stream Live on PC, Mac, or Smartphone on Twitch
Once you’ve gathered all the necessary equipment, you can proceed with the following steps to start your Twitch stream.
How to stream Twitch live on PC or Mac
Step 1: Download and install Twitch Studio on your PC or Mac. Then, launch Twitch Studio and log in to your Twitch account. You’ll receive a prompt to connect your microphone and webcam.
Step 2: Use Twitch Studio to customize your Twitch stream with different scenes and settings. Experiment with these features to find what works best for your livestream.

Step 3: When you’re ready to start broadcasting, click “Start Stream” at the bottom of the Twitch Studio. Then, select your stream category and enter your live stream title. Hit “Go Live” to begin streaming.

How to stream Twitch live on a smartphone
Starting Twitch streaming from your smartphone is a bit different, as the app primarily allows broadcasting from your device’s camera. Here’s how to live stream on Twitch from your smartphone:
Step 1: Download and install the Twitch App .
Step 2: Log in to the Twitch app. Then, go to your profile and tap “Go Live.” If you are using newer version of the Twitch app, you can tap “Create.”

You’ll then have two options: “Stream Games” or “Stream IRL.” The “Stream IRL” will allow you to live stream on Twitch using your phone’s camera, while the first option lets you stream mobile games.

Step 3: Grant access to your camera and/or microphone before starting your stream.
Step 4: Set up the stream and Go Live. Give your stream a name, choose a content category, and select the camera you want to use.
Once you’ve completed these steps, press the “Start Stream” button, and you’ll be live on Twitch.
Key elements of success for streaming on Twitch
While the process for starting Twitch streaming may be similar for all streamers, what makes a streamer successful? Based on reports, there are a few key elements of success for streaming on Twitch.
- Engaging content
Successful Twitch streamers captivate their audience with compelling content that resonates with viewers. This could include entertaining gameplay, informative discussions, or engaging activities. If people like your stream, they might subscribe or donate their money.
- Make use of the interactive features
Twitch stream labs offer unique features like chat rooms and special emojis, fostering interaction between streamers and viewers. Streamers actively engaging with their audience tend to cultivate a loyal and enthusiastic community.
- Consistency and persistence
This is often the toughest part. On Twitch, consistency is crucial. Successful streamers usually maintain regular schedules to make sure their audience knows when to expect new content. If you are new, continuous live streaming can be an effective strategy to engage with your audience consistently and increase your channel’s visibility.
Part 3: Best AI-Powered Tool for You To Set Up a 24/7 Live Stream on Twitch
If you want to make your Twitch channel stand out and automate the live streaming process, you can use Wondershare Virbo Live. With this tool, you can set up a 24/7 live stream on Twitch without needing to be present all the time.
Additionally, the Virbo live stream feature seamlessly integrates with major live-streaming platforms supported by OBS. You can also use it on numerous other platforms, such as TikTok Live, 1688 Live Platform, Alibaba International, Kwai, and more.
How to live stream 24/7 on Twitch with Wondershare Virbo Live
To live stream 24/7 on Twitch with Virbo, you will first need to prepare your AI avatar on Virbo Live to broadcast continuously on Twitch. Once you have customized your avatar, you can obtain the streaming key from Twitch. This key will enable OBS to connect with Twitch’s streaming platform.
Follow the detailed steps on how to live stream 24/7 on Twitch:
Step 1: Access Wondershare Virbo Live and create a live streaming room.
Go to Wondershare Virbo Live and select “Create Stream Room Now” > “Create a Blank Live Stream Room” to initiate the setup process.

Step 2: Write your content script or upload audio recordings.
Within the Virbo Live interface, you can either compose the script for your live stream or upload pre-recorded audio content by selecting “Upload local file.”

Pro Tip: You can use Virbo’s AI Script Writer for inspiration. Click on “AI Smart Script” and provide topic details, language preferences, and stylistic choices. Click “Generate” to create a script. Then, you can refine it as needed.
Step 3: Customize your AI avatar and background.
Navigate to “AI Avatars” to select an avatar for your live stream. Additionally, you can customize the background, incorporate stickers, or use available templates.

Step 4: Start the live stream.
Once your AI avatar and background are set, click “Start Livestream” to commence broadcasting. The next step should be acquiring the Twitch streaming key to put into the OBS.

Once everything is ready, click “Start Streaming” in OBS Studio, and your stream will broadcast on Twitch.
Conclusion
With billions of hours of video watched and many content creators vying for attention, streaming on Twitch can be exciting and challenging. However, by following the essential preparations outlined in this guide, you’ll be able to kickstart your Twitch live stream ahead of others.
You can use Wondershare Virbo Live to make an automated streaming experience 24/7. This helps you maintain a consistent presence on the platform even when you’re not around.
Live streaming has become a regular source of enjoyment for many people in recent years, especially on a platform like Twitch. In the first quarter of 2023 alone, Twitch users watched over 5.3 billion hours of video.
If you’re a content creator, you should definitely consider leveraging this power of Twitch video streaming, as it tends to have higher levels of engagement compared to pre-recorded content. But with so many Twitch streamers out there, standing out from the crowd can be challenging.
If you’re new to the scene, we can help you start your Twitch streaming journey off right with the right gear and some useful tips.
Part 1: Essential Preparations Before Beginning Your Twitch Streaming Journey
Whether you’re playing games, hosting events, or just chatting, streaming on Twitch is an exciting and rewarding way to engage with your audience in real-time. But to do well on Twitch, you need to prepare properly so your viewers can enjoy watching your content.
To start streaming on Twitch, here’s what you’ll need:
Twitch Streaming Software
First, you need to download streaming software for your Twitch video streaming. OBS Studio is the popular one, but Twitch has released its Twitch Studio, which is more beginner-friendly.
- OBS Studio
OBS Studio is a free streaming software that works on any device. You can use it to make your Twitch streams live more attractive by adding alerts, creating starting screens, and using different audio and video sources.
- Twitch Studio
Twitch Studio is the official free streaming application developed to simplify the streaming process for new streamers on Twitch. It offers an intuitive interface and pre-made scenes designed to streamline the user experience.
Streaming equipment
- A device to stream from
To kickstart your Twitch streaming journey, the first step you need to take is selecting the device from which you’ll broadcast. You can use your desktop, mobile phone, or gaming console. Your choice will depend on your existing equipment and the nature of your intended content.
If you plan to make gaming content for your Twitch Live, we recommend using a PC with these specifications:
- CPU
When streaming and gaming, it’s crucial to have a powerful CPU to minimize lagging. The number of cores in a CPU determines its processing power, ranging from dual to eight cores. Some good options to consider are the AMD Ryzen 9 5900X, Intel i9 – 12900K, or the more budget-friendly Intel Core i5-12400.
- GPU or graphic cards
Nvidia RTX graphics cards come equipped with built-in hardware encoders, which can lighten the CPU’s workload when used with OBS Studio. Alternatively, you can consider the Radeon RX 570 and the GeForce GTX 1660 Ti for quality GPU options.
- Microphone
Although you might get by using a gaming headset’s built-in microphone for a bit, it’s better to invest in a standalone mic from the start. Some top microphone options for Twitch streaming include the Elgato Wave:3, HyperX QuadCast S, Audio-Technica AT2020, Razer Seiren Mini, and Blue Yeti X.
- Webcam
If your Twitch stream content involves showcasing your reactions or facial expressions, investing in a camera is a wise choice. Webcams are convenient as they can easily connect to your computer or laptop.
You can consider some popular webcam choices like the Logitech HD Pro C920, Logitech StreamCam, Logitech BRIO, Microsoft LifeCam HD-3000, and Razer Kiyo.
Understanding Twitch Streaming Rules
Aside from preparing your streaming gear, you must also understand Twitch streaming rules to avoid any potential violations that could result in penalties or even suspension of your account. Twitch’s community guidelines cover a wide range of topics, including harassment, hate speech, copyright infringement, and mature content. You can read the full Twitch streaming rules here .
Part 2: Comprehensive Guide To Stream Live on PC, Mac, or Smartphone on Twitch
Once you’ve gathered all the necessary equipment, you can proceed with the following steps to start your Twitch stream.
How to stream Twitch live on PC or Mac
Step 1: Download and install Twitch Studio on your PC or Mac. Then, launch Twitch Studio and log in to your Twitch account. You’ll receive a prompt to connect your microphone and webcam.
Step 2: Use Twitch Studio to customize your Twitch stream with different scenes and settings. Experiment with these features to find what works best for your livestream.
Step 3: When you’re ready to start broadcasting, click “Start Stream” at the bottom of the Twitch Studio. Then, select your stream category and enter your live stream title. Hit “Go Live” to begin streaming.
How to stream Twitch live on a smartphone
Starting Twitch streaming from your smartphone is a bit different, as the app primarily allows broadcasting from your device’s camera. Here’s how to live stream on Twitch from your smartphone:
Step 1: Download and install the Twitch App .
Step 2: Log in to the Twitch app. Then, go to your profile and tap “Go Live.” If you are using newer version of the Twitch app, you can tap “Create.”
You’ll then have two options: “Stream Games” or “Stream IRL.” The “Stream IRL” will allow you to live stream on Twitch using your phone’s camera, while the first option lets you stream mobile games.
Step 3: Grant access to your camera and/or microphone before starting your stream.
Step 4: Set up the stream and Go Live. Give your stream a name, choose a content category, and select the camera you want to use.
Once you’ve completed these steps, press the “Start Stream” button, and you’ll be live on Twitch.
Key elements of success for streaming on Twitch
While the process for starting Twitch streaming may be similar for all streamers, what makes a streamer successful? Based on reports, there are a few key elements of success for streaming on Twitch.
- Engaging content
Successful Twitch streamers captivate their audience with compelling content that resonates with viewers. This could include entertaining gameplay, informative discussions, or engaging activities. If people like your stream, they might subscribe or donate their money.
- Make use of the interactive features
Twitch stream labs offer unique features like chat rooms and special emojis, fostering interaction between streamers and viewers. Streamers actively engaging with their audience tend to cultivate a loyal and enthusiastic community.
- Consistency and persistence
This is often the toughest part. On Twitch, consistency is crucial. Successful streamers usually maintain regular schedules to make sure their audience knows when to expect new content. If you are new, continuous live streaming can be an effective strategy to engage with your audience consistently and increase your channel’s visibility.
Part 3: Best AI-Powered Tool for You To Set Up a 24/7 Live Stream on Twitch
If you want to make your Twitch channel stand out and automate the live streaming process, you can use Wondershare Virbo Live. With this tool, you can set up a 24/7 live stream on Twitch without needing to be present all the time.
Additionally, the Virbo live stream feature seamlessly integrates with major live-streaming platforms supported by OBS. You can also use it on numerous other platforms, such as TikTok Live, 1688 Live Platform, Alibaba International, Kwai, and more.
How to live stream 24/7 on Twitch with Wondershare Virbo Live
To live stream 24/7 on Twitch with Virbo, you will first need to prepare your AI avatar on Virbo Live to broadcast continuously on Twitch. Once you have customized your avatar, you can obtain the streaming key from Twitch. This key will enable OBS to connect with Twitch’s streaming platform.
Follow the detailed steps on how to live stream 24/7 on Twitch:
Step 1: Access Wondershare Virbo Live and create a live streaming room.
Go to Wondershare Virbo Live and select “Create Stream Room Now” > “Create a Blank Live Stream Room” to initiate the setup process.
Step 2: Write your content script or upload audio recordings.
Within the Virbo Live interface, you can either compose the script for your live stream or upload pre-recorded audio content by selecting “Upload local file.”
Pro Tip: You can use Virbo’s AI Script Writer for inspiration. Click on “AI Smart Script” and provide topic details, language preferences, and stylistic choices. Click “Generate” to create a script. Then, you can refine it as needed.
Step 3: Customize your AI avatar and background.
Navigate to “AI Avatars” to select an avatar for your live stream. Additionally, you can customize the background, incorporate stickers, or use available templates.
Step 4: Start the live stream.
Once your AI avatar and background are set, click “Start Livestream” to commence broadcasting. The next step should be acquiring the Twitch streaming key to put into the OBS.
Once everything is ready, click “Start Streaming” in OBS Studio, and your stream will broadcast on Twitch.
Conclusion
With billions of hours of video watched and many content creators vying for attention, streaming on Twitch can be exciting and challenging. However, by following the essential preparations outlined in this guide, you’ll be able to kickstart your Twitch live stream ahead of others.
You can use Wondershare Virbo Live to make an automated streaming experience 24/7. This helps you maintain a consistent presence on the platform even when you’re not around.
Also read:
- [Updated] The Ultimate 8 Top Collaborative Video Collage Tools on Android (Affordable)
- 2024 Approved The Ultimate Meme Design Collection
- Babel Fish Reimagined: Uncovering the Top 6 Advantages
- Exploring the Ageing Technology of Netgear C300n Modem/Router Combo – Is It Effective Anymore?
- In 2024, Best 12 Sports Streaming Sites (Free & Paid)
- New 2024 Approved Review of LazLive Live Selling Platform With Guide
- New How To Get More NFL Viewers For Your Sports Live Streaming Channel for 2024
- New In 2024, 6 Must-Have Tools for Successful Game Streaming
- Step-by-Step Guide on Setting Up a VMware Template for Windows Server 2022
- Thrifty Tech Choices Made Simple - Reviewing the Caixnun 4K Android TV, 75 Inches of Crystal Clear Action!
- Unveil the Power of FaceTime Direct Messages and Calls on Snapchat for 2024
- Unveiling the Latest: Discover How Apple's Upcoming AirPods 4 Set Themselves Apart From Previous Generations - Insights From ZDNet
- Updated 2024 Approved Maximize Your User Engagement With Instagram Live Shopping Expert Tips
- Updated Beginners Tutorial Stream to Facebook With OBS Studio for 2024
- Updated How to Stream on Twitch The Ultimate Guide for 2024
- Updated Perfect Guide To Excel in TikTok Live Shopping for 2024
- Updated Top List Best Livestream Shopping Apps Of
- Will iSpoofer update On Oppo Reno 11 Pro 5G | Dr.fone
- Windows 11'S Search Tweaks: Enhancing Your Experience
- Title: Updated 2024 Approved Unveiling the Secrets of Shopee Livestream Selling System
- Author: Jeff
- Created at : 2025-02-12 16:27:46
- Updated at : 2025-02-19 16:00:26
- Link: https://ai-live-streaming.techidaily.com/updated-2024-approved-unveiling-the-secrets-of-shopee-livestream-selling-system/
- License: This work is licensed under CC BY-NC-SA 4.0.